Introduction: Bringing Unreleased Streaming Favorites to Your Shelf
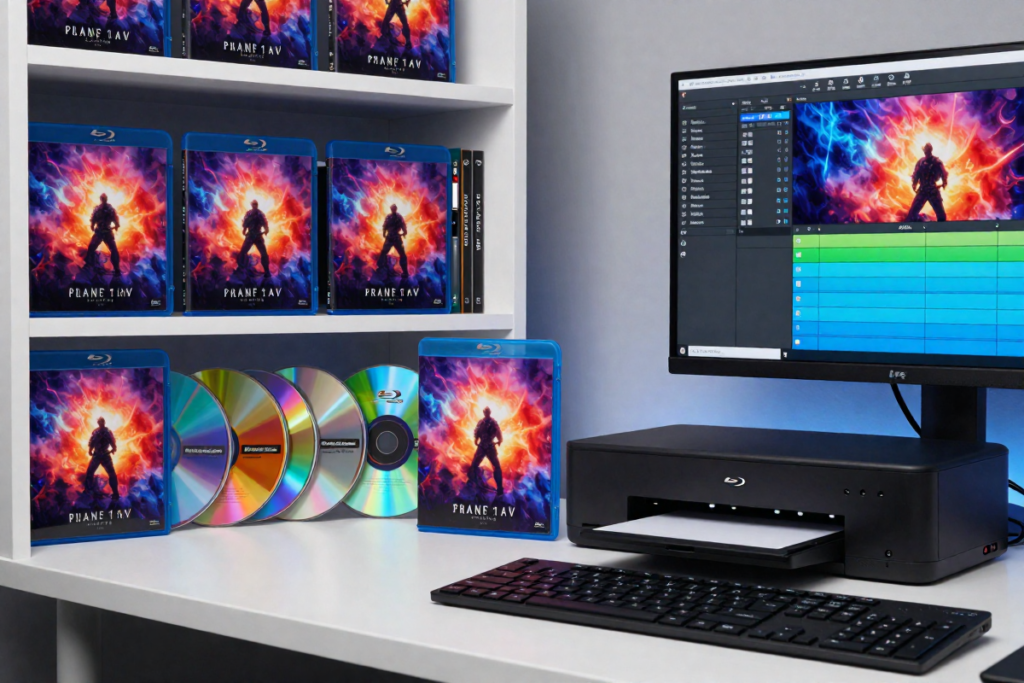
Some of the most captivating films and TV series never make it beyond the digital realm. They live only on streaming platforms, vulnerable to sudden removals, licensing changes, and the slow fade of obscurity. Some are not even on streaming at all. Imagine owning them in tangible form—etched onto a blank DVD or blank Blu-Ray, tucked neatly into a custom-designed case, and adorned with professional disc artwork that looks like it came straight from a Hollywood studio. This isn’t just about preserving media; it’s about creating a lasting, physical archive of stories you love, the ones you can’t find in stores or add to your cart on release day. With the right disc authoring tools, DVD burning software, and a little creativity, you can transform your favorite streaming exclusives into stunning DVDs and Blu-Rays that feel as authentic as any studio release. These aren’t just backups—they’re collector’s pieces, conversation starters, and proof that some treasures deserve to be held, displayed, and enjoyed without an internet connection.
Step 1: Capture Your Movies or Shows from Streaming
Diving into the world of capturing your favorite streaming movies or shows might sound daunting at first, but it’s actually the cornerstone of building your very own physical media collection. With the right tools and a sprinkle of know-how, you’ll be saving high-quality digital copies that look—and sound—as good as the originals.
Recommended Recording Software for High-Quality Results
When it comes to capturing video streams, not all software is created equal. The good news? There are some standout options designed specifically for this purpose. Audials Movie, StreamFab, and PlayOn consistently top the charts for their ease of use, versatility, and output quality.
Audials Movie is a robust player in this space, known for its ability to capture video streams in high definition with minimal fuss. It supports a wide range of streaming platforms and can automatically detect and record movies or TV shows, saving you time and energy.
StreamFab takes things a step further by offering powerful options for batch downloading, allowing you to queue up multiple titles to record in one go. This is ideal if you have a marathon weekend planned or want to back up an entire series.
PlayOn shines with its simple interface and smart features, such as automatic commercial skipping and cloud storage integration. This makes organizing and accessing your recordings a breeze.
Whichever software you choose, the key is to prioritize programs that maintain the original video quality without compressing the files too much. After all, the goal is to replicate that crisp, cinema-like experience on your own discs.
Tips for Getting the Best Video and Audio Quality While Recording
Quality is king here, so a few technical tips will go a long way. Start by ensuring your internet connection is stable and fast—streaming hiccups during recording can degrade the final file. If possible, connect your device via Ethernet instead of Wi-Fi to reduce interruptions.
Adjust your recording settings to the highest resolution available. Most modern streaming services offer HD or even 4K options, so select the matching quality in your software to preserve every detail. Don’t forget about audio settings: choose stereo or surround sound options if available, to keep the immersive feel alive.
Avoid multitasking heavily on your recording device during the process. Running multiple programs or downloads can hog system resources, leading to frame drops or audio glitches. Patience here ensures a smooth, flawless capture.
Step 2: Cut Out the Clutter — Remove Commercials and Extras
Once your movie or show is safely captured via streaming, it’s time to give it the refinement it deserves. This is where raw recordings transform into polished, cinematic experiences. Commercials, awkward pauses, and unwanted segments have no place in your final cut. By trimming away the excess, you keep the pacing tight and the viewing experience immersive—just like a studio-produced disc.
User-Friendly Video Editing Tools for Every Skill Level
Not every great editor started with a Hollywood budget or a degree in post-production. Today’s video editing software makes it remarkably easy to sculpt your footage without an intimidating learning curve.
If you want professional power without spending a dime, DaVinci Resolve is a top-tier choice. Its precision trimming tools and timeline-based interface give you meticulous control, while its color grading capabilities can subtly enhance your footage for a more cinematic feel.
For those already comfortable with the industry standard, Adobe Premiere Pro offers a robust editing environment with intuitive shortcuts, ripple edits, and razor-sharp cut tools. It’s ideal if you want to fine-tune every transition and frame.
Prefer something approachable and lightning-fast? Filmora is perfect for beginners and casual editors. Drag-and-drop trimming, easy splitting, and straightforward export settings make it a joy to use—especially if your goal is efficiency.
Other honorable mentions include Shotcut for those who like open-source simplicity, and Vegas Pro for users who appreciate a straightforward, no-nonsense editing workflow.
How to Trim Your Videos for Smooth, Seamless Playback
Start by scrubbing through your footage and marking the timestamps where commercials or interruptions appear. Most editing programs allow you to drop markers or “in” and “out” points directly on the timeline—this keeps your cut precise and avoids disc burning errors.
When removing segments, aim to cut on natural scene changes whenever possible. Trimming mid-shot can feel abrupt unless you use a crossfade or dissolve to soften the break. A well-placed transition can mask even the most jarring commercial cut, preserving flow without calling attention to the edit.
Pay attention to audio continuity. If a commercial is sandwiched between two scenes with similar ambient sounds, match the audio levels after trimming to avoid sudden jumps in volume or tone. Many editors offer waveform displays so you can visually match peaks and troughs for smoother sound blending.
Once your edits are in place, watch the entire timeline from start to finish. Don’t just skip to the cuts—immerse yourself in the playback as your audience will. If anything feels abrupt, tweak the timing until it flows naturally.
This step might seem purely technical, but it’s where your project begins to feel like a true, store-bought disc. Every clean transition and seamless audio cue adds to the illusion of a professionally mastered release. By the time you’re done trimming, your footage should feel uninterrupted, intentional, and ready for the artistry still to come.
Step 3: Export Like a Pro
Your edits are locked in, the flow is seamless, and it’s time to prepare your masterpiece for its journey onto a shiny disc. This stage is more than hitting “Save As.” The export settings you choose can make the difference between a disc that looks crisp and vibrant, and one that feels muted or washed out.
Best File Formats for Disc Creation (Why MP4 is a Safe Bet)
When it comes to Blu-Ray disc creation or burning DVDs, not all file formats play nicely with disc authoring tools. You want something that balances high quality with compatibility—and that’s where MP4 (H.264 codec) stands tall. It’s lightweight without sacrificing visual fidelity, widely recognized by most DVD burning software and Blu-Ray burners, and efficient for storage.
Blu-Ray creators like DVDFab handle MP4 beautifully, ensuring smooth rendering without unnecessary re-encoding. That means less chance of compression artifacts creeping into your final product. For those who crave absolute maximum quality and have the storage space to spare, MKV and MOV are also viable—but they can be finicky, requiring extra conversion steps before burning.
Resolution matters too. For Blu-Ray video format, exporting at 1920×1080 (Full HD) is ideal unless your source is 4K, in which case you can retain the original resolution for the ultimate clarity. DVD video format, by contrast, will downscale to standard definition, so you can safely stick to SD settings for older content.
Keeping Audio Quality True to the Original Source
Video grabs the spotlight, but audio is half the experience. The wrong export settings can flatten rich dialogue, weaken bass, or muddy ambient details that make a scene feel alive. To preserve that cinematic soundscape, match your export settings to the original recording as closely as possible.
If your source audio is stereo, stick to stereo. If it’s 5.1 surround, maintain the 5.1 channel structure during export. Many authoring programs support Dolby Digital (AC-3) and DTS—both of which keep dynamic range intact while remaining disc-friendly. Avoid unnecessary downmixing unless space is a pressing concern.
Bitrate plays a key role here. For stereo, aim for at least 192 kbps; for 5.1 surround, 448 kbps or higher is a safe zone. A higher bitrate means fuller, more robust sound, especially noticeable in music-heavy scenes or action sequences.
Once exported, always preview your file before moving forward. Check for sync issues between audio and video, listen for dropouts, and confirm the overall loudness feels balanced from start to finish.
By the time your export is complete, you’ll have a pristine, ready-to-author MP4 to DVD or Blu-Ray file—one that looks sharp, sounds spectacular, and feels like it could have been pulled straight from an official release. This is the foundation upon which your custom Blu-Ray and DVD menus, disc artwork, and final disc printing will shine.
Step 4: Build Your Blu-Ray Menu and Layout
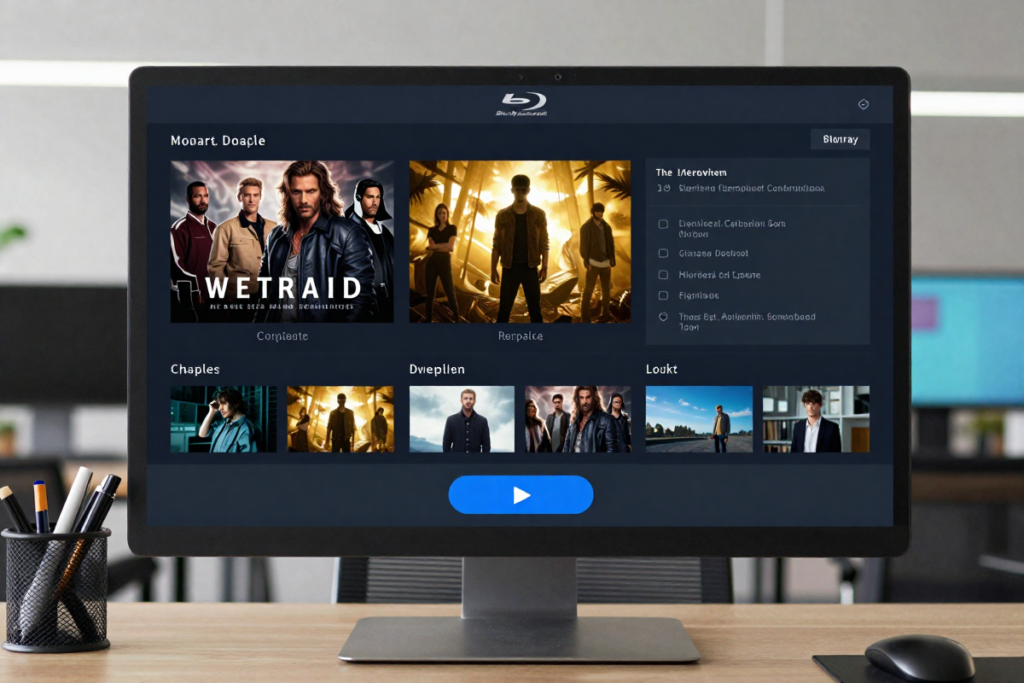
A well-crafted menu sets the tone before a single frame plays. It’s the welcome mat to your disc—a blend of design, navigation, and atmosphere that transforms raw video into a cinematic experience. With the right setup, your homemade Blu-Ray can feel indistinguishable from a commercial release.
How to Use DVDFab Blu-Ray Creator for Custom Menus
DVDFab Blu-Ray Creator makes menu building remarkably intuitive while still offering room for artistry. After importing your final video file, switch to the “Menu” tab. Here, you can choose from built-in templates or start from scratch for a fully personalized design.
Templates give you a head start with pre-arranged play buttons, chapter lists, and background areas. Custom mode, however, lets you rearrange and resize elements, tweak fonts, and change colors to match the tone of your movie. For example, a suspenseful thriller might call for a darker palette with sharp, modern text, while a nostalgic TV series could use retro fonts and warm tones.
Chapter markers are another essential touch. By adding them at natural breakpoints—scene changes, episode starts, or major plot shifts—you give viewers the ability to skip effortlessly without fumbling through fast-forward.
Adding Background Images, Music, and Navigation for a Professional Touch
A static, plain-colored menu feels unfinished. Background imagery brings your disc to life. Upload stills from the film, promotional posters, or custom-designed art that complements your disc’s printed label. For crisp display quality, aim for at least 1920×1080 resolution for Blu-Ray menus.
Motion menus add polish. DVDFab allows you to loop short video clips in the background—perhaps an iconic moment or a subtle pan over the title artwork. Keep loops under 30 seconds for smooth playback and manageable file size.
Audio completes the sensory experience. Import a snippet of the film’s score or fitting royalty-free music to set the mood. Lower the volume slightly so it doesn’t overpower dialogue or narration.
Navigation should be intuitive. Position “Play,” “Scenes,” and “Extras” buttons where they’re easy to spot but not crowded. Keep alignment consistent so the eye flows naturally from one option to the next. A great menu feels effortless to use—no second-guessing where to click.
Once your design is complete, preview it within DVDFab’s simulator. Navigate the buttons, test the audio, and watch for image stretching or alignment issues. These final checks ensure your menu feels smooth, cohesive, and ready for the main event.
With the menu locked in, your disc now has its personality—an elegant first impression hinting at the care and craftsmanship waiting in the feature presentation.
Step 5: Burn Your Disc with Perfect Quality
The final act of creating your Blu-Ray or DVD is where digital files meet the physical world. This is the moment your masterpiece leaves the hard drive and takes form as a tangible, playable disc. Every choice—from the disc itself to the burn process—matters.
Choosing the Right Blank Discs — Why Printable Inkjet White Coating Matters
Not all blank discs are created equal. Cheap, off-brand options may save a few dollars, but they often degrade faster, develop playback issues, or fail mid-burn. For long-term reliability, opt for reputable brands like Verbatim or JVC Taiyo Yuden, known for consistent quality and archival-grade longevity.
For a professional look, printable inkjet white-coated discs are worth the investment. This special surface allows direct-to-disc printing, producing full-color labels that won’t peel, bubble, or smudge like stickers. The white base ensures colors remain vibrant, crisp, and photo-accurate—perfect for matching the quality of commercial releases.
For Blu-Ray projects, use BD-R discs with at least 25GB capacity for single-layer or 50GB for dual-layer content. DVDs typically require standard DVD-R or DVD+R formats, depending on your burner.
Avoiding Burning Errors and Ensuring Longevity
Burning might seem like a simple “click and wait” task, but a few precautions can mean the difference between a flawless disc and a frustrating coaster.
Burn at a moderate speed—often half of your disc’s maximum rating. While high-speed burns save time, slower burns usually produce cleaner, more reliable data writing, reducing playback glitches.
Ensure your computer isn’t bogged down during burning. Close unnecessary apps, disable sleep mode, and avoid heavy multitasking to prevent data interruptions.
Store blank discs in a cool, dry place before use, and handle them by the edges only to avoid fingerprints or scratches.
After burning, verify the disc. Many programs, including DVDFab and ImgBurn, offer verification modes to check data integrity. This quick step can save you from discovering a corrupted disc later.
For long-term preservation, store finished discs vertically in cases, away from direct sunlight and heat. Avoid paper sleeves, which trap dust and can scratch the surface.
A clean burn paired with quality media doesn’t just guarantee smooth playback—it gives your creation the lifespan it deserves. Your disc becomes a lasting keepsake to enjoy decades from now without frozen frames or missing chapters. In the world of physical media, that durability is priceless.
Step 6: Print Directly on the Disc for a Factory-Finish Look
Nothing elevates a homemade Blu-Ray or DVD like professional-grade disc art. It’s the detail that bridges the gap between “burned at home” and “straight off the shelf.” Direct-to-disc printing creates polished, smudge-free labels that look impressive and feel authentic.
Best Printers with Disc Trays (Canon PIXMA TS702a and Similar Models)
To achieve this, you need a printer with a dedicated disc tray—a feature that makes all the difference. The Canon PIXMA TS702a is a standout, offering sharp, high-resolution prints, rich colors, and a straightforward disc-loading process. The built-in tray holds printable inkjet discs firmly, preventing shifts or smears.
Other excellent options include the Canon PIXMA iP8720, great for larger-format printing alongside disc printing, and the Epson Expression Photo XP-8600, known for exceptional color accuracy. Choosing a printer designed for media printing ensures your labels stay vivid and aligned for years.
How to Align Disc Art Perfectly with Included Printer Software
Alignment is key to a factory-finish label. Most disc printers come with proprietary software—like Canon’s Easy-PhotoPrint Editor or Epson’s Print CD—that guides you step-by-step. Load your disc template, then import your artwork.
Use on-screen tools to fine-tune placement. Watch the center hole position and outer edges carefully; even a millimeter off can make your design look uneven. Many programs offer live previews so you can confirm fit before printing.
Design artwork at a resolution of at least 300 dpi, matching the disc’s exact dimensions for sharp text, defined edges, and vibrant colors without pixelation.
When printing, choose the highest quality setting and use pigment-based inks if possible—they resist fading better. Let the disc dry fully before handling, even if it feels dry to the touch. This prevents smudging and keeps artwork pristine.
When aligned and printed correctly, your disc will carry a professional, symmetrical look that rivals commercial releases. Paired with a glossy or matte finish on the printable surface, it becomes a centerpiece in your collection—a testament that home-crafted media can match studio aesthetics.
Step 7: Create Stunning Custom Disc Artwork
A disc without artwork feels unfinished—like a book without a cover. The label is more than decoration; it’s an identity, a visual introduction to the experience waiting inside. Whether you choose to replicate official designs or craft something uniquely yours, well-made disc art turns a piece of plastic into a collector’s treasure.
Photo Editing Tools for Eye-Catching Designs
The right design software gives you precision, control, and the ability to bring your vision to life.
- Adobe Photoshop remains the gold standard, offering advanced layer control, masking tools, and endless customization options. Perfect for pixel-level image manipulation.
- Affinity Photo is a budget-friendly powerhouse with professional-grade tools and a one-time purchase, ideal for long-term projects without subscription fees. It handles high-res files effortlessly and supports non-destructive editing.
- GIMP, the open-source favorite, offers robust editing capabilities—from color correction to precise cropping. With the right plug-ins, it can rival paid software, though its interface can feel a bit utilitarian.
Use Templates to Get It Right
Always start with a disc template that matches your printable media. Templates ensure perfect placement around the center hole and edges, preventing awkward cropping or alignment mishaps.
Where to Find Ready-to-Use Artwork
Websites like CoverCity and Fanart.tv are treasure troves of high-res disc labels, movie posters, and Blu-Ray artwork created by talented fans. Many mimic official designs, while others offer unique, creative takes that add flair to your discs.
When downloading artwork, choose images at least 3000 pixels wide for crisp printing. Avoid low-res files to prevent blurriness or pixelation.
How to Make Your Own
If you want a truly personal touch, start by gathering high-quality stills, promotional posters, or custom typography that fits your movie’s tone. Layer these elements carefully, focusing on balance and composition. Use gradient overlays, drop shadows, and sharpening to add depth and polish.
Add finishing touches like Blu-Ray or DVD logos, studio-style rating icons, or thematic textures. These subtle details give your artwork an official, professional look.
Save your final design as a high-resolution TIFF or PNG file to ensure sharp, vivid print quality. Once printed and applied, your disc will look like it belongs on any retail shelf.
Step 8: Design a Professional Blu-Ray Sleeve
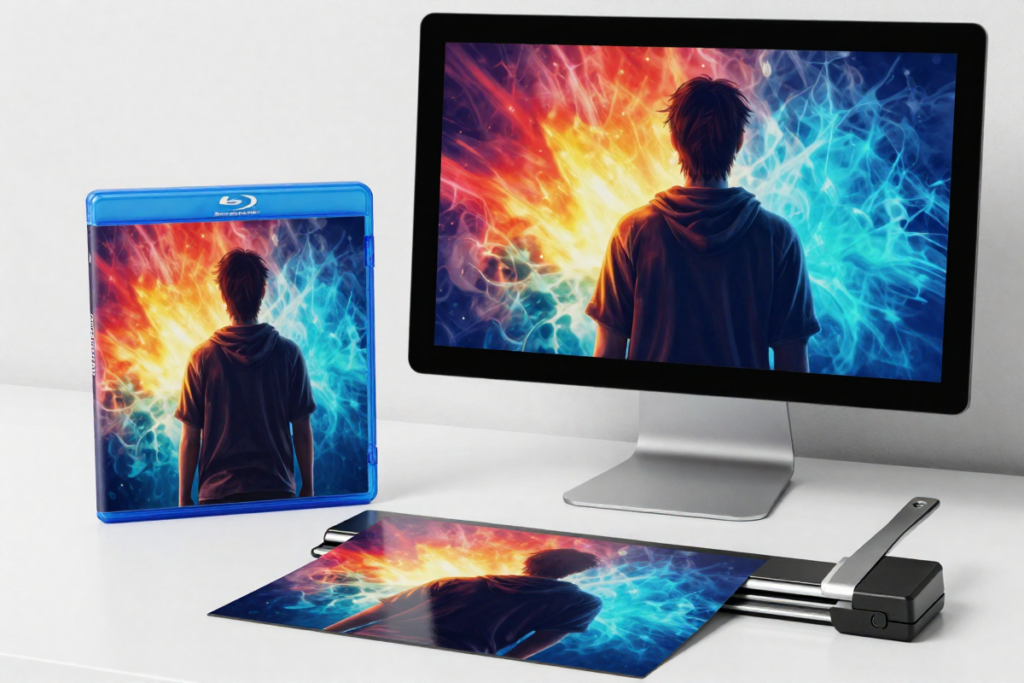
A polished Blu-Ray sleeve is the crowning glory of your DIY project, transforming your disc into a display-worthy collectible. The right sleeve evokes excitement and anticipation, rivaling store-bought releases. Creating one that looks crisp and professional is totally achievable with the right tools and printing know-how.
Free Tools for Accurate Sleeve Printing
Bluray Cover Printer is a free, user-friendly software designed specifically for Blu-Ray and DVD covers. It offers perfectly sized templates that align your front, back, and spine artwork flawlessly.
The intuitive interface lets you import custom designs or download high-quality covers from integrated databases. You can tweak text, add ratings, and customize layouts easily—no more guesswork with margins or sizes.
Using Bluray Cover Printer guarantees your sleeve fits standard Blu-Ray cases perfectly, avoiding cropping or misalignment. It’s the secret behind professional-looking sleeves that make your discs stand out.
Recommended Print Settings for Crisp Colors and Sharp Text
Even the best design can fall flat with poor print settings. For a glossy, retail-quality finish:
- Choose highest print quality or photo mode on your printer (1200 dpi or higher). This sharpens text and enhances fine details like logos.
- Use glossy or semi-gloss brochure paper to mimic commercial Blu-Ray jackets, enhancing color saturation and giving a professional feel. Matte paper offers a subtler, elegant look but avoid plain copier paper.
- Prefer pigment-based inks if available—they offer superior durability and resist fading better than dye-based inks, especially important for longevity.
- Do a test print on plain paper first to check alignment and colors, then adjust settings as needed.
After printing, trim carefully with a precision cutter, following the template’s cut lines exactly. Slip your masterpiece into a clear plastic Blu-Ray case, and voilà—a professional, shelf-ready look that’s sure to impress.
Step 9: Choose the Right Paper for Authentic Results
Selecting the perfect paper might seem simple, but it’s crucial to achieving the authentic, high-end look of your Blu-Ray sleeve. The paper’s feel and finish contribute just as much as the artwork to the overall presentation.
Glossy vs. Matte Brochure Paper — Which Gives the Best Movie Studio Look?
- Glossy paper is king when it comes to replicating the slick, vibrant look of commercial Blu-Ray sleeves. Its reflective finish makes colors pop with brilliant contrast and sharp highlights, just like you see in stores. However, it can show fingerprints and glare under bright light.
- Matte paper offers a smooth, velvety texture with reduced glare and smudge resistance, ideal for indie or collector’s editions with a more artistic vibe. Colors appear softer and less saturated than glossy.
For that blockbuster, big-studio feel, go glossy. For a premium, understated aesthetic, matte is a sophisticated choice.
Top Paper Picks for Vibrant Colors and Long-Lasting Prints
Look for heavyweight photo or brochure paper in the 200–300 gsm range. This weight balances durability and flexibility, keeping your sleeve sturdy but not bulky.
- For glossy lovers, Canon Photo Paper Pro Platinum is a standout with ultra-high gloss and superb color reproduction. It works well with pigment and dye inks and feels thick and sturdy.
- For matte fans, Hahnemühle FineArt Pearl offers a luxurious texture with excellent color depth and a subtle sheen, plus acid-free durability to prevent yellowing.
Pigment inks generally last longer and resist fading better than dye inks—especially important on glossy surfaces.
Pro tip: Always test a small print before committing to a full run. Printers and inks can interact with paper in unexpected ways, and you want your sleeve to look like it just rolled off a professional press—not a rushed home printer.
Step 10: Finish the Look with Quality Blu-Ray Cases
Your masterpiece isn’t truly complete until it’s encased in a sturdy, professional-grade Blu-Ray case that cradles your custom disc and artwork with care. The right case not only enhances the overall aesthetic but also preserves your creation for years to come. Let’s dive into why investing in quality cases is just as important as perfecting your disc burning technique and custom movie discs.
Best Sources for Sturdy, Standard-Size Blu-Ray Cases
When sourcing cases, the details matter. Standard Blu-Ray cases measure approximately 135mm x 171mm x 14mm—thin, sleek, and elegant. But not all cases are created equal. Look for cases made from high-grade polypropylene, known for durability and resistance to cracking. This material also offers a glossy finish that complements your printed sleeves and disc artwork beautifully.
Reliable vendors like Amazon, eBay, and specialty retailers such as CaseLogic and Disctopia offer bulk packs of genuine Blu-Ray cases at reasonable prices. Buying in bulk is smart if you plan to build an extensive personal DVD collection or Blu-Ray library. It ensures consistency and helps avoid frustration caused by mismatched sizes or flimsy, generic cases that fail the test of time.
Keep an eye out for cases with reinforced hinges and secure snap closures. These little features make a massive difference in protecting your discs from dust, scratches, and warping—key for media disc preservation.
Why Case Quality Matters for a Long-Lasting Collection
It’s easy to underestimate the humble Blu-Ray case’s role in preserving your investment. But consider this: a flimsy case is like a thin paper jacket on a hardcover book—it won’t protect what’s inside when life gets messy. Dropped discs, shelf wear, or sun exposure can degrade your physical media without a robust case guarding them.
Quality cases also prevent warping and keep your discs perfectly aligned with the central spindle, minimizing stress on the disc surface. This reduces the risk of scratches during storage or handling, keeping your viewing experience flawless for years. Plus, a well-crafted case elevates the unboxing experience—whether you’re showing off your home movie discs or gifting a custom disc to a friend.
To achieve that factory-finish look, consider investing in Blu-Ray cases with clear outer sleeves designed to hold your printed covers snugly. This way, your professionally designed disc artwork shines through without slipping or crinkling.
The finishing touch might seem small, but it’s the final piece that ties your entire DIY Blu-Ray project together. It’s where protection meets presentation, ensuring your carefully crafted discs stand the test of time—and look fantastic while doing it. With the right cases, your custom collection won’t just be seen; it will be admired.
Step 11: Keep It Legal
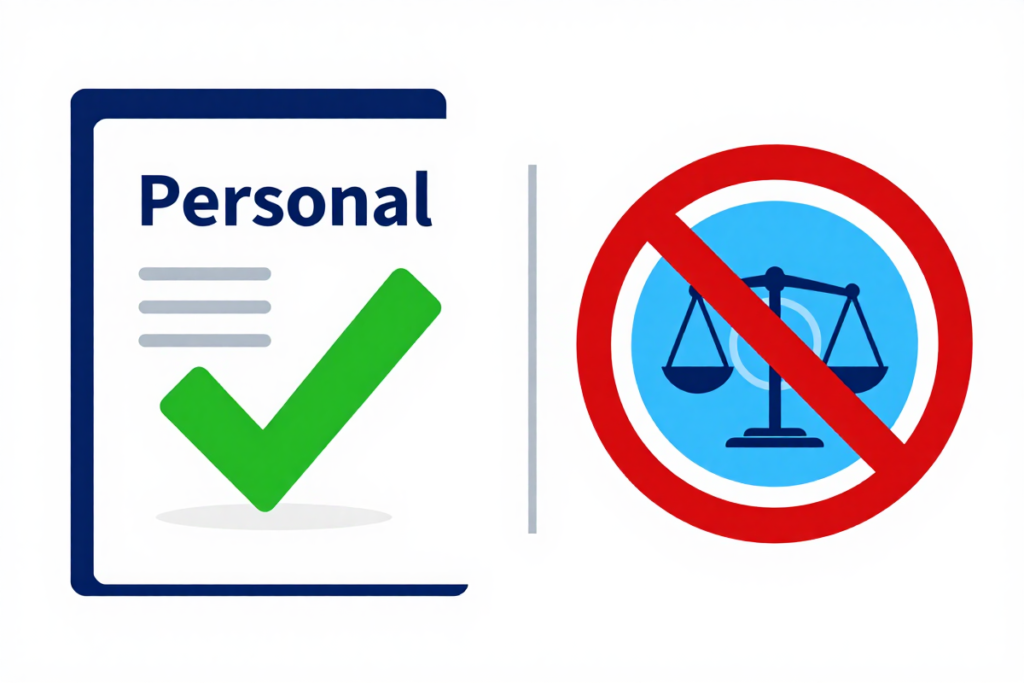
Creating your own DVDs and Blu-Rays from streaming content is undeniably satisfying. But before diving into the final steps, it’s crucial to navigate the legal landscape carefully. Understanding DVD copyright rules and Blu-Ray copyright laws isn’t just about staying out of trouble—it’s about respecting the artists, studios, and creators whose work you cherish.
Understanding Copyright Laws for Personal Use
The legalities around copying streamed movies for personal use can be murky, but here’s the key: in most countries, making a backup or format-shifting content you’ve legally accessed is often considered “fair use” or “personal use.” This means you can create a copy for your own viewing, such as transferring a movie from a streaming service to a physical disc for your home video archiving or personal DVD collection.
However, this privilege comes with boundaries. The copied content must never be shared, distributed, or made publicly available. It’s a one-to-one transfer, not a free-for-all. Respecting this line preserves your rights while honoring copyright protections.
Keep in mind, some streaming platforms include explicit clauses prohibiting any copying or downloading, even for personal use. Always review the terms of service for each platform. While the temptation to preserve your favorite, hard-to-find titles offline is strong, crossing legal lines can lead to serious repercussions.
Why Selling Your Custom Discs Can Lead to Trouble
Here’s the deal: selling discs you’ve burned from streaming content, no matter how professional the disc artwork or how rare the title, is a legal minefield. Unauthorized distribution infringes on copyright holders’ exclusive rights and is considered piracy.
Even if you’re not profiting—or just covering costs—selling custom copies is often viewed as commercial activity. This can trigger hefty fines, legal claims, or worse. The entertainment industry takes copyright infringement seriously, and enforcement measures have grown more sophisticated over the years.
Instead, keep your custom DVDs and Blu-Rays as a private treasure trove. Share the joy of these unique physical copies with family or close friends, but never sell or upload them online. Staying on the right side of the law safeguards your freedom to enjoy your collection without risking penalties.
Ultimately, the goal is to enhance your viewing experience and archiving cinema treasures, not create legal headaches. Respecting copyright law protects the creative ecosystem, encouraging studios and artists to keep producing the content we love—whether it’s streaming or on physical media.
Your DIY discs should be a celebration of your personal passion, crafted with care, and enjoyed responsibly. With this legal compass guiding you, your home cinema will stay both stunning and secure.
Step 12: Perfect for Rare and Unreleased Titles
One of the greatest joys of creating your own DVDs and Blu-Rays from streaming is the ability to preserve titles that simply aren’t available on physical media. Think about those elusive indie films, cult classics, or limited-release documentaries that streaming platforms offer but have never made it to a store shelf. These rare gems can easily vanish when licensing agreements expire, leaving you with no tangible way to revisit your favorites. This is where your custom-made discs truly shine.
Building a collection of rare and unreleased titles transforms your home library into a personal archive—an exclusive trove that reflects your unique tastes and dedication. It’s not just about owning a movie or show; it’s about capturing a piece of cinematic history that might otherwise slip through the cracks. With your own DVDs and Blu-Rays, you hold the keys to a vault of stories that mainstream physical releases overlook. Here we highly encourage you to purchase movie and TV titles that available on physical media to help support it and keep it going for as long as it can. If we continue to buy 4K, blu-ray and DVD movies the studios will keep producing them. When creating your own blu-rays try to focus on what is not available on physical media in order to preserve these titles in your own collection and archive.
The beauty lies in the permanence and control. Unlike streaming, which depends on internet connections, regional availability, and licensing deals, your physical discs are yours to keep, share, and enjoy anytime. No more “content unavailable” messages or sudden removals from platforms. Your collection becomes a fortress against the fickle nature of digital libraries.
This approach also invites creativity. Crafting custom artwork and packaging for these rare titles elevates them to collector’s status—far beyond a simple digital file. Imagine flipping through your shelves, each spine a conversation piece, each disc a labor of love. It’s a statement of your passion and a testament to your devotion as a cinephile.
In a world where physical media is often sidelined, creating your own discs for hard-to-find titles is a bold move. It’s about celebrating the art of film preservation and curating a collection that is truly your own. Whether it’s a limited-run indie, a foreign film with no official DVD or Blu-Ray release, or a beloved series that vanished from streaming, your discs become a lasting homage to the stories that matter most to you.
So, embrace the rare. Build your one-of-a-kind collection. And relish in the knowledge that your home cinema holds treasures that no store or streaming service can offer. This is the power of DIY disc making: turning fleeting digital content into enduring physical keepsakes.
Conclusion: Enjoy Your Handmade Masterpieces
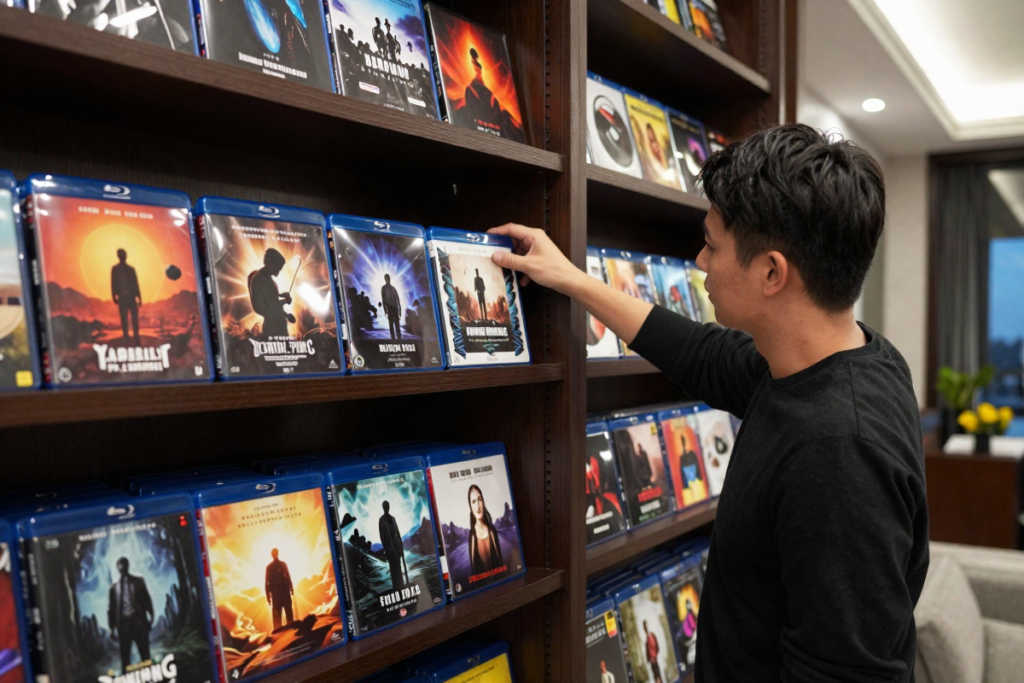
Now that you’ve poured your time, creativity, and care into crafting your own custom Blu-Ray discs and DVDs, it’s time to think about how to preserve these precious handmade masterpieces. Proper storage isn’t just a matter of tidiness — it’s a vital step to ensure your custom DVDs and Blu-Rays stand the test of time. While Blu-Rays and DVDs might seem durable, neglect can lead to scratches, warping, or even data degradation. So, let’s talk about the best practices for storing Blu-Ray discs and DVDs to maximize their lifespan.
First off, always keep your discs in high-quality Blu-Ray cases or DVD cases designed specifically for your format. Those sturdy, standard-size cases do more than just look professional — they protect your collection against dust, fingerprints, and accidental damage. When you’re not using your discs, store them vertically, much like books on a shelf. This helps prevent warping over time and keeps the discs evenly supported.
Avoid exposing your collection to extreme temperatures or humidity; heat and moisture are the biggest enemies of optical media like Blu-Rays and DVDs. Store your collection in a cool, dry place, away from direct sunlight or areas prone to temperature swings. If you live in a humid environment, consider adding silica gel packets inside your storage area to absorb moisture and maintain dry air — a small but impactful step in storing Blu-Ray discs safely.
Cleaning your discs before storage also helps extend their life. Use a soft microfiber cloth and always wipe from the center outward in straight lines — never in circles, as this can cause micro-scratches that affect playback quality. For tougher grime, opt for a gentle cleaning solution formulated for optical discs.
But beyond physical care, there’s something magical about watching movies on custom DVDs and Blu-Rays you’ve crafted yourself. This isn’t just another movie night — it’s a ritual steeped in personal effort and craftsmanship. Holding a disc you designed, with artwork you chose or created, adds an intangible layer of satisfaction to the viewing experience. The simple act of sliding your handmade disc into the player feels like a reward, a celebration of the journey from digital file to tangible art.
Your movie nights become immersive events with no buffering or “content unavailable” messages. Instead, it’s just you, the screen, and a film carefully curated, edited, and preserved to your exact liking. It’s a tactile connection to your favorite stories that streaming can’t replicate. When friends or family come over, sharing these unique custom Blu-Ray discs becomes a point of pride — a conversation starter highlighting your dedication and passion.
This process transforms passive viewing into an active celebration of cinema. It’s about reclaiming control over your media, honoring films and shows that might otherwise slip away, and creating a lasting legacy for your collection. Your handmade discs are more than just storage devices; they’re artifacts of your personal film archive.
So, store your collection wisely in quality Blu-Ray cases, treat it with care, and most importantly, enjoy every moment of your custom-crafted movie nights. They’re not just watching experiences — they’re celebrations of the art, effort, and love you put into every step of this rewarding process.