In today’s digital age, preserving your cherished DVD collection by copying it to your computer is not just a convenience but a necessity. Whether you’re looking to save space, protect your investment, or simply enjoy your movies and music on the go, digitizing your DVDs can offer a world of benefits. Welcome to the **Ultimate 2026 Guide** on how to copy DVDs to your computer in minutes!
In this comprehensive guide, we’ll walk you through the entire process, from selecting the best software tools to configuring settings for the best quality and troubleshooting common issues. Whether you’re a beginner or an experienced user, this guide is packed with tips, tricks, and valuable insights to make the transition from physical discs to digital files as smooth as possible.
Ready to embark on this digital journey? Let’s dive in!
Why Copy DVDs to Your Computer?
Copying DVDs to your computer isn’t just about keeping up with the digital age—it’s a smart move that offers a range of benefits, from preserving valuable content to enhancing convenience and accessibility. Whether you’re a movie enthusiast or someone looking to safeguard your cherished media collection, here’s why you should consider making the transition from physical discs to digital files.
- Preservation and Longevity
Physical Wear and Tear: DVDs, like any physical media, are susceptible to damage over time. Scratches, smudges, and even exposure to heat can render a DVD unplayable, resulting in the loss of cherished movies or important data. By copying your DVDs to your computer, you ensure that your media is protected from these physical vulnerabilities.
Digital Backup: Digitizing your DVDs creates a backup that won’t degrade over time. Unlike physical media, digital files can be stored indefinitely without worrying about deterioration. This means your favorite movies, family videos, and important data can be preserved for years to come, untouched by the ravages of time.
- Convenience and Accessibility
Instant Access Across Devices: Once your DVDs are copied to your computer, you can enjoy your media across various devices without the need for a DVD player. Whether you’re at home, traveling, or simply lounging in bed, having digital copies means you can watch your favorite films on laptops, tablets, smartphones, and smart TVs.
Streamlined Media Library: Imagine having all your DVDs organized in one digital library, easily searchable and accessible with just a few clicks. No more rummaging through stacks of discs to find what you’re looking for—digital files make it simple to categorize and retrieve your media.
- Space Saving
Declutter Your Space: Physical DVDs can take up significant space, especially if you’re an avid collector. By transferring them to digital format, you can declutter your living space, freeing up room for other things. Whether you have a dedicated media room or just a small shelf, going digital can make a noticeable difference.
Travel-Friendly Entertainment: Planning a trip? Carrying a stack of DVDs can be cumbersome and impractical. With digital copies, you can load your favorite movies onto a portable hard drive or cloud storage and access them anywhere. Enjoy entertainment on the go without the bulk of physical media.
- Protection Against Loss
Safeguard Against Theft or Loss: In unfortunate events such as theft or loss, having a digital backup of your DVDs can be a lifesaver. Digital files can be stored securely on external hard drives, cloud services, or even remote servers, ensuring that your media collection remains intact no matter what happens.
Disaster Recovery: Natural disasters or accidental damage (like spilling a drink on your DVD shelf) can lead to irreversible loss. By keeping digital copies, you have peace of mind knowing your content is protected against unforeseen events.
- Flexibility and Versatility
Customization Options: Digitizing DVDs opens up possibilities for customizing and editing your media. Want to extract specific scenes or create a personal highlight reel? Digital formats allow for easy editing, enhancing your creative potential and personal enjoyment.
Sharing Memories: Have home videos or special moments captured on DVD? Copying them to your computer makes sharing with family and friends a breeze. Easily send clips or entire videos via email, social media, or cloud-sharing services, spreading joy without mailing physical discs.
- Environmental Impact
Reduce Plastic Waste: By moving to digital media, you contribute to reducing plastic waste. DVDs are made from non-biodegradable materials, and cutting down on their production and disposal helps minimize environmental impact.
Eco-Friendly Storage: Digital files require no physical packaging or storage materials, leading to a greener footprint for your entertainment habits.
- Future-Proofing Your Collection
Adaptation to Technological Changes: As technology evolves, formats and media players change. By converting DVDs to digital files, you ensure compatibility with future devices and platforms, protecting your investment as DVD players become less common.
Seamless Integration with Streaming Services: Many streaming services allow integration with personal media libraries. By having your DVDs in digital format, you can easily incorporate them into streaming platforms like Plex or Kodi, enhancing your viewing experience.
Copying DVDs to your computer is a practical decision that offers many benefits. From preserving irreplaceable memories to enjoying convenient access across devices, digitizing your DVDs is a worthwhile investment in your entertainment future. So, whether you want to safeguard your collection or simplify your viewing experience, this guide will help you navigate the process with ease.
Legal Considerations
Before you begin copying DVDs to your computer, it’s important to understand the legal landscape surrounding this practice. While copying DVDs can provide numerous benefits, it’s crucial to navigate this process legally and ethically. This section will help clarify what is permissible and how you can avoid potential legal pitfalls.
- Understanding Copyright Laws
DVDs are protected by copyright laws, which are designed to safeguard the rights of content creators and distributors. These laws vary from country to country, but they generally prohibit unauthorized copying and distribution of copyrighted material. Here’s a closer look at the key elements of copyright laws related to DVDs:
- Copyright Ownership: When you purchase a DVD, you buy a license to view the content, not ownership of the content itself. The creators and distributors hold the exclusive rights to reproduce and distribute the material.
- Unauthorized Duplication: Copying DVDs for distribution, sale, or sharing without explicit permission from the copyright holder is illegal. This includes uploading content to the internet or making copies for others.
- Circumvention of DRM: Many DVDs come with Digital Rights Management (DRM) protections, designed to prevent copying. Circumventing these protections, even for personal use, may violate laws such as the Digital Millennium Copyright Act (DMCA) in the United States.
- Fair Use and Personal Backup
Despite the restrictions, there are exceptions that allow for legal DVD copying under specific circumstances. Here’s how you might legally copy DVDs:
- Personal Use: Many jurisdictions allow you to make a single copy of a DVD for personal use, often referred to as “format shifting” or “time-shifting.” This means you can copy a DVD you own to watch it on a different device or preserve it from physical damage.
- Fair Use Doctrine: The fair use doctrine permits copying for purposes such as criticism, comment, news reporting, teaching, scholarship, or research. However, this typically does not extend to copying entire DVDs for personal entertainment.
Key Considerations for Personal Use:
- Ownership: You must own the original DVD you are copying.
- Non-commercial Intent: The copied DVD must be for personal use only and not for resale or distribution.
- DRM Compliance: While personal copying may be legal, bypassing DRM protections might still breach the law in some regions.
- Legal Cases and Precedents
Several legal cases have shaped the current understanding of DVD copying rights. Here are a few notable examples:
- Sony Corp. v. Universal City Studios (1984): Known as the “Betamax case,” this landmark ruling established the legal precedent for time-shifting, allowing individuals to record broadcasts for personal use. While this case didn’t involve DVDs, it set a precedent for personal copying practices.
- RealNetworks, Inc. v. DVD Copy Control Association, Inc. (2009): This case reinforced the importance of DRM protections. RealNetworks attempted to sell software that copied DVDs by bypassing DRM, but the court ruled against them, emphasizing the illegality of circumvention.
- Vernor v. Autodesk, Inc. (2010): This case clarified ownership rights, concluding that software buyers only receive a license to use the content and do not own the actual media, which parallels DVD ownership.
- Staying Within the Law
To legally copy DVDs, it’s essential to adhere to the following guidelines:
- Read Licensing Agreements: Review the DVD’s licensing agreement, which often outlines specific rights and restrictions regarding copying.
- Use Legitimate Software: Choose software that complies with legal standards and does not bypass DRM protections illegally. Look for reputable programs designed for personal backup rather than mass duplication or distribution.
- Stay Informed on Local Laws: Different countries and regions have varying laws regarding DVD copying. Make sure to stay informed about local regulations to ensure compliance.
- Regional Differences
Understanding regional differences in copyright laws is essential, as regulations vary globally. Here’s a brief overview of legal considerations in key regions:
United States:
- DMCA: The DMCA prohibits circumvention of DRM technologies, even for personal use. However, the Copyright Office periodically grants specific exemptions, allowing certain personal copying activities under the law.
- Fair Use: U.S. copyright law permits copying for personal use under the fair use doctrine, but only under specific circumstances.
European Union:
- Private Copying Exceptions: Many EU countries permit copying for private use, but the legality of DRM circumvention remains unclear and varies by jurisdiction.
- EU Copyright Directive: The directive outlines harmonized rules, including exceptions for private copying, but implementation varies between member states.
Australia:
- Fair Dealing: Australia’s copyright law includes fair dealing provisions similar to fair use, allowing copying for personal use within specific limits.
- Private Use Rights: Australians can legally copy DVDs they own for personal use, but bypassing DRM may violate the law.
Canada:
- Private Copying Levy: Canada has a levy on blank media to compensate creators for private copying, making personal DVD copying more permissible under certain conditions.
- DRM Regulations: Canadian law restricts DRM circumvention, aligning with international standards.
- Best Practices for Legal DVD Copying
Here are some best practices to ensure you stay within legal boundaries when copying DVDs:
- Copy Only What You Own: Make copies only of DVDs you have legally purchased or possess ownership rights.
- Keep Copies for Personal Use: Restrict the use of copied DVDs for personal purposes and avoid sharing them with others.
- Educate Yourself on Current Laws: Stay informed about the latest legal developments and changes in copyright regulations.
- Choose Ethical Software Providers: Select software from reputable providers that comply with legal standards and do not encourage piracy or illegal activities.
- Ethical Considerations
While the law provides guidelines, ethical considerations play a significant role in responsible DVD copying:
- Respect Intellectual Property: Recognize the efforts of creators and respect their rights by not distributing or sharing copied content.
- Support Legal Alternatives: Consider supporting content creators by purchasing digital copies, subscribing to streaming services, or using authorized digital platforms.
Conclusion
Copying DVDs to your computer offers numerous advantages, but it’s vital to approach this process with a clear understanding of legal and ethical considerations. By adhering to copyright laws and respecting the rights of creators, you can enjoy your digital media collection responsibly and without legal complications.
By following these guidelines and staying informed about the legal landscape, you can enjoy the benefits of digital media while remaining compliant with copyright laws.
What You Need Before You Start
Before diving into the process of copying DVDs to your computer, it’s essential to gather the right tools and software to ensure a smooth and efficient experience. Having everything prepared in advance will make the process quicker and more straightforward, allowing you to focus on digitizing your DVD collection without any hitches.
List of Essential Tools
To successfully copy DVDs to your computer, you’ll need a few key components. Here’s a checklist to help you get started:
- Computer with a DVD Drive (or External DVD Drive)
- Built-in DVD Drive: If your computer has an internal DVD drive, you’re already set for the ripping process. However, many modern laptops and desktops have omitted this feature in favor of sleeker designs.
- External DVD Drive: An external DVD drive is a convenient solution if your device lacks an internal one. These drives are typically plug-and-play, connecting via USB, and are relatively inexpensive. They’re compatible with both Windows and macOS, making them a versatile choice for users looking to copy DVDs without an internal drive.
- Recommended External DVD Drives:
- Using an external DVD drive not only allows you to rip DVDs on computers without built-in drives but also adds flexibility, as you can connect it to any device with a USB port. This makes it a handy tool for both desktop and laptop users.
- Reliable Internet Connection for Downloading Software
Having a stable internet connection is crucial for downloading DVD ripping software and any necessary updates or drivers. Here’s why you need a reliable connection:
- Downloading Software: Many of the recommended DVD ripping tools are available online, requiring a download to your computer. A reliable connection ensures a smooth download process without interruptions.
- Accessing Updates: Software developers frequently release updates to enhance performance and fix bugs. A steady internet connection allows you to download these updates to ensure your software is running at its best.
- Accessing Tutorials and Support: If you encounter issues or want to learn advanced features, online tutorials, and support forums can be incredibly helpful. A good internet connection ensures you can access these resources whenever needed.
- Ample Storage Space on Your Hard Drive
Copying DVDs to your computer requires adequate storage space, especially if you plan to digitize an extensive collection. Here are some considerations:
- File Size: DVD movies typically range from 4.7 GB for single-layer DVDs to 8.5 GB for dual-layer DVDs. Make sure your hard drive has enough space to accommodate these large files.
- External Storage Options: If your internal hard drive is limited, consider using external storage solutions like external hard drives or network-attached storage (NAS) devices. This ensures you have ample space without overburdening your computer’s internal drive.
- Recommended External Hard Drives:
- Cloud Storage Alternatives: Consider cloud storage services like Google Drive, Dropbox, or OneDrive for additional backup and accessibility. These services allow you to store your files securely online, making them accessible from any device with an internet connection.
Recommended Software
With the right tools in place, the next step is selecting the best software for copying DVDs to your computer. The market is filled with numerous DVD ripping tools, but choosing the right one can make a significant difference in the quality and ease of the process. Below are some top-rated software options, both free and paid, to consider.
1. WonderFox DVD Ripper Pro
Overview: WonderFox DVD Ripper Pro is a powerful Windows-based DVD ripping and conversion tool designed to help users digitize their DVD collections quickly and easily. It can convert DVDs to popular video and audio formats, create 1:1 digital backups, and optimize videos for a wide variety of devices. The software also supports DVD discs, ISO image files, and DVD folders, making it a versatile option for preserving and accessing DVD content digitally.
Key Features:
- Fast DVD Ripping: WonderFox DVD Ripper Pro uses hardware acceleration and optimized DVD processing technology to speed up the ripping process. WonderFox states that a DVD can typically be backed up to MPG in about 5–10 minutes, while MP4 and other formats generally take less than 20 minutes, depending on the source and system.
- Wide Format and Device Support: The software provides hundreds of output profiles for popular video and audio formats, including MP4, MKV, AVI, MOV, MPG, MP3, and WAV. It also includes presets for devices such as iPhone, iPad, Xbox, PS5, HDTVs, and 4K TVs.
- 1:1 DVD Backup: For users who want to preserve their DVDs without converting them to a compressed video format, WonderFox DVD Ripper Pro can create 1:1 digital copies as ISO images or DVD folders. It also supports quick-copy options for preserving DVD content while maintaining the original quality.
- DVD Copy Protection and Region Support: WonderFox DVD Ripper Pro is designed to process many types of DVD protection and region restrictions, including technologies such as CSS, region codes, RCE, Sony ARccOS, and UOPs. Availability and legality of bypassing copy protection can vary by country and circumstance, so users should make sure their use complies with applicable copyright laws.
- High-Quality Output: Users can choose between different output profiles and customize settings such as resolution, bitrate, frame rate, encoder, and aspect ratio. The software also provides 1:1 backup options when preserving the original DVD content is the priority.
- Built-In Editing Tools: WonderFox includes basic editing capabilities that allow users to trim or crop video, apply effects, adjust output settings, and manage audio and subtitle tracks before creating the final digital file.
Pricing:
- Free Trial: WonderFox offers a free trial so users can test the software before purchasing.
- Lifetime License: The official store currently lists WonderFox DVD Ripper Pro at $29.95 for a lifetime license on one PC. The purchase includes lifetime free upgrades, and WonderFox offers a 30-day money-back guarantee. Pricing and promotional discounts may change over time.
Affiliate Link: WonderFox DVD Ripper Pro – Try It Now
Why Choose WonderFox DVD Ripper Pro?
WonderFox DVD Ripper Pro is a strong choice for Windows users who want an easy way to digitize and preserve their DVD collections. Its combination of fast processing, broad format and device support, 1:1 backup capabilities, customizable output settings, and built-in editing tools makes it suitable for both beginners and more experienced users. Whether you want to convert DVDs to convenient MP4 files for playback on modern devices or create a digital archive of your discs, WonderFox provides a comprehensive solution in a relatively straightforward interface.
- HandBrake
Overview: HandBrake is a well-known open-source DVD ripping software that has garnered a loyal following for its versatility and ease of use. Best of all, it’s completely free, making it a great option for those on a budget.
Key Features:
- Cross-Platform Compatibility: Available for Windows, macOS, and Linux, HandBrake caters to a broad audience of users across different operating systems.
- Comprehensive Format Support: HandBrake supports a wide range of input and output formats, including MP4, MKV, and more, ensuring compatibility with most devices.
- Advanced Encoding Options: For those seeking more control over the ripping process, HandBrake offers advanced encoding settings, including bitrate adjustments, codec options, and more.
- Batch Processing: HandBrake allows users to queue multiple DVDs for ripping, saving time and effort for those with extensive collections.
Pricing:
- Free: HandBrake is open-source and free to use, with regular updates and community support.
Download Link: HandBrake – Free Download
Why Choose HandBrake?HandBrake’s reputation as a robust and reliable ripping tool makes it a fantastic choice for anyone looking to copy DVDs without spending money on software. While it may not have the speed of paid alternatives, its flexibility and range of features make it a standout option.
- DVDFab DVD Ripper
Overview: DVDFab DVD Ripper is a premium software that offers a seamless DVD copying experience with advanced features and exceptional output quality. It’s a popular choice among users who demand high performance and versatility.
Key Features:
- Fast and Efficient: DVDFab’s multi-core processing technology enables fast ripping speeds without compromising quality, allowing users to convert DVDs in minutes.
- Customizable Output: With extensive customization options, users can tailor their output settings to achieve the desired video and audio quality.
- Comprehensive DRM Removal: DVDFab DVD Ripper can handle a variety of copy protections, ensuring that you can back up even the most heavily protected DVDs.
- Editing Tools: Built-in video editing tools let users crop, trim, and add subtitles to their ripped DVDs, providing additional versatility for content customization.
Pricing:
- Free Trial: Offers limited features for a trial period.
- Paid Version: Priced at $54.99, the full version provides access to all features and regular updates.
Affiliate Link: DVDFab DVD Ripper – Explore Features
Why Choose DVDFab DVD Ripper?DVDFab DVD Ripper is an excellent choice for users seeking a premium ripping solution with high-quality output and advanced features. Its user-friendly interface, combined with powerful capabilities, makes it a valuable tool for anyone serious about digitizing their DVD collection.
- MakeMKV
Overview: MakeMKV is a straightforward DVD and Blu-ray ripping tool known for its simplicity and effectiveness. It’s perfect for users who want a hassle-free experience with minimal setup and configuration.
Key Features:
- Ease of Use: MakeMKV’s intuitive interface allows users to start ripping DVDs with just a few clicks, making it accessible for beginners.
- Preservation of Quality: By converting DVDs to MKV format, MakeMKV ensures that the original quality of the video and audio is maintained.
- Support for Blu-ray Discs: In addition to DVDs, MakeMKV also supports Blu-ray discs, providing additional versatility for users with diverse media collections.
- Free Updates: MakeMKV offers free updates during the beta phase, keeping the software current with new features and improvements.
Pricing:
- Free: While in beta, MakeMKV is free to use. The Blu-ray ripping feature may require a license key after the beta period.
Download Link: MakeMKV – Download Now
Why Choose MakeMKV?MakeMKV is an excellent option for users who value simplicity and quality. Its ability to preserve the original content quality while offering a straightforward ripping process makes it a great choice for users who want to avoid complicated settings.
Choosing the Right Software for Your Needs
With several excellent options available, selecting the right DVD ripping software depends on your specific needs and preferences. Here’s a quick guide to help you decide:
- For Speed and Versatility: Consider WinX DVD Ripper for its fast performance and wide format support. It’s ideal for users who want a quick and reliable ripping solution.
- For Budget-Friendly Options: HandBrake is the perfect choice for those looking for a free, open-source tool with extensive features and cross-platform compatibility.
- For Advanced Features: If you require advanced editing capabilities and high-quality output, DVDFab DVD Ripper offers a comprehensive suite of tools for a premium experience.
- For Simplicity and Quality Preservation: MakeMKV provides a straightforward solution for users who want to maintain the original quality without delving into complex settings.
Conclusion
Preparing the right tools and selecting the best software is crucial to ensure a smooth and efficient DVD copying process. Whether you’re a tech-savvy user seeking advanced features or a beginner looking for a simple solution, the options above cater to a wide range of needs and preferences.
By using the recommended tools and software, you’ll be well-equipped to copy DVDs to your computer with ease, preserving your media collection and enjoying digital access to your favorite content.
Feel free to explore the affiliate links provided to discover more about these software solutions and find the perfect fit for your DVD ripping journey.
Step-by-Step Guide to Copying DVDs to Your Computer
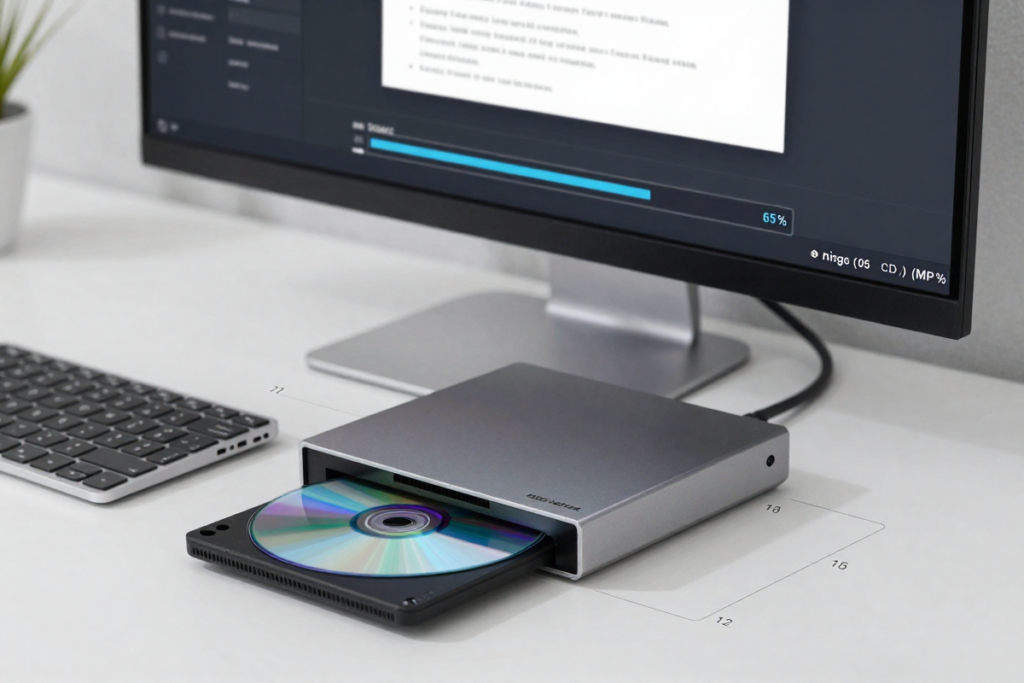
Copying DVDs to your computer can be a straightforward process when you have the right tools and knowledge. This step-by-step guide will walk you through the entire process, ensuring that even beginners can successfully digitize their DVD collection. Let’s dive into the detailed instructions.
Step 1: Install the Software
Before you can begin copying DVDs, you need to install the software of your choice on your computer. Here’s a detailed guide to help you get started:
1.1 Download the Software
- Choose Your Software: Based on your preferences and needs, select the DVD ripping software that suits you best from our recommended list. For this guide, we’ll use Wonderfox DVD Ripper Pro as an example, but the steps are generally applicable to other software as well.
- Visit the Official Website: Navigate to the official website of the software. For Wonder Fox DVD Ripper Pro, you can go to Wonderfox DVD Ripper Pro.
- Select the Download Option: Click on the “Download” button to begin downloading the installation file. Make sure to select the appropriate version for your operating system (Windows or macOS).
- Check System Requirements: Before downloading, verify that your computer meets the system requirements specified on the website. This ensures smooth installation and operation of the software.
1.2 Install the Software
- Locate the Installation File: Once the download is complete, locate the installation file in your downloads folder or the location you specified during the download process.
- Run the Installer: Double-click the installation file to launch the installer. You may need to grant permission for the installation to proceed, especially on macOS.
- Follow the Installation Wizard: Follow the on-screen instructions provided by the installation wizard. You can typically accept the default settings, but you may also customize the installation location if desired.
- Complete the Installation: Once the installation is complete, you may be prompted to launch the software immediately. If not, you can find the software in your applications or start menu.
Troubleshooting Tips
- Antivirus Warnings: If your antivirus software flags the installation, ensure you’re downloading from the official website and temporarily disable the antivirus during installation if necessary.
- Administrative Permissions: On Windows, right-click the installation file and select “Run as administrator” if you encounter permission issues.
Step 2: Insert the DVD and Select Output Format
With the software installed, you can now move on to inserting your DVD and selecting the appropriate output format. This step ensures compatibility with your preferred devices.
2.1 Insert the DVD
- Insert into DVD Drive: Place the DVD you wish to copy into your computer’s DVD drive. If using an external DVD drive, ensure it’s properly connected via USB.
- Software Detection: Open the DVD ripping software. It should automatically detect the inserted DVD and display its contents, including the main title, chapters, and other features.
- Troubleshooting Detection Issues: If the DVD isn’t detected, ensure the drive is functioning correctly, and the disc is clean and undamaged. You may also need to restart the software or computer.
2.2 Select Output Format
- Understand Output Formats: The choice of output format depends on where and how you plan to use the copied files. Here’s a quick guide to common formats:
- MP4: Highly compatible with most devices, including smartphones, tablets, computers, and TVs. It balances quality and file size, making it a popular choice for most users.
- AVI: Offers good quality but may result in larger file sizes. Suitable for older devices that support AVI playback.
- MKV: Ideal for preserving original quality, including subtitles and multiple audio tracks. It’s best for archiving purposes but may require specific players or software.
- MOV: Best for Apple devices, providing high-quality video and audio. Compatible with macOS and iOS but less so with non-Apple devices.
- Choose Your Format: Within the software interface, you’ll typically find a dropdown menu or list of formats. Select your preferred format based on the above considerations.
- Device-Specific Profiles: Many DVD ripping software offer device-specific profiles, such as iPhone, Android, or Xbox. Selecting these can simplify the process, ensuring optimal compatibility and quality for the chosen device.
Compatibility Considerations
- Smartphones/Tablets: MP4 is generally recommended for mobile devices due to its balance of quality and compatibility.
- Smart TVs/Media Players: MKV or MP4 formats are ideal, depending on the device’s specifications.
- Computers/Laptops: AVI, MP4, and MKV formats are widely supported across operating systems.
Step 3: Configure Settings for Best Quality
Configuring settings is a crucial step to ensure that your digital copy maintains the desired quality and performance. Here’s how to optimize the settings:
3.1 Adjust Video and Audio Quality
- Video Quality Settings: Look for options such as resolution, bitrate, and frame rate. Here’s a guide to common settings:
- Resolution: Maintain the original resolution (e.g., 720p, 1080p) for best quality. Reducing resolution can save space but may degrade quality.
- Bitrate: A higher bitrate results in better quality but larger files. For high-quality video, aim for at least 1500 kbps.
- Frame Rate: Match the DVD’s original frame rate (typically 24 or 30 fps) to preserve smooth playback.
- Audio Quality Settings: Select the audio track and bitrate that meet your preferences:
- Audio Track: Choose the primary language or desired audio track.
- Bitrate: Higher bitrates (e.g., 192 kbps) ensure better sound quality, but may increase file size.
- Encoding Options: If the software supports it, select advanced encoding options like H.264 for video and AAC for audio to achieve efficient compression without sacrificing quality.
3.2 Presets for Different Scenarios
- High-Quality Video: Opt for the highest resolution and bitrate, preserving the DVD’s original quality. This is ideal for archiving or watching on large screens.
- Fast Ripping: Choose lower resolutions and bitrates to speed up the ripping process. This is suitable for viewing on smaller screens or when storage is limited.
- Balanced Quality and Size: Use medium settings for a balance between quality and file size, perfect for everyday viewing on various devices.
Step 3: Configure Settings
Tips for Best Quality
- Experiment with Settings: Feel free to experiment with different settings to find the perfect balance between quality and size that suits your needs.
- Preview Feature: Many software offers a preview feature to test settings before starting the full rip, ensuring the output meets your expectations.
Step 4: Start the Ripping Process
Once you’ve configured the settings, you’re ready to start copying your DVD. Here’s how to initiate and monitor the process:
4.1 Initiate the Ripping Process
- Confirm Settings: Double-check your selected output format, quality settings, and destination folder to ensure everything is set correctly.
- Start Ripping: Click the “Start” button or equivalent in your software to begin the ripping process. The software will read the DVD and convert it into the chosen format.
- Monitor Progress: A progress bar will typically display the status of the ripping process, including the estimated time remaining.
4.2 Estimated Time and Monitoring
- Estimated Time: The time it takes to copy a DVD can vary based on factors such as DVD size, chosen settings, and computer performance. Expect the process to take anywhere from a few minutes to over an hour.
- Monitor Progress: Keep an eye on the software’s progress bar to ensure everything is running smoothly. You can usually see real-time updates on the current task and remaining time.
- Pause/Cancel Options: Many ripping tools offer options to pause or cancel the ripping process if needed. This can be useful if you need to temporarily stop the task or if something goes wrong.
Step 4: Start the Ripping Process
Tips for Efficient Ripping
- Close Unnecessary Programs: To speed up the process, close other applications running on your computer to allocate more resources to the ripping task.
- Use Power Mode: Ensure your computer is plugged in and set to a high-performance power mode to maintain optimal performance during ripping.
Step 5: Save and Access Your Files
Once the ripping process is complete, it’s time
Troubleshooting Common Issues
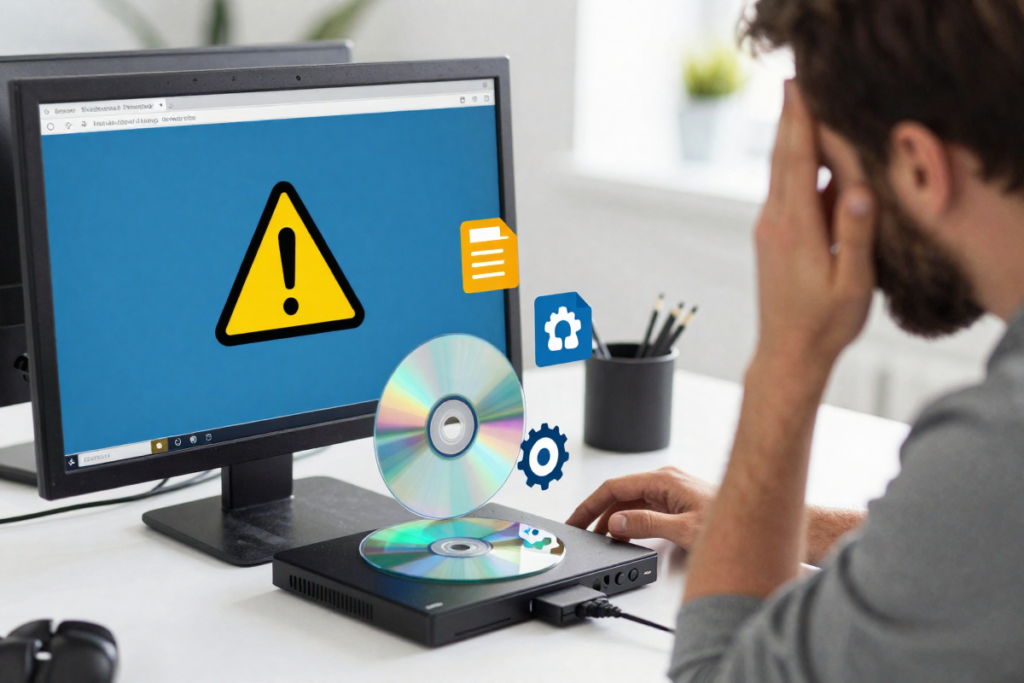
Even with the best tools and preparation, you might encounter a few hurdles while copying DVDs to your computer. Understanding and resolving these issues will ensure a smooth and efficient process, allowing you to enjoy your digital copies without any problems. Here’s a guide to troubleshooting common issues, addressing error messages, and ensuring quality and compatibility.
Error Messages
Encountering error messages during the ripping process can be frustrating, but they often have simple solutions. Here are some common errors and how to overcome them:
1.1 “DVD Not Recognized” or “No Disc Detected”
- Cause: This error typically occurs when the software fails to detect the DVD in the drive. It can result from a dirty or damaged disc, faulty drive connection, or software settings.
- Solution:
- Check the Disc: Ensure the DVD is clean and free of scratches. Gently clean the disc with a soft cloth and reinsert it.
- Reconnect the Drive: If using an external drive, disconnect and reconnect it to ensure a secure connection. Check the USB cable and port for any issues.
- Restart the Software: Close and reopen the DVD ripping software to refresh its detection capabilities. Sometimes, simply restarting the application can resolve the issue.
- Test with Another Disc: Insert a different DVD to determine if the problem is with the disc itself or the drive/software.
1.2 “Copy Protection Error”
- Cause: Many commercial DVDs have copy protection mechanisms (DRM) that prevent unauthorized copying. This error indicates the software cannot bypass these protections.
- Solution:
- Use Updated Software: Ensure you’re using the latest version of the DVD ripping software, as updates often include improvements for handling DRM.
- Enable Decryption Settings: Check the software settings for options related to decryption or copy protection removal. Enable these features if available.
- Try Alternative Software: Some DVDs may be more challenging to decrypt, so trying different ripping software (e.g., DVDFab or MakeMKV) may offer better results.
- Legal Considerations: Always ensure you’re copying DVDs legally and understand the legal restrictions regarding DRM removal in your region.
1.3 “Failed to Initialize” or “Software Crashes”
- Cause: Software crashes or initialization failures can result from system incompatibilities, corrupted installations, or insufficient system resources.
- Solution:
- Check System Requirements: Ensure your computer meets the software’s minimum requirements. Insufficient RAM or processing power can cause crashes.
- Update Software: Look for software updates that may address bugs or compatibility issues.
- Reinstall Software: Uninstall and reinstall the software to fix potential installation issues or corrupted files.
- Close Background Applications: Shut down unnecessary applications to free up system resources and prevent interference with the ripping software.
1.4 “Output File is Corrupted or Unplayable”
- Cause: Corrupted output files usually stem from interruptions during the ripping process or incompatible settings.
- Solution:
- Re-rip the DVD: Attempt the ripping process again, ensuring a stable environment with no interruptions.
- Check Output Settings: Verify that the output format and settings are compatible with your intended playback device.
- Use Alternative Players: Some media players handle specific formats better. Try VLC Media Player or another player to test the file.
Quality Concerns
Ensuring high-quality output is crucial for an enjoyable viewing experience. If the copied DVD doesn’t look or sound right, follow these tips to improve quality and compatibility:
2.1 Poor Video Quality
- Cause: Low video quality often results from incorrect settings, such as low resolution or bitrate.
- Solution:
- Adjust Resolution: Set the resolution to match the DVD’s original quality (e.g., 720p for standard DVDs). Higher resolutions can improve clarity but may increase file size.
- Increase Bitrate: A higher bitrate typically enhances video quality. Experiment with different settings to find the optimal balance between quality and file size.
- Enable Advanced Encoding: Use H.264 or H.265 encoding for better compression without sacrificing quality. This option is available in most modern DVD ripping software.
- Check Output Format: Ensure the output format supports high-quality video playback on your chosen devices. MP4 is generally a safe choice for compatibility.
2.2 Audio Sync Issues
- Cause: Audio synchronization problems can occur due to incorrect settings or conversion issues during the ripping process.
- Solution:
- Adjust Audio Settings: Ensure the audio track and bitrate are set correctly. Mismatched settings can cause sync issues.
- Test Different Codecs: Experiment with different audio codecs (e.g., AAC, MP3) to find one that maintains proper synchronization.
- Use Software with Sync Features: Some DVD ripping tools offer audio sync adjustment features, allowing you to manually correct any delays or mismatches.
- Re-rip with Correct Settings: If issues persist, try re-ripping the DVD with adjusted settings to ensure proper synchronization.
2.3 Compatibility Problems with Devices
- Cause: Compatibility issues arise when the output format or settings aren’t suitable for your intended playback device.
- Solution:
- Select Compatible Formats: Choose formats known for broad compatibility, such as MP4 or MKV. These formats work well on most devices, including smartphones, tablets, TVs, and computers.
- Use Device-Specific Profiles: If available, select profiles tailored to specific devices (e.g., iPhone, Android) to ensure optimal settings for playback.
- Check Device Requirements: Verify your device’s supported formats and settings to ensure compatibility with the copied DVD.
- Convert Files if Needed: Use conversion tools to adapt files to compatible formats if issues persist.
Conclusion
Troubleshooting common issues during the DVD ripping process requires a blend of technical know-how and patience. By following the solutions outlined above, you can overcome most challenges and ensure a smooth experience, resulting in high-quality digital copies of your DVDs.
Remember that technology can sometimes be unpredictable, but with the right approach and understanding, you’ll be well-equipped to handle any obstacles that come your way.
Advanced Tips and Tricks
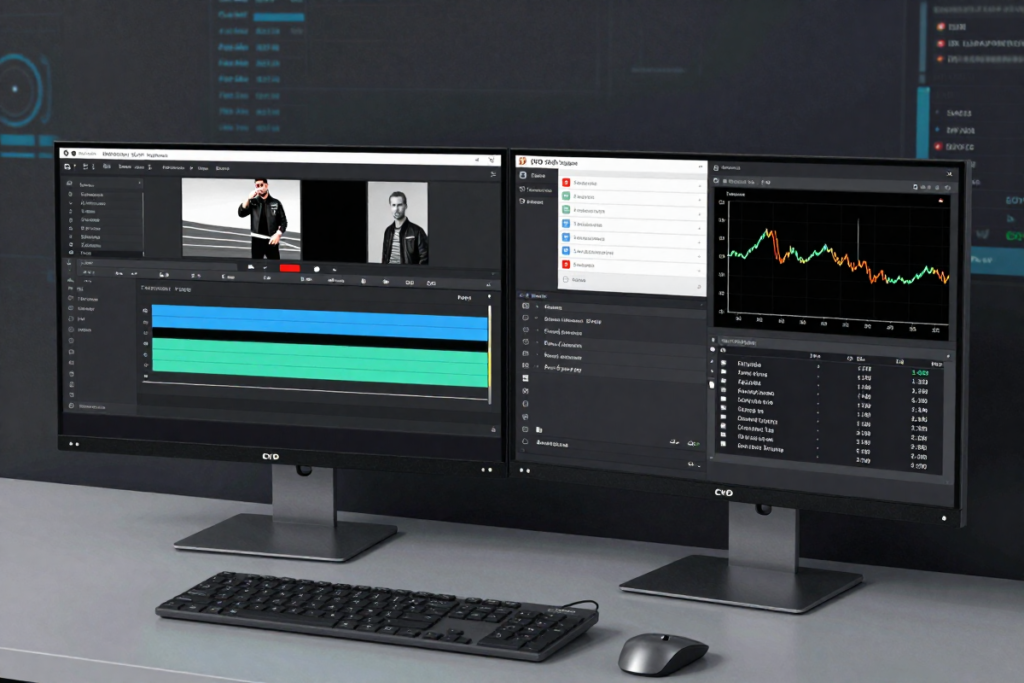
Once you’re comfortable with the basic process of copying DVDs to your computer, you may want to explore some advanced features that can save time and provide more control over the output. This section will introduce you to batch processing, video customization, and other expert tips to elevate your DVD ripping skills.
Batch Processing
If you have a collection of DVDs to digitize, batch processing can significantly streamline the process. This feature allows you to copy multiple DVDs in one go, saving time and effort.
1.1 What is Batch Processing?
Batch processing refers to the ability to handle multiple tasks simultaneously or sequentially without manual intervention. In the context of DVD ripping, this means setting up the software to copy multiple DVDs or multiple titles from a single DVD in a single session.
1.2 Benefits of Batch Processing
- Time Efficiency: Rip several DVDs overnight or while you’re away, freeing up your time for other tasks.
- Consistency: Apply consistent settings across multiple DVDs, ensuring uniform quality and format.
- Reduced Manual Effort: Set up the process once and let the software handle the rest, minimizing the need for constant supervision.
1.3 How to Copy Multiple DVDs Efficiently
Here’s a step-by-step guide on how to perform batch processing with your DVD ripping software:
- Select Batch Mode: Most advanced ripping software offers a “Batch Mode” or similar feature. Look for this option in the main menu or settings.
- Load Multiple DVDs: Insert the first DVD into your drive. Once detected, add it to the batch list. If you have multiple drives, insert additional DVDs simultaneously. If using a single drive, replace DVDs as each one is loaded into the batch.
- Select Titles and Settings: For each DVD, choose the titles you want to copy and apply the desired output settings. You can apply a global setting to all DVDs or customize each one individually.
- Choose Destination Folder: Specify a location on your hard drive where the copied files will be saved. Ensure there’s enough storage space for all the DVDs you’re ripping.
- Start Batch Ripping: Once everything is set up, click the “Start” button to begin the batch ripping process. The software will handle each DVD sequentially or simultaneously, depending on your configuration.
- Monitor Progress: While not necessary, you can keep an eye on the progress to ensure everything is running smoothly. Most software will display a progress bar for each DVD in the batch.
Troubleshooting Batch Processing
- Drive Overload: If using a single drive, be mindful of potential overheating from continuous use. Allow the drive to cool down if you notice slow performance.
- Disk Space: Regularly check available storage space to avoid interruptions. Consider using an external hard drive if needed.
- Software Limitations: Some free software may have limitations on the number of DVDs processed in batch mode. Consider upgrading to a premium version if necessary.
Customizing Output
Beyond simple copying, many users want to personalize their video outputs. This section explores various customization options, including adding subtitles, trimming unnecessary parts, and more.
2.1 Adding Subtitles
Subtitles can enhance the viewing experience, especially for foreign films or viewers with hearing impairments. Here’s how to add them to your copied DVDs:
- Built-in Subtitles: Most DVDs come with embedded subtitles. During the ripping process, select the desired subtitle track from the list provided by the software.
- External Subtitle Files: If the DVD lacks subtitles or if you prefer custom ones, you can download external subtitle files (e.g., .srt files) from a websites like OpenSubtitles.
- Add Subtitles in Software: Many DVD rippers allow you to import external subtitle files during the ripping process. Look for an “Add Subtitles” option within the software interface and select your file.
- Burn-in or Soft Subtitles: Choose whether to burn the subtitles directly into the video (permanent) or keep them as a separate track that can be toggled on or off during playback.
2.2 Trimming and Editing Videos
Sometimes, you might want to cut out unwanted sections from your DVD, such as previews or credits. Here’s how to trim and edit your video outputs:
- Select Trimming Tool: Open the trimming tool within your ripping software. This feature is often found in the advanced settings or editing menu.
- Define Start and End Points: Use the timeline to mark the start and end points of the section you want to keep. Any content outside this range will be removed.
- Preview the Changes: Most software offers a preview window to see how the trimmed video will look. Make adjustments as necessary to ensure accuracy.
- Save the Edited Output: Once satisfied, proceed with ripping the edited version of the DVD. The software will create a new file based on your selections.
Advanced Editing Options
- Cropping: Remove black bars or unwanted sections around the video frame.
- Adjusting Aspect Ratio: Modify the aspect ratio to fit specific screens or devices.
- Applying Filters: Some software offers basic video filters for color correction or enhancement.
Conclusion
Exploring advanced features like batch processing and video customization can greatly enhance your DVD ripping experience. These tools provide greater control, efficiency, and personalization, allowing you to enjoy your digital media collection precisely the way you want it.
By following this guide, you’ll be well-equipped to handle multiple DVDs with ease and create customized outputs that match your preferences. Embrace these advanced tips to make the most of your DVD copying endeavors.
How to Store and Access Your Copied DVDs
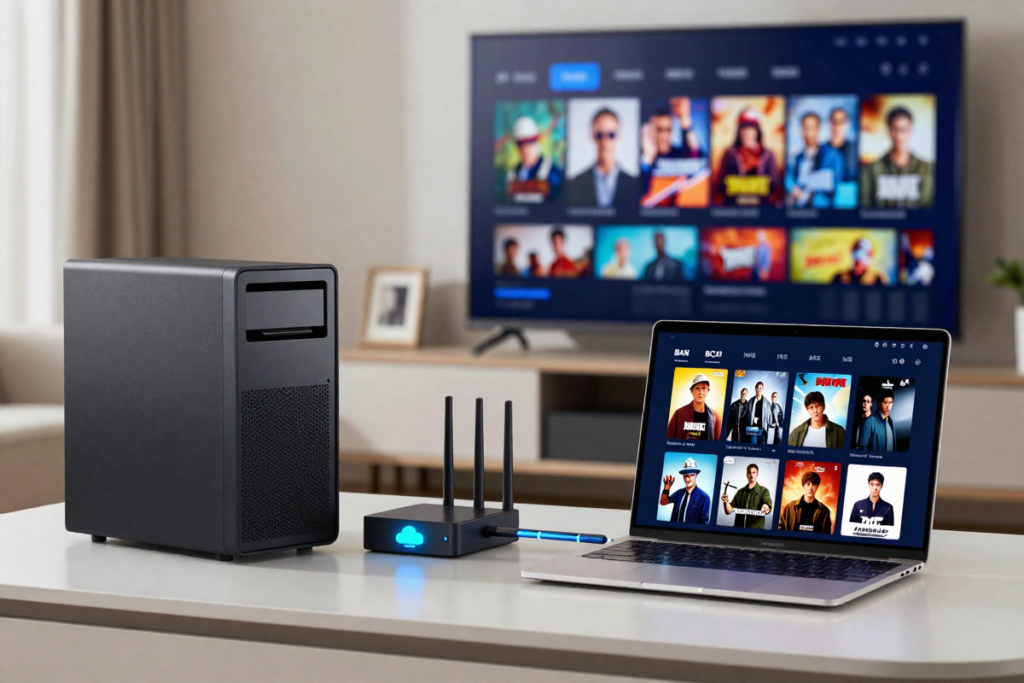
Once you’ve successfully copied your DVDs to your computer, it’s essential to think about how you’ll store and access these digital files. Proper storage and accessibility ensure that your media collection remains organized, secure, and readily available. In this section, we’ll explore cloud storage solutions and home network sharing to help you manage your copied DVDs effectively.
Cloud Storage Options
Cloud storage offers a convenient and flexible way to store and access your copied DVDs from anywhere with an internet connection. Here’s a closer look at the benefits and options for cloud storage:
1.1 Benefits of Cloud Storage
- Accessibility: Access your DVDs from any device with an internet connection, whether you’re at home or on the go. This convenience is ideal for streaming your collection on different devices.
- Scalability: Easily scale your storage needs as your media collection grows. Cloud storage providers offer various plans to accommodate different storage capacities.
- Backup and Security: Cloud storage provides an additional layer of backup for your media files, reducing the risk of data loss due to hardware failures or accidental deletions.
- Collaboration: Share access with family or friends, allowing them to view or download your copied DVDs as needed.
1.2 Popular Cloud Storage Solutions
- Google Drive: Offers 15 GB of free storage with options to upgrade to larger plans. Google Drive provides seamless integration with other Google services and supports easy sharing and collaboration.
- Dropbox: Known for its user-friendly interface and reliable performance. Dropbox offers 2 GB of free storage and various paid plans with additional space and features.
- iCloud: Ideal for Apple users, iCloud provides 5 GB of free storage and integrates smoothly with Apple devices and applications. Upgrading to higher storage plans is straightforward.
- OneDrive: Microsoft’s cloud storage solution offers 5 GB of free storage and integrates well with Windows and Office 365. Paid plans provide additional storage and features.
1.3 Affiliate Links and Promotions
- Google Drive Plans: Explore Google Drive’s storage plans and take advantage of promotional offers.
- Dropbox Offers: Check out Dropbox’s plans and special promotions for additional storage.
- iCloud Storage: Upgrade your iCloud storage with special promotions available for Apple users.
- OneDrive Subscription: Discover OneDrive’s pricing plans and current deals for additional storage options.
Home Network Sharing
Setting up a home media server allows you to stream your copied DVDs across various devices within your home network. This setup provides a centralized location for your media collection, making it accessible from multiple devices without relying on external cloud services.
2.1 Benefits of Home Network Sharing
- Local Streaming: Stream your DVDs directly to smart TVs, computers, tablets, and other devices connected to your home network.
- No Internet Dependency: Access your media without needing an Internet connection, reducing bandwidth usage and ensuring access even during outages.
- Personalized Control: Maintain full control over your media library and streaming preferences.
2.2 Setting Up a Home Media Server
- Choose Your Hardware: Select a dedicated computer or NAS (Network-Attached Storage) device to act as your media server. Popular NAS options include Synology DiskStation and QNAP TS series.
- Install Media Server Software: Software such as Plex Media Server or Emby can organize and stream your media files. Both offer user-friendly interfaces and support a wide range of devices.
- Plex Media Server: Plex offers a robust media server solution with features like automated metadata fetching, cross-device synchronization, and remote access. It’s compatible with most operating systems and devices.
- Emby: Emby provides similar functionalities to Plex, with a focus on customization and advanced user controls. It supports various devices and platforms.
- Organize Your Media Library: Structure your copied DVD files into a well-organized folder system on your media server. Use clear naming conventions and metadata to make navigation easy.
- Configure Access and Sharing: Set up user accounts and access permissions to control who can view or manage your media. Ensure your media server software is properly configured to allow seamless streaming.
2.3 Home Network Sharing Tips
- Network Speed: Ensure your home network has sufficient speed and stability to handle streaming, especially if you plan to stream high-definition content.
- Device Compatibility: Check that your devices support the media server software you choose. Some devices may require additional apps or plugins for optimal performance.
- Regular Maintenance: Keep your media server and software updated to benefit from the latest features and security improvements.
Conclusion
Choosing the right method to store and access your copied DVDs depends on your needs and preferences. Cloud storage offers flexibility and convenience for accessing your media from anywhere, while a home media server provides robust local streaming capabilities and control over your media library. By utilizing these storage solutions, you can ensure that your digital collection is well-organized, secure, and easily accessible.
Explore the cloud storage options and home network solutions mentioned to find the best fit for your media management needs. Embrace these tools to enhance your viewing experience and enjoy your copied DVDs with ease.
Final Thoughts
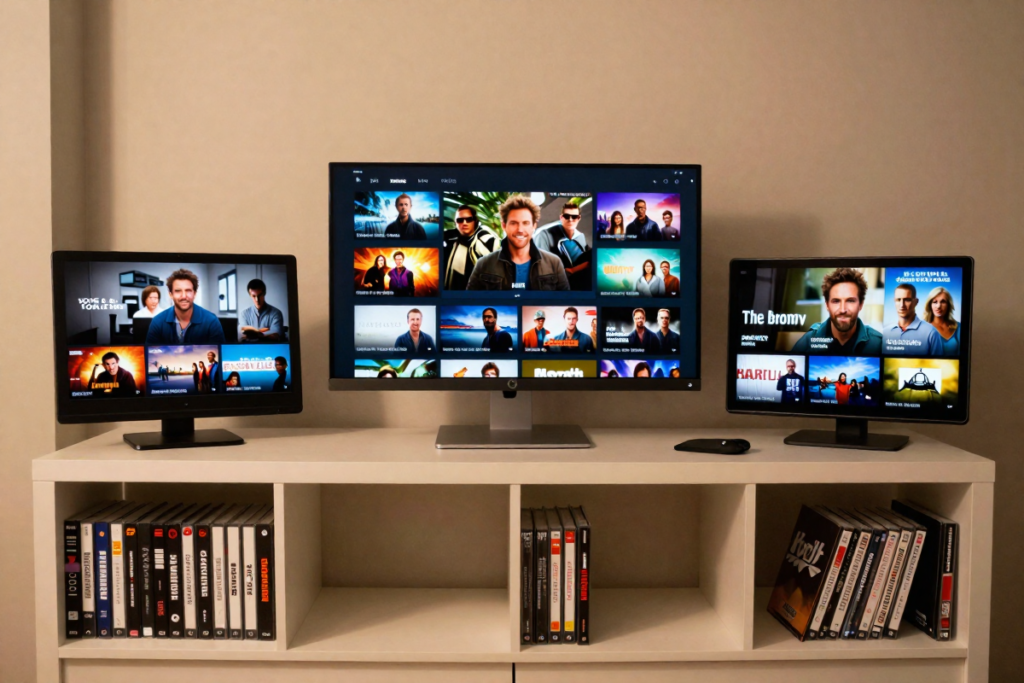
In this guide, we’ve explored the essential steps and advanced techniques for copying DVDs to your computer, ensuring you can enjoy your media collection with greater flexibility and convenience. Let’s recap the key points and encourage you to take action on transforming your DVD collection into digital format.
Summarized Key Points
Copying DVDs to your computer opens up a world of possibilities for accessing and managing your media collection. Here’s a brief summary of what we’ve covered:
- Why Copy DVDs: Digital copies offer greater convenience, protection against physical damage, and the flexibility to enjoy your media across various devices without needing the physical DVD.
- Legal Considerations: It’s important to be aware of copyright laws and ensure that your DVD copying practices comply with legal regulations in your region.
- Preparation and Tools: Before starting, ensure you have the necessary hardware, reliable software, and sufficient storage space. We recommended top-rated DVD ripping software such as Wonderfox DVD Ripper Pro and HandBrake for their robust features and ease of use.
- Step-by-Step Process: We provided a comprehensive guide on installing software, selecting formats, configuring settings, and completing the ripping process, ensuring high-quality digital copies of your DVDs.
- Troubleshooting: Addressed common issues such as error messages and quality concerns, with practical solutions to ensure a smooth ripping experience.
- Advanced Tips: Discussed batch processing for efficient ripping and customization options like adding subtitles or trimming videos for a personalized media library.
- Storage and Access: Covered options for storing your digital copies, including cloud storage solutions and setting up a home media server for seamless access and streaming.
Before You Go
Now that you’re equipped with the knowledge to copy DVDs to your computer, it’s time to put it into practice! Start by choosing the software that best fits your needs and follow the steps outlined in this guide to begin digitizing your DVD collection.
Try It Out: Download the recommended DVD ripping software and see how easy it is to convert your DVDs into digital files. Experience the benefits of having your favorite movies and shows available at your fingertips.
Explore Software Options: If you haven’t yet decided on which software to use, check out our affiliate links for Wonderfox DVD Ripper Pro and HandBrake. Both offer excellent features and performance, and you might find special promotions or discounts available.
Transforming your DVD collection into a digital library has never been easier. Embrace the convenience and flexibility of digital media, and enjoy your favorite DVDs anytime, anywhere. Happy ripping!
Affiliate Links and Resources
Wonderfiox DVD Ripper Pro
Handbrake
MakeMKV
Emby Media Server
Plex Media Server
OpenSubtitles
Dropbox
iCloud Storage
OneDrive Subscription
LG Electronics Ultra Slim Portable DVD Writer
ASUS ZenDrive Ultra Slim External DVD Drive
Dell USB Slim DVD +/- RW Drive
Seagate Portable 2TB External Hard Drive
Western Digital 4TB My Passport
Samsung T7 Portable SSD 1TB