Imagine having your entire CD collection—those precious albums with the crackling nostalgia of the past—transformed into pristine digital files that you can enjoy anytime, anywhere. Whether you’re an audiophile craving the lossless quality of FLAC or simply seeking the convenience of MP3s for your playlist, the process of ripping your CDs can seem daunting. But it doesn’t have to be. In this comprehensive guide, we’ll walk you through the art of ripping CDs to FLAC, MP3, and other popular formats with ease. From choosing the right software to ensuring your metadata and artwork are flawless, this quick and easy guide is designed to make the transition smooth and efficient. Say goodbye to bulky discs and hello to a streamlined digital library. Dive in, and let’s unlock the full potential of your music collection with just a few simple steps.
Digitize Your CD Collection And Start Streaming
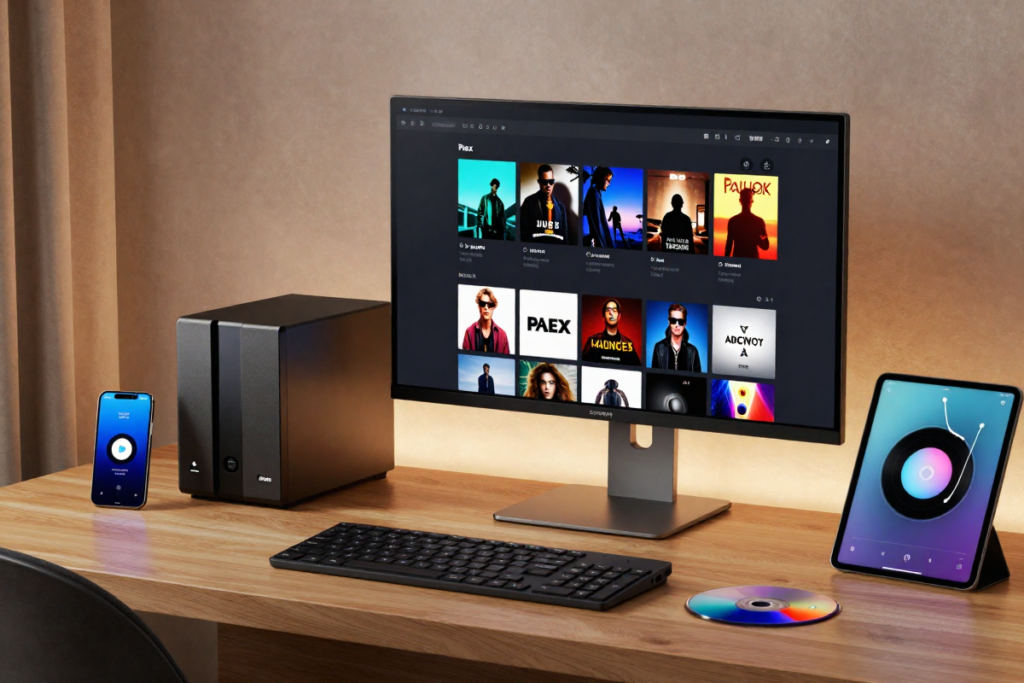
Why Copying CDs and Streaming with Plex is a Game-Changer
There’s something magical about holding a physical CD in your hand, the tangible weight of music in its purest form. But let’s face it: times have changed. The allure of streaming music from your devices anywhere, anytime, is simply irresistible. This is where Plex, a media server powerhouse, steps in and completely changes the game. Imagine having your entire CD collection, meticulously digitized, available at your fingertips—no matter where you are. Whether you’re at home, on the go, or relaxing on a distant beach, Plex makes it possible to access your beloved tracks with just a tap.
But it’s not just about convenience. Streaming your ripped CDs through Plex allows you to maintain the high-quality sound that audiophiles crave. Unlike many streaming services that compress audio files, Plex keeps your music pristine. The richness, the depth, the nuances of every note—nothing gets lost. Plus, Plex offers an unrivaled level of organization. Your digital music library isn’t just a chaotic digital dump; it’s a carefully curated collection, complete with album artwork, artist details, and genre categorizations that make finding and enjoying your favorite tracks an absolute pleasure.
Moreover, Plex’s user interface is a thing of beauty. It’s sleek, intuitive, and designed with the user in mind. Even if you’re not particularly tech-savvy, navigating through your digital library feels natural. The customization options are another huge win. Want to create a playlist for a special occasion? Or perhaps you want to organize your music by decade, mood, or genre? Plex gives you the tools to do all that and more, transforming your music collection into an experience tailored just for you.
Overview of the Simple Method
Now, you might be thinking that copying CDs and setting up a Plex media server sounds like a daunting task, something reserved for tech wizards and audiophiles with too much time on their hands. But that’s where this guide comes in to prove you wrong. The process is far more straightforward than you might expect. In fact, once you get the hang of it, you’ll wonder why you didn’t start sooner.
Here’s the basic rundown. You’ll begin by preparing your CDs, making sure they’re clean and ready for ripping. Then, you’ll use CD ripping software—whether free or paid—to rip those CDs to your computer in FLAC audio format, preserving the highest possible sound quality. This format is essential for anyone who values audio integrity, but don’t worry; we’ll also touch on how to convert those files to more common formats like MP3, should you need it. Next, it’s all about ensuring that your ripped files have the correct music metadata—think album names, track titles, and artist information. This is crucial for organizing music files in your Plex setup.
But that’s not all. You’ll also learn how to add album artwork to your music files, making your digital collection just as visually appealing as the real thing. Finally, we’ll guide you through the process of setting up your NAS server setup and integrating it with Plex, so you can stream music from Plex seamlessly across all your devices. Whether you’re lounging at home or halfway across the world, your music will be right there with you, in all its lossless glory.
This method isn’t just easy—it’s empowering. By the end of this guide, you’ll have all the tools and knowledge you need to convert your physical CD collection into a digital powerhouse, ready to be streamed at a moment’s notice.
[GET PLEX MEDIA SOFTWARE HERE: Plex Media Server]
[RECOMMENDED NAS MEDIA HARDWARE: NAS Server Device]
Preparing Your CD for Ripping
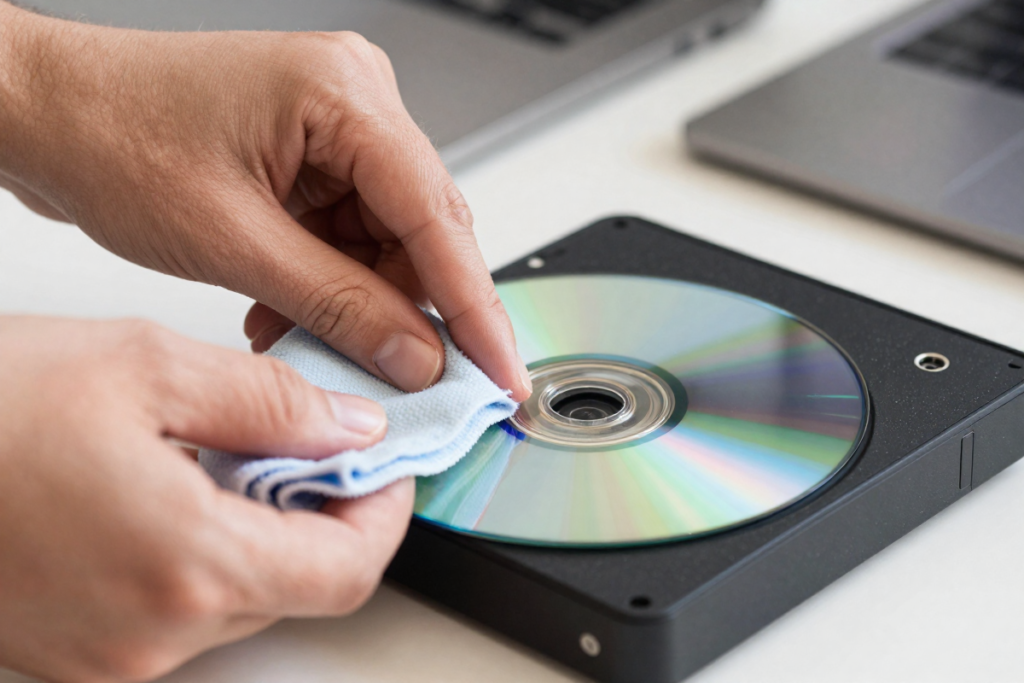
Ensuring Your Disc is Clean and Ready
Before you embark on the journey of ripping your cherished CDs, there’s a crucial first step that’s often overlooked: making sure your discs are spotless. Even the tiniest speck of dust or smudge can interfere with the ripping process, leading to glitches, skips, or even corrupted files. And nobody wants that—especially when it comes to preserving your favorite albums.
Start by examining your CD under good lighting. Look for any visible dust particles, fingerprints, or scratches. While scratches can be a bit trickier to deal with, a clean, dust-free surface is something you can easily achieve. A soft, lint-free cloth, slightly dampened with a mixture of water and isopropyl alcohol, works wonders for gently wiping away dirt. Always clean in straight lines from the center of the disc outwards—never in a circular motion, as this could further damage the CD.
Taking a few extra minutes to clean your disc can make all the difference. Not only does it ensure a smooth ripping process, but it also preserves the integrity of the digital copy, giving you that flawless playback every time. After all, if you’re going to digitize your music collection, you might as well do it right.
[RECOMMENDED PRODUCT: CD/DVD Disc Cleaner Kit]
Choosing the Right CD Copy Software: Free vs. Paid Options
Now that your CD is clean and ready to go, it’s time to choose the right CD extraction tools for the job. When it comes to ripping software, the options are plentiful, ranging from robust free programs to feature-rich paid ones. Your choice ultimately depends on your specific needs and how much control you want over the ripping process.
For those on a budget, there are excellent free options available. Exact Audio Copy (EAC) is a favorite among audiophiles for its precision and ability to handle even scratched CDs with grace. It’s a bit more hands-on, but the results are worth it. Another solid free choice is Fre:ac, which supports a wide range of formats and offers a straightforward interface that’s perfect for beginners.
If you’re looking for something a bit more advanced, with added features and a polished user experience, paid software might be the way to go. dBpoweramp is a top contender, offering an all-in-one solution for ripping, converting, and managing your digital music library. Its multi-encoder feature allows you to rip a CD into multiple formats simultaneously—a huge time-saver for those who want both FLAC and MP3 versions of their music. Plus, it has an extensive online database that automatically pulls in accurate metadata, saving you from manual entry.
Another paid option worth considering is EZ CD Audio Converter. This software is known for its speed and efficiency, boasting the ability to rip CDs quickly without compromising quality. It also includes a host of features like format conversion, CD burning, and even the ability to download album artwork directly within the app.
Whichever software you choose, make sure it meets your needs. If you’re a casual user who just wants to digitize a few CDs, a free program may suffice. But if you’re looking to build a meticulously organized, high-quality digital music library, investing in a paid option could be well worth the cost. The right software not only simplifies the process but also enhances the quality of your digital music collection, ensuring that your favorite tunes are preserved in all their glory.
[RECOMMENDED FREE SOFTWARE: Exact Audio Copy (EAC)]
[RECOMMENDED PAID SOFTWARE: dBpoweramp or EZ CD Audio Converter]
Ripping the CD to Your Computer
Why FLAC Format is Best for Quality
When it comes to ripping CDs, the format you choose can make or break the listening experience. This is where FLAC—Free Lossless Audio Codec—comes into play. Unlike MP3s or other compressed formats that sacrifice audio quality for smaller file sizes, FLAC preserves every nuance, every subtle detail of the original recording. Think of it as the digital equivalent of vinyl: warm, rich, and true to the artist’s intent.
FLAC is a lossless format, which means it compresses the audio without losing any of the original data. The result? Crystal-clear sound quality that’s identical to the original CD, but with the added benefits of a digital file. Whether you’re listening through high-end headphones or a premium home audio system, FLAC delivers an immersive, high-fidelity experience that’s second to none. And here’s the best part: FLAC files are compatible with most modern devices and media players, including Plex media server, making it easier than ever to stream your music collection in all its glory.
But it’s not just about superior sound. FLAC files also support robust music metadata tagging, which is essential for keeping your Plex music collections organized. Album names, track titles, artist information, and even album artwork can be embedded directly into the file, ensuring your digital music library looks as good as it sounds. With FLAC, you get the best of both worlds: impeccable audio quality and meticulous digital music organization.
How to Rip CDs in FLAC Format with Popular Software
Ripping your CDs to FLAC is a straightforward process, especially with the right CD ripping software at your disposal. Let’s dive into how you can preserve your music collection in pristine condition, starting with a few popular tools.
If you opted for Exact Audio Copy (EAC) as your software of choice, you’re in for a treat. EAC is renowned for its precision and accuracy, making it a top pick for audiophiles. To get started, insert your CD and let EAC do its thing. It will automatically detect the CD, pull in the track information, and prepare to rip. Before you hit that rip button, make sure you’ve selected FLAC as your output format. EAC allows you to customize the compression settings, so if you’re a stickler for detail, feel free to adjust them to your liking. Once everything is set, click the rip button and let EAC work its magic. The software will extract the audio tracks, convert them to FLAC, and save them to your designated folder.
For those who went with dBpoweramp, the process is just as seamless. This software is known for its user-friendly interface and powerful features. After inserting your CD, dBpoweramp will automatically detect it and download the metadata. Before ripping, select FLAC from the list of available formats. dBpoweramp also offers the option to adjust the compression level, though the default setting usually strikes a perfect balance between file size and quality. Once you’re satisfied with the settings, click the rip button. dBpoweramp will handle the rest, ripping your CD to FLAC with speed and precision.
Using EZ CD Audio Converter? No problem. Insert your CD and let the software load it up. Select FLAC as your desired output format, and take advantage of the software’s metadata editing tools to ensure everything is just right. EZ CD Audio Converter even lets you download high-resolution album artwork directly within the app, saving you time and effort. Once you’re ready, click the rip button, and watch as your CD is transformed into high-quality FLAC files, ready for Plex media streaming.
No matter which software you choose, ripping your CDs to FLAC ensures you’re getting the absolute best quality from your digital music collection. It’s a small effort with big rewards, and once you hear the difference, you’ll never look back.
Selecting and Verifying CD Info
How to Properly Select CD Info in Your Software
Once your CD is ripped into FLAC format, the next crucial step is selecting the correct CD information in your software. This might seem like a minor detail, but it’s pivotal for ensuring that your digital music library is organized, easy to navigate, and visually appealing within Plex. Most ripping software, like EAC or dBpoweramp, will automatically pull metadata from online databases as soon as you insert the disc. However, relying solely on automated processes can lead to errors or inconsistencies.
To start, take a moment to manually review the CD information. This includes the album title, artist name, track titles, and genre. In Exact Audio Copy (EAC), for example, after the software retrieves the data, you can click on each field to edit or correct any discrepancies. Pay close attention to the spelling, capitalization, and formatting—small details that can make a big difference when you’re scrolling through your Plex library. It’s also a good idea to double-check the track order, ensuring that everything aligns perfectly with the physical CD.
In dBpoweramp, this process is just as intuitive. The software typically offers multiple metadata sources, so you can compare different versions and select the one that’s most accurate. If there are any conflicts, dBpoweramp allows you to merge or manually edit the metadata to ensure everything is spot-on. The same goes for EZ CD Audio Converter, where you can preview and edit metadata before ripping begins. By taking a few extra minutes to verify this information, you’re setting the stage for a well-organized and visually cohesive digital music collection.
The Importance of Accurate Metadata for Plex and Organization
Accurate metadata is the backbone of any well-organized digital music library, especially when it comes to streaming through Plex. Metadata doesn’t just make your library look neat—it’s what Plex uses to categorize, display, and retrieve your music. Imagine searching for your favorite album only to find it buried under a misspelled artist name or mislabeled genre. Frustrating, right? That’s why getting this step right is so crucial.
With Plex, accurate metadata allows you to fully harness the power of its organizational features. Whether you’re sorting by artist, album, genre, or even year of release, having precise and consistent metadata ensures that everything appears exactly where it should. This makes it easier to create custom playlists, set up smart collections, or simply find that perfect track for the moment. Without accurate metadata, your Plex library can quickly turn into a chaotic mess, with albums scattered under incorrect headings or tracks lost in the abyss of your digital vault.
Furthermore, metadata plays a significant role in how Plex displays your music. From the album artwork to artist bios and track listings, every detail enhances your listening experience. But if the metadata is off, you might end up with generic album covers, incorrect artist information, or missing track titles—detracting from the immersive experience that Plex is known for.
By meticulously selecting and verifying CD info during the ripping process, you’re ensuring that your Plex library is not only organized but also visually stunning and easy to navigate. It’s an investment in the longevity and enjoyment of your music collection, allowing you to enjoy seamless streaming without the headaches of disorganized files. After all, a well-curated digital library isn’t just about having access to your favorite tunes—it’s about enjoying them to the fullest, with everything just a click away.
Checking and Correcting File Information
How to Verify Music Files for Proper Album, Song, and Artist Text
Once your CDs are ripped and the metadata has been applied, the next step is to verify that everything has been correctly tagged. This may sound tedious, but it’s an essential part of ensuring your digitize music collection is both accurate and easy to navigate within Plex media server. Start by opening your newly ripped files in a media player or music management software like MusicBee or Foobar2000. These programs are excellent for viewing and editing music metadata, allowing you to quickly spot any discrepancies.
Begin by checking the album title. Is it consistent with the physical CD? Does it include any additional details like a release year or special edition label? Next, move on to the artist name. Make sure it’s spelled correctly and formatted uniformly across all tracks. For example, some albums feature collaborations or featured artists—these should be clearly indicated but not at the expense of consistency. If the artist name varies slightly between tracks (e.g., “The Beatles” vs. “Beatles”), it can cause confusion in your Plex library.
The song titles are another critical area to double-check. Ensure they are spelled correctly and follow the same format throughout the album. This is particularly important for live recordings or albums with bonus tracks, where titles might include additional information like “Live” or “Remastered.” If your software allows, preview the songs while reading the metadata—this can help catch any errors that might not be immediately obvious.
Finally, pay attention to the genre tags. While not as critical as other fields, having consistent genre information can make it easier to organize and find your music in Plex. If you’re a stickler for organizing music files, you might even want to create custom genres or sub-genres that better reflect your collection. For instance, instead of just “Rock,” you could use “Classic Rock” or “Indie Rock” for more precise sorting.
[MUSIC MANAGEMENT SOFTWARE: MusicBee or Foobar2000]
Common Errors to Watch Out For
Even with the best CD extraction tools, errors in metadata are almost inevitable. Knowing what to look for can save you from future headaches. One common issue is inconsistent capitalization. For example, you might find a mix of “Rock,” “rock,” and “ROCK” in your genre tags. While this may seem trivial, it can result in your music being sorted into separate categories, making it harder to find later.
Another frequent problem is incorrect or missing track numbers. This can throw off the order of songs in an album, especially in Plex media streaming, where the track number determines the sequence in which songs are played. Double-check that the tracks are numbered correctly and in order—this is particularly important for concept albums or live performances where track order is crucial to the listening experience.
Mislabeling artist collaborations is another common mistake. If a track features another artist, make sure it’s indicated in a way that’s consistent with the rest of your library. For example, “Artist feat. Guest Artist” should be used consistently across all tracks. Inconsistencies here can lead to multiple entries for the same artist in Plex, cluttering your library and making it harder to find what you’re looking for.
Lastly, watch out for generic or placeholder album artwork. Some software might automatically apply a default image if the correct cover art isn’t available. This can make your library look unpolished and detract from the overall experience of browsing your collection in Plex. If you notice any tracks with missing or incorrect artwork, it’s worth taking the time to find and apply the correct image.
By taking a few extra minutes to verify and correct these details, you’ll ensure that your digital music library is not only accurate but also a pleasure to browse and listen to. With everything in its right place, you can fully enjoy the convenience and beauty of streaming your collection through Plex, knowing that every track is exactly where it should be.
Adding Album Artwork
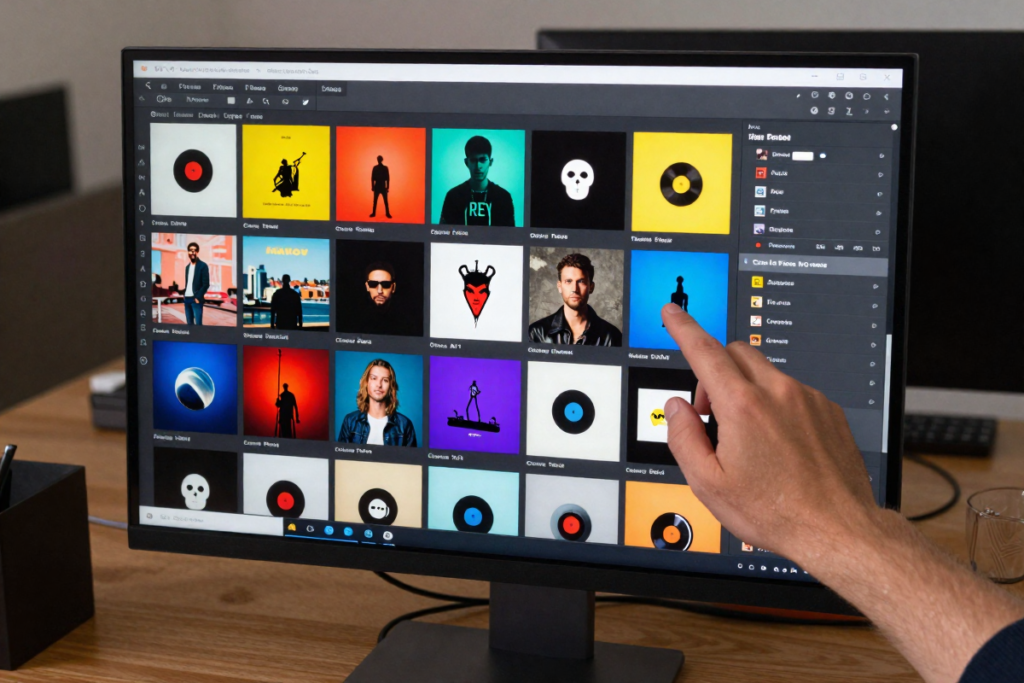
Once your music files are properly tagged, the next step in perfecting your digital music organization is adding high-quality album artwork. The visual element is crucial, as it transforms your Plex media setup from a list of tracks into a visually rich experience. This is where “Album Art Downloader” comes in—a powerful, free tool that simplifies the process of finding and applying album covers that make your library shine.
Using “Album Art Downloader” for High-Quality Album Images
“Album Art Downloader” is an indispensable resource for any music enthusiast aiming to create music collections Plex can display beautifully. It pulls images from multiple online sources, ensuring that you get the best possible match for each album. Start by downloading and installing the software, which is lightweight and user-friendly. Once it’s up and running, select the directory where your music files are stored. The software will scan your folders and present you with a list of albums that need artwork.
With a simple click, you can search for images, and within seconds, Album Art Downloader presents a range of options. From high-resolution images to more vintage or artistic representations, you can pick the one that best matches your aesthetic. But here’s a pro tip: Always go for the highest resolution available. This ensures that your artwork looks sharp and vibrant on any device, whether you’re streaming music from Plex to your TV, tablet, or smartphone.
After selecting the perfect image, save it directly to the album’s folder. Make sure to name it “folder.jpg” or “cover.jpg” so that Plex automatically recognizes it. If you’re meticulous about your digital music collection, you might also want to store a backup of the original image in a separate directory, just in case you need it later.
[FREE SOFTWARE: Album Art Downloader]
Resizing Artwork to 600px x 600px with Photo Software
While Album Art Downloader provides high-quality images, these often come in various sizes, some of which may not be optimized for Plex. Plex recommends using images that are 600 pixels by 600 pixels to ensure uniformity across your library. If the image you’ve chosen doesn’t fit these dimensions, you’ll need to resize it. This step is crucial because inconsistent artwork sizes can make your Plex media management look disjointed and unprofessional.
To resize your artwork, you can use any photo editing software you’re comfortable with, like Adobe Photoshop, GIMP, or even a simple tool like Paint.net. Start by opening the image in your chosen software. Next, locate the resizing option, typically found under the “Image” or “Edit” menu. Input 600px x 600px as the new dimensions and ensure that the aspect ratio is maintained to avoid any distortion.
Once resized, save the image in JPEG format, as this is the most universally compatible with Plex. Name it appropriately and replace the original artwork file in your album’s folder. If your photo software offers an option to compress the image without losing quality, consider using it. This keeps your library lean and helps with faster loading times when streaming your music.
By investing the time to add and resize album artwork, you’re not just creating a visually appealing library—you’re elevating your entire Plex media streaming experience. Every time you browse your collection, those crisp, uniform album covers will make it feel more organized and enjoyable. This attention to detail not only reflects your dedication to your music but also enhances the overall ambiance of your listening sessions. It’s the small touches like these that make a significant difference in how you interact with your digital collection, ensuring that every album is a pleasure to explore.
[IMAGE EDITING SOFTWARE: Adobe Photoshop, GIMP, or Paint.net]
Embedding Artwork into Music Files
Once you’ve sourced and resized the perfect album artwork, the next step is embedding it directly into your music files. This ensures that no matter where or how you access your music, the cover art is always intact and displayed correctly. Embedding album art isn’t just about aesthetics—it’s about creating a seamless, professional experience every time you browse your music library in Plex media server or any other media player.
How to Drag and Drop Album Artwork into the Album Folder
First, locate the folder containing the album’s music files on your computer. This should be the same folder where you saved the resized album artwork earlier. The most straightforward method to ensure your artwork is easily accessible to Plex is to drag and drop the image file into this folder. Name the image file “folder.jpg” or “cover.jpg” so that most media players, including Plex, can automatically recognize and display it.
However, just having the image in the folder isn’t enough for those who want a truly polished collection. To make sure the artwork is permanently embedded in the music files themselves—so the cover art is always there, even if you move or copy the files—you’ll need to take an extra step.
Step-by-Step Guide to Using Taghycardia for Permanent Artwork Embedding
Taghycardia is an excellent tool for this purpose. It’s a lightweight, no-nonsense software designed specifically for tagging and embedding artwork into music files. After downloading and installing Taghycardia, open the program and navigate to the folder where your album files are stored. This program will automatically detect the album artwork file you placed in the folder.
Next, follow these steps to embed the artwork:
- In Taghycardia, click on the folder icon to select the album folder containing your music files.
- The program will load the files and display a preview of the current tags and artwork.
- Ensure that the “Embed when missing” option under the Cover Art Processing settings is checked. This tells the software to add the artwork if it’s not already embedded in the files.
Configuring Taghycardia Settings for Best Results
For the best results, you’ll want to tweak a few settings in Taghycardia to ensure that everything is embedded correctly and consistently. First, make sure the “Don’t rename folders” option is selected. This prevents the program from making any unwanted changes to your file organization, which is crucial if you’ve meticulously organized your music files.
Next, under the Cover Art Processing section, check the box labeled “Limit Size to 600 x 600.” This ensures that the artwork remains the optimal size for Plex media streaming. You’ll also want to select “Save as JPEG” to maintain compatibility with the widest range of media players. Lastly, under “Sort Tracks in Personal Compilations,” make sure “Don’t sort” is checked. This keeps your tracks in the exact order you prefer, without any automatic reordering by the software.
The Process of Embedding Artwork and Verifying
Once your settings are configured, it’s time to embed the artwork. Hover over the album folder in Taghycardia, and a prompt will appear to start the embedding process. Click on the folder and then press “Go.” Taghycardia will now embed the album artwork into each music file, permanently associating the image with the tracks.
After the process is complete, it’s essential to verify that everything went smoothly. Open a few of the music files in a media player like VLC or Foobar2000 to check that the correct artwork appears. If the image shows up consistently across all files, you’ve successfully embedded the artwork.
By embedding the album artwork directly into your music files, you’re taking your digital music library to the next level. Not only will your collection look stunning in Plex media server, but it will also retain its polished appearance no matter where or how you choose to play your music. This final touch ensures that your library is not just organized but also visually cohesive, making your listening experience as enjoyable as possible.
[FREE SOFTWARE: Taghycardia]
Setting Up Your Music on a NAS Server
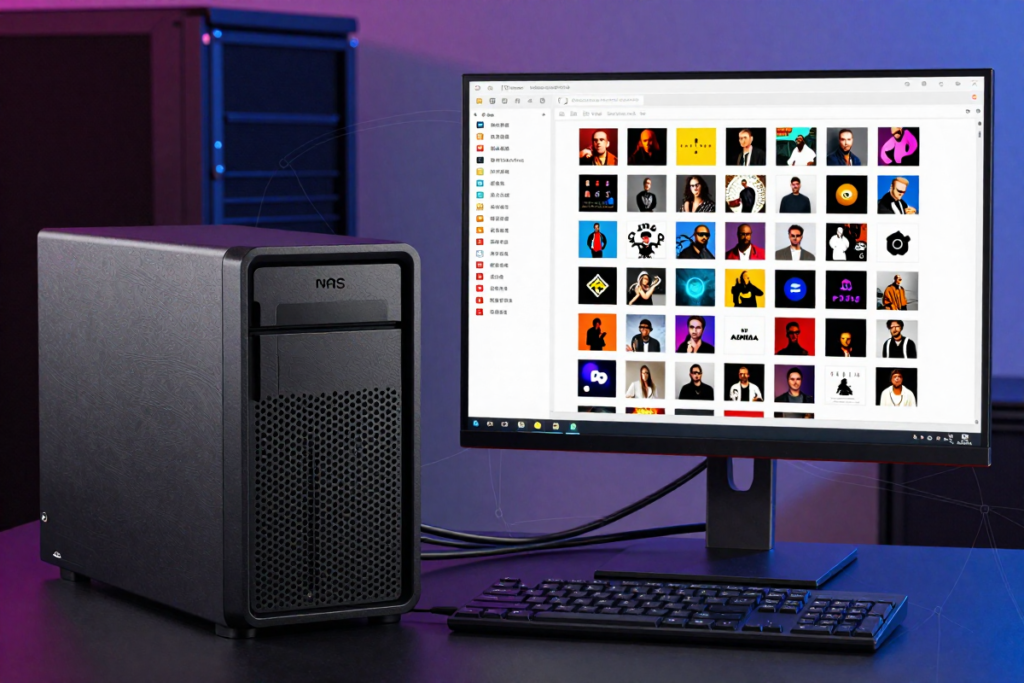
Once you’ve meticulously organized and tagged your music collection, the next step is to set up your library on a NAS (Network Attached Storage) server. This step is crucial for those who want to access their music from any device, anywhere in the world, via Plex media streaming. A NAS server acts as a centralized storage hub, allowing you to keep your files in one place while accessing them from multiple devices. This setup is not only efficient but also ensures that your music is always at your fingertips.
How to Add Artist and Album Folders to Your NAS Server
Adding your music files to a NAS server is a straightforward process, but attention to detail is key to maintaining an organized library. Start by ensuring that your NAS server is properly set up and connected to your network. If you haven’t done this already, refer to the user manual for your specific NAS model, as setup processes can vary.
Once your NAS is ready, access it through your computer’s file explorer. Create a main folder specifically for your music collection—naming it something simple like “Music Library” will make it easy to locate. Within this main folder, organize your music by artist and album. For example, create individual folders for each artist, and within those artist folders, create subfolders for each album. This hierarchical structure will not only make your library easy to navigate but also ensure compatibility with Plex’s organizational system.
When adding your music files to the NAS, simply drag and drop each album folder (which should already contain properly tagged and embedded files) into the appropriate artist folder on the NAS. It’s a good idea to double-check that all files are in the correct locations and that there are no duplicates. This initial organization will save you time and frustration when it comes to streaming your music later on.
[RECOMMENDED NAS SERVER: Synology DiskStation DS225+]
Ensuring Proper Folder Structure for Plex Compatibility
Plex relies heavily on proper folder structure to accurately display your Plex music collections. To ensure smooth operation, your folder hierarchy should be as follows: The main music folder should contain artist folders, and within each artist folder, there should be album folders. Inside each album folder, you should have the music files, properly tagged and embedded with artwork, along with a “folder.jpg” or “cover.jpg” file containing the album art.
If your NAS server supports it, consider setting up automated backups for your music collection. This will protect your files in case of hardware failure or accidental deletion. Backups can usually be configured through your NAS’s user interface and can be scheduled to run at regular intervals, ensuring that your collection is always safe.
Once your music is uploaded to the NAS, it’s time to connect Plex to your NAS server. Open the Plex Media Server application on your computer, and navigate to the “Libraries” section. Click “Add Library,” select “Music,” and then point Plex to the main music folder on your NAS. Plex will scan the folder, index the music files, and retrieve additional metadata to enrich your library.
After the scanning process is complete, you’ll see your organized music collection displayed beautifully within Plex. With everything set up on your NAS, your music is now accessible from any device with Plex installed. Whether you’re at home or on the go, you can enjoy your music library in its full glory, with all the album artwork and metadata perfectly intact.
By taking the time to set up your music collection on a NAS server, you’re investing in a robust and flexible system that makes streaming your music effortless. With Plex handling the heavy lifting of organizing and displaying your library, all that’s left for you to do is sit back, relax, and enjoy the tunes.
Adding Your Music Folder to Plex
Now that your music library is neatly organized on your NAS server, the final step in the process is importing your collection into Plex media server. This is where all your hard work comes together, transforming your raw music files into a beautifully organized library, accessible from anywhere. Plex is designed to handle this seamlessly, but there are a few key steps to ensure everything goes smoothly.
Step-by-Step Guide to Importing Music into Plex
Start by launching the Plex Media Server application on your computer. If you haven’t installed it yet, download it from the official Plex website and follow the installation instructions. Once installed, open the application and navigate to the left-hand sidebar. Here, you’ll find the “Libraries” section—this is where all your media content lives within Plex.
Click on “Add Library,” and a new window will pop up, giving you the option to select the type of media you want to add. Since we’re focusing on music, select “Music” from the list. Name your music library—something simple like “My Music” will do—and then click “Next.”
You’ll now be prompted to point Plex to the location of your music files. Click “Browse for Media Folder,” and navigate to the main music folder on your NAS server. Once you’ve selected the folder, click “Add,” and Plex will begin scanning the folder for music files. This scanning process can take a few minutes, depending on the size of your library.
As Plex scans your music folder, it automatically retrieves music metadata for each album and track. This includes artist information, album art, and even genre classifications. If you’ve followed the earlier steps in this guide, your files should be correctly tagged and embedded with artwork, allowing Plex to display your library in all its glory.
Once the scan is complete, your music library will appear in the “Libraries” section of Plex. You can click on “My Music” to view your collection, sorted by artist, album, or genre. Take a moment to explore your new library—you’ll notice how effortlessly Plex organizes your music, making it easy to find exactly what you’re looking for.
Troubleshooting Common Issues During Import
While Plex is generally reliable, you may encounter a few hiccups during the import process. One common issue is missing or incorrect metadata. If you notice that some albums or tracks aren’t displaying correctly, double-check that your files are properly tagged. You can use a tool like MP3Tag to edit the metadata directly, ensuring everything is in order before re-importing the files.
Another potential issue is Plex not recognizing certain file formats. While Plex supports a wide range of formats, some less common ones might not import correctly. If this happens, consider converting the files to a more widely accepted format like FLAC or MP3 using reliable CD extraction tools.
Occasionally, Plex may struggle to retrieve album art or other metadata, especially for more obscure albums. If this happens, you can manually add the missing artwork or metadata by editing the album details within Plex. Simply right-click on the album, select “Edit,” and you’ll be able to upload new artwork or enter the correct information.
If Plex is having trouble connecting to your NAS server, ensure that both your computer and NAS are on the same network. A simple restart of both devices can often resolve connectivity issues. Additionally, check that your NAS server setup is properly configured for sharing files over the network, as improper settings can prevent Plex from accessing your music folder.
With these steps completed, your music library should now be fully integrated into Plex, ready to stream at your convenience. Plex’s intuitive interface and powerful features make it easy to manage music in Plex and enjoy your music collection from any device, whether you’re at home or on the go.
Streaming Your Music from Plex
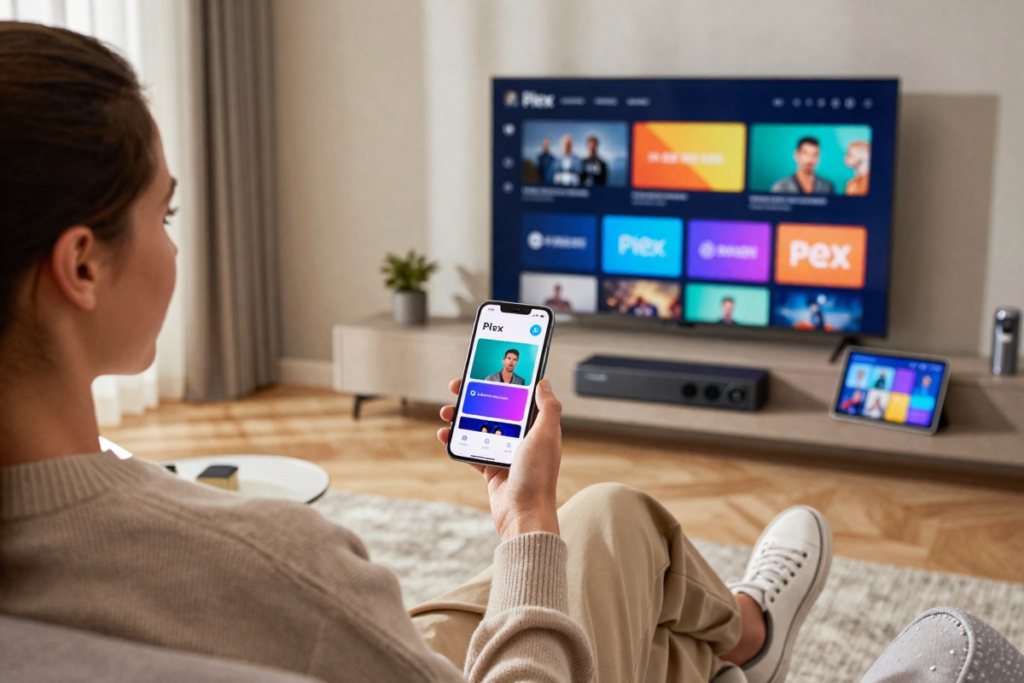
With your music library now perfectly organized and imported into Plex, it’s time to enjoy the fruits of your labor. Streaming your collection from Plex is not only convenient but also an immersive experience that puts your entire digital music library at your fingertips, wherever you are.
How to Access and Play Your Music Collection
Accessing your music through Plex is a breeze. Start by opening the Plex app on your preferred device—whether that’s your smartphone, tablet, smart TV, or even your web browser. Once logged in, navigate to the “Music” section of your Plex dashboard. Here, you’ll find all your albums, artists, and playlists neatly organized.
To start playing your music, simply click or tap on an album or artist. Plex’s interface makes it easy to browse through your collection, whether you want to shuffle through an entire artist’s discography or just listen to a specific album. The artwork you meticulously added earlier will be prominently displayed, enhancing the visual appeal of your library.
If you’re on the go, Plex’s mobile app allows you to download music for offline listening. This feature is perfect for long flights, road trips, or any situation where you might not have reliable internet access. Just tap the download icon next to an album or playlist, and Plex will save it to your device for offline enjoyment.
Plex also offers a powerful search function, allowing you to quickly find any song, album, or artist in your collection. Whether you’re in the mood for something specific or just want to explore, Plex’s search capabilities make it easy to dive into your music library.
Tips for Optimizing Your Streaming Experience
To get the most out of your Plex streaming experience, there are a few tips and tricks you can employ. First, ensure that your internet connection is strong and stable. Streaming high-quality audio files, especially FLAC files, requires a good amount of bandwidth, so a fast and reliable connection will prevent buffering and interruptions.
Next, consider adjusting the audio quality settings in Plex. If you’re streaming over a mobile network or a slower connection, you might want to lower the audio quality to prevent stuttering. On the other hand, if you’re on a high-speed Wi-Fi network, crank up the quality to enjoy your FLAC audio format files in all their lossless glory.
Plex also offers a feature called “Loudness Leveling,” which can be found in the settings menu. This feature normalizes the volume across all your tracks, ensuring a consistent listening experience without sudden jumps in volume between songs. This is particularly useful if your collection includes music from various sources with differing audio levels.
If you’re using Plex on a smart TV or a high-quality sound system, consider enabling “Direct Play.” This feature allows Plex to stream your music files in their original format, without any transcoding or quality loss. It’s the best way to ensure that your music sounds as good as possible, especially if you’ve gone through the effort of ripping your CDs to high-quality audio files.
Finally, take advantage of Plex’s playlist features. Creating playlists for different moods, occasions, or genres can help you organize your music in a way that makes sense for you. Plex allows you to create and edit playlists easily, so you can curate the perfect soundtrack for any moment.
With these music streaming tips in mind, your Plex music streaming experience will be seamless, enjoyable, and fully customized to your preferences. Whether you’re lounging at home or on the move, Plex ensures that your music is always within reach, beautifully organized, and ready to play at the touch of a button.
Creating and Managing Collections in Plex
With your music library now streaming seamlessly, it’s time to take your Plex media server experience to the next level by organizing your collection into custom collections. This feature not only enhances your digital music library’s organization but also allows you to tailor your listening experience to your preferences.
How to Create Collections for Better Organization
Creating collections in Plex is a straightforward process that brings a new level of organization to your music library. Start by accessing Plex on your computer or device. Navigate to your music library and locate the “Collections” tab in the sidebar. Click on “Create Collection,” and you’ll be prompted to name your new collection. Choose a name that reflects the theme or purpose of the collection, such as “Chill Vibes,” “Classic Rock Essentials,” or “Workout Beats.”
Once you’ve named your collection, you can start adding music to it. Plex allows you to include entire albums, individual tracks, or even specific artists. To add music, simply browse through your library and drag the desired items into your newly created collection. You can also use the “Add to Collection” option from the music’s context menu for a more streamlined approach.
Collections are especially useful for organizing music by mood, genre, or occasion. For example, you might create a collection for relaxing background music, one for high-energy workout tracks, and another for your favorite summer hits. This organizational strategy ensures that you can quickly find and enjoy the perfect music for any situation.
Customizing and Managing Collections in Plex
Once your collections are created, Plex offers a variety of customization options to enhance their appearance and functionality. To manage your collections, go to the “Collections” tab and select the collection you want to customize. Here, you can edit the collection’s name, add or remove items, and even choose a cover image that represents the collection’s theme.
Customizing the cover image adds a personal touch and makes it easier to identify your collections at a glance. To change the cover image, click on the collection, select “Edit,” and then upload a new image or choose from Plex’s available options. The cover image should be visually appealing and relevant to the collection’s content, making it both functional and stylish.
Managing collections also involves regular updates. As you add new music to your library, you’ll want to keep your collections current. Periodically review and update your collections to include new albums and tracks, and remove any items that no longer fit the collection’s theme. This ongoing maintenance ensures that your Plex music collections remain fresh and organized.
Plex also allows you to create nested collections for even more detailed organization. For example, within a “Chill Vibes” collection, you might have sub-collections for “Acoustic,” “Instrumental,” and “Relaxing Beats.” This hierarchical structure helps you drill down into specific genres or moods with ease.
Lastly, take advantage of Plex’s smart collections feature. Plex can automatically group your music based on certain criteria, such as genre or release year. These smart collections are updated in real-time, ensuring that your library remains dynamically organized without requiring constant manual adjustments.
By creating and managing collections in Plex, you enhance your music library’s organization and tailor your listening experience to your personal preferences. With collections at your fingertips, you can easily access and enjoy your music, whether you’re in the mood for a specific genre, activity, or occasion.
Let’s Recap What We Learned
Recap of the Easy Method for Copying CDs and Streaming from Plex
Congratulations! You’ve navigated through the entire process of ripping your CDs and setting up your music for seamless streaming with Plex. From ensuring your discs are clean and choosing the right software to embedding artwork and organizing your music library, you’ve transformed your physical music collection into a digital masterpiece. Here’s a quick recap of the steps you’ve taken to bring your music to life:
- Preparing Your CD: Starting with a clean disc ensures that your ripped files are free of errors. Choosing the right CD ripping software—whether free or paid—sets the stage for a smooth ripping process.
- Ripping Your CD: Opting for FLAC audio format guarantees the highest audio quality. Using popular CD extraction tools to handle this task helps preserve every nuance of your favorite tracks.
- Selecting and Verifying CD Info: Accurate music metadata is crucial for Plex’s organization and functionality. Ensuring correct album, song, and artist information prevents confusion and enhances your listening experience.
- Adding and Embedding Album Artwork: High-quality album images add a professional touch to your digital music library. Resizing artwork to 600px x 600px and embedding it with tools like Taghycardia ensures that each album is visually appealing and correctly labeled.
- Setting Up on a NAS Server: Proper folder structure on your NAS server facilitates easy access and management of your music collection, making it ready for Plex library integration.
- Importing into Plex: Adding your music folder to Plex and troubleshooting any import issues ensures that your collection is correctly recognized and displayed.
- Streaming Your Music: Accessing your music and optimizing the streaming experience ensures that you enjoy high-quality audio files with minimal interruptions.
- Creating and Managing Collections: Organizing your music into collections enhances your ability to quickly find and enjoy specific genres, moods, or occasions.
Encouraging Next Steps and Further Exploration
Now that your music is fully integrated into Plex and streaming effortlessly, it’s time to explore the full potential of your newly organized digital music library. Dive into Plex’s additional features, such as creating custom playlists and exploring Plex’s music recommendations based on your listening habits.
Consider expanding your setup by integrating other media types, such as movies and TV shows, into Plex for a comprehensive home entertainment system. Explore Plex’s advanced settings and plugins to further enhance your media experience and make the most of your Plex media management.
Experiment with different configurations and customizations to tailor Plex to your specific needs. The more you explore, the more you’ll discover how Plex can transform your media consumption.
And don’t forget to periodically update your collections as you add new music to your library. Keeping your Plex setup current ensures that you always have access to the latest and greatest tracks.
By following these steps and continuing to explore Plex’s capabilities, you’ll keep your digital music organization fresh and accessible, enhancing your listening experience and making the most of your music streaming setup. Enjoy the seamless integration of your music collection into Plex and the enhanced experience it provides for all your listening pleasures.
TOOLS CHECKLIST (everything mentioned in post)
MEDIA SERVER
Plex Media Server (The Software)
NAS Server Device (The Hardware)
CD RIPPING
CD/DVD Disc Cleaner Kit
Exact Audio Copy (EAC)
dBpoweramp
EZ CD Audio Converter
MUSIC FILES MANAGEMENT
MusicBee
Foobar2000
DISC ART FILES FOR PLEX
Album Art Downloader
Adobe Photoshop
GIMP
Paint.net
Taghycardia
Disclaimer: This article contains affiliate links. If you purchase an item from a link I will earn a commission. There is no extra cost to you.