In today’s rapidly digitizing world, clunky DVD collections are becoming relics of the past. Remember that stack of DVDs gathering dust on your shelf? Now imagine having all your favorite movies and crucial data right at your fingertips, accessible with just a few clicks. That’s not just convenience; it’s a game-changer. Transitioning from physical discs to digital files not only safeguards your cherished collections from inevitable wear and tear but also liberates you to enjoy them anywhere, anytime, on any device. Imagine watching your beloved films on a flight, or during a lazy afternoon at the park—no DVD player required. Plus, you’re not just saving space; you’re future-proofing your library against obsolescence. This guide will lead you through the surprisingly simple process of converting your DVDs into versatile digital formats. It’s easier than you think, and you don’t need to be tech-savvy to do it. Ready to unlock the full potential of your DVD collection? Let’s dive into the world of digital freedom.
Is It Legal to Copy DVDs?
Navigating the murky waters of DVD copying legality might seem like traversing a labyrinth, but fear not—it’s simpler than it seems. You may have wondered if you’re allowed to duplicate your DVDs, especially with the whisper of copyright laws looming overhead. The answer is nuanced. At its core, understanding the legalities involves differentiating between personal use and distribution. Let’s break it down.
Understanding Copyright Laws
Copyright laws are the invisible guardians of creative content. They protect the rights of creators and ensure their work isn’t unlawfully duplicated or distributed. When you purchase a DVD, you’re not actually buying the content itself. Instead, you’re buying a license to view it. This means the actual video or data remains the intellectual property of the creator or production company.
In most countries, circumventing digital rights management (DRM) to copy a DVD is technically illegal. Yet, there’s a catch. Some jurisdictions make exceptions for personal use, a concept rooted in the idea of fair use. However, the legal framework can vary, making it essential to familiarize yourself with local copyright laws. Knowing the legal landscape of your region can help avoid potential pitfalls and keep you on the right side of the law.
Personal Use vs. Distribution
Here’s where the plot thickens. Copying a DVD for personal use often falls into a legal gray area, but many countries, including the United States, allow it under specific conditions. The golden rule is simple: **it’s acceptable as long as it’s for personal use only**. This means you can make a digital copy of your DVD collection to enjoy privately on your computer, smartphone, or tablet. Imagine having all your films neatly organized on your personal device, accessible without the clutter of physical discs. You are not allowed to share or sell your digital copy anywhere as it is illegal.
This includes uploading them to file-sharing sites, selling copies, or even sharing them with friends. While it might seem harmless, it infringes on the copyright holder’s rights and can lead to serious legal repercussions.
Essential Tools for Copying DVDs
Before embarking on your digital conversion journey, it’s crucial to equip yourself with the right tools. Think of this as assembling a toolkit for a DIY project. The right software and hardware will make the process of copying DVDs to your computer seamless and efficient. Let’s explore what you need to get started.
Software You’ll Need
Choosing the right software is like picking the perfect paintbrush for an artist. It’s the tool that will turn your DVDs into high-quality digital files. While there are numerous options available, not all are created equal. Here’s a breakdown of some of the most popular choices:
- HandBrake Free and open-source, HandBrake is a favorite among beginners and experts alike. It supports a wide range of formats, making it versatile for any DVD collection. Plus, it’s updated regularly to ensure compatibility with the latest encryption technologies.
- MakeMKV MakeMKV is another excellent choice, especially for those looking to preserve the original quality of their DVDs. It converts DVDs to MKV format without losing any data, including subtitles and audio tracks. While it’s free during its beta phase, it might eventually require a purchase.
- WonderFox DVD Ripper If you’re looking for speed and ease, WonderFox DVD Ripper is a solid option. With its user-friendly interface, it’s perfect for beginners. It also offers various output formats, so you can tailor the digital file to suit your device’s specifications.
- VLC Media Player Yes, VLC isn’t just for playing media. It can also rip DVDs, making it a versatile tool for those who want an all-in-one solution. It’s not the most robust ripping tool, but it’s an excellent option if you’re just starting out.
- DVDFab For those who want a more professional solution, DVDFab offers a comprehensive suite of features. While it comes with a price tag, its capabilities extend beyond simple ripping, offering tools for conversion, editing, and burning.
When selecting software, consider what you value most—speed, quality, or flexibility. Each program has its strengths and caters to different needs. Remember, some options are free, while others require a purchase. Investing in the right software can make a significant difference in the final output.
Hardware Requirements
Now that you’ve chosen your software, it’s time to look at the hardware. Just as a craftsman relies on quality tools, your computer’s hardware plays a vital role in the DVD copying process. Here’s what you need:
- DVD Drive First and foremost, you’ll need a DVD drive. Most modern laptops lack built-in drives, so an external USB DVD drive is your best bet. They’re affordable, easy to use, and crucial for reading the physical disc. Ensure your drive supports DVD reading to avoid any compatibility issues.
- Sufficient Storage Space DVD files can be hefty, often ranging from 4GB to 9GB per disc. Make sure your computer has enough storage space to accommodate the copies. If space is tight, consider using an external hard drive or cloud storage solutions to house your digital library Decent Processing Power
- Copying DVDs is a resource-intensive task. A computer with a modern processor will ensure the ripping process runs smoothly and efficiently. While most contemporary computers are equipped for the job, older models might struggle with the demands.
- Reliable RAM Having enough RAM will make the process faster and reduce the risk of crashes or freezes. Aim for at least 4GB, but 8GB or more is ideal for a seamless experience.
- Stable Power Supply The copying process can take some time, especially for high-quality conversions. Ensure your computer is plugged in or has enough battery life to complete the task without interruptions.
Arming yourself with the right software and hardware sets the stage for a smooth transition from physical DVDs to digital files. With these essentials in hand, you’re ready to embark on your conversion adventure. Up next, we’ll guide you through choosing the perfect software tailored to your needs, ensuring your digital copies are pristine and perfectly suited for any device. Let’s get started on your digital transformation!
Choosing the Right Software for DVD Copying
With the tools assembled, it’s time to focus on the key ingredient: software. In the bustling marketplace of DVD ripping software, choosing the right one can feel like a daunting task. The choice often boils down to two main options: free or paid. While both have their merits, understanding the differences between them can help you make an informed decision tailored to your specific needs. Let’s dive in.
Free vs. Paid Software: What’s the Difference?
The age-old debate of free versus paid software isn’t just about cost; it’s about value, functionality, and long-term satisfaction. **Free software**, as the name suggests, doesn’t require a financial commitment. It’s perfect for those who are budget-conscious or new to the world of DVD ripping. While many free options offer essential features and can get the job done, they often come with certain limitations.
- Functionality and Features
Free software tends to offer basic ripping capabilities, often limited in formats or options. Paid software, on the other hand, usually provides a wider array of features, allowing you to customize the output to suit your preferences. Whether it’s selecting specific chapters or adjusting video quality, premium software often has the edge in versatility.
- Speed and Efficiency
Time is money, and while free software might save you cash, it could cost you in time. Paid software typically boasts faster ripping speeds and optimizations that can make the process smoother and more efficient. Free options might lag or struggle with larger files, leading to potential frustration.
- Updates and Support
One of the most significant benefits of paid software is the access to regular updates and customer support. As DVDs evolve with new encryption technologies, keeping your software up-to-date is crucial. Free versions might lag behind in updates or lack dedicated support, leaving you in the lurch if something goes awry.
- Ads and Watermarks
Many free programs offset their costs with ads or include watermarks on the output files. This can detract from the viewing experience. Paid software, on the other hand, often provides a clean, professional output without such distractions.
- User Experience
Paid software often features a more intuitive, user-friendly interface, designed to streamline the ripping process for users of all experience levels. Free software might have a steeper learning curve, which can be off-putting for beginners.
Choosing the right software for DVD copying is about aligning your needs with the features and functionalities each program offers. Whether you choose a free or paid option, these recommendations provide a solid starting point for creating digital backups of your DVD collection. With the right software in hand, you’re well on your way to converting your DVDs with ease. Next up, we’ll prepare your computer for the task, ensuring it’s ready to handle the rigors of DVD ripping.
Preparing Your Computer for DVD Copying
You’ve selected the software that perfectly suits your needs. Now, it’s time to ready your computer for the DVD copying process. Before diving in, you’ll want to make sure that your computer is up to the task. Just like preparing a kitchen before cooking a gourmet meal, setting up your computer correctly will ensure a smooth and efficient copying experience. Let’s explore how to clear space for those hefty digital files and keep your system up-to-date.
Clearing Space: Make Room for Your Files
A DVD can consume a considerable chunk of your computer’s storage, with typical movie files weighing between 4GB and 9GB. If you’re planning to digitize an entire collection, this can add up quickly. Therefore, it’s essential to ensure your computer has ample space to accommodate these files without slowing down or running into issues.
- Audit Your Storage
Begin by checking your computer’s available storage. Navigate to your computer’s storage settings to see how much free space you have. Identify and clear any unnecessary files, old downloads, or rarely used applications that are hogging space.
- Clean Out the Clutter
Use built-in tools like Disk Cleanup (Windows) or CleanMyMac (MacOS) to purge temporary files, caches, and other space-eating culprits. These tools are straightforward and effective, providing a quick win for freeing up gigabytes.
- External Storage Solutions
Consider using external hard drives or cloud storage options for archiving large files that you don’t need on your internal drive. These solutions offer a convenient way to expand your storage without compromising your computer’s performance. Investing in an external SSD can also speed up file transfer times.
- Organize Your Files
Organizing your files can make it easier to identify and remove duplicates or unnecessary clutter. Consider setting up a system of folders for your new digital library, making future access simple and intuitive. Use dedicated tools like CCleaner or Duplicate Cleaner to streamline the process.
- Assess File Formats
Sometimes, ripping DVDs in certain file formats can save space. Converting DVDs to compressed formats like MP4, instead of keeping the original VOB files, can help you preserve space without a noticeable loss in quality.
By clearing space and organizing your files, you’ll set a solid foundation for your DVD copying endeavor. A tidy computer isn’t just pleasing to the eye; it’s a functional necessity for handling large file operations efficiently.
Updating Your System: Keeping Things Running Smoothly
Once you’ve freed up space, the next step is ensuring that your computer is operating at its peak. A well-maintained system is less likely to encounter glitches or slowdowns during the DVD copying process. Here’s how to make sure your system is in tip-top shape.
- Check for System Updates
Keeping your operating system up-to-date is vital for smooth operation and security. Updates often contain important patches and optimizations that ensure compatibility with the latest software, including DVD ripping tools. Whether you’re on Windows, Mac, or Linux, navigate to your system settings and run a check for any pending updates.
- Update Drivers and Firmware
Pay special attention to updating your DVD drive’s drivers and firmware. These updates can resolve issues related to disc reading and copying. Visit your hardware manufacturer’s website to download the latest drivers, ensuring your drive performs efficiently.
- Optimize System Performance
Before starting the DVD copying process, close any unnecessary programs running in the background. This frees up valuable CPU resources and memory, allowing your ripping software to function more effectively. Use task manager tools to identify and disable any background processes that are not essential.
- Secure Your System
Protect your computer from potential threats by running antivirus and malware scans. While this might seem unrelated, a secure system is a stable system, less likely to encounter hiccups during extensive operations like DVD copying. Make sure your antivirus software is updated and functioning correctly.
- Backup Important Data
While the chances of something going wrong are slim, it’s always wise to back up important files before making substantial changes or performing large operations. Consider using backup solutions like Acronis True Image or native tools like Time Machine on Mac to safeguard your data.
Taking the time to update your system and ensure everything is running smoothly can save you from headaches down the line. With these preparations complete, you’re now ready to dive into the actual process of copying DVDs to your computer. Your system is primed, your storage is ample, and your tools are at the ready. Let’s proceed to the next exciting stage: the step-by-step guide to copying DVDs effortlessly.
Step-by-Step Guide to Copying DVDs
You’ve set the stage, and now it’s showtime. Copying DVDs might seem like a daunting task, but with the right guidance, it’s a straightforward and rewarding endeavor. Let’s walk through the process step-by-step, turning those stacks of DVDs into a sleek digital library.
Step 1: Install the DVD Ripping Software
The journey begins with installing the chosen software. Whether you opted for the user-friendly HandBrake or the powerful DVDFab, the process is generally intuitive.
- – Download and Run the Installer: Head to the official website of your selected software. Look for the download section and grab the installer compatible with your operating system. Double-click the downloaded file, and follow the on-screen instructions to complete the installation.
- – Adjust Preferences: Once installed, take a moment to familiarize yourself with the settings. Many programs allow you to adjust preferences, such as the default output folder or file naming conventions. Tailoring these settings to your liking can streamline the process later on.
- – Updates and Plugins: Check for any available updates or additional plugins that may enhance functionality or ensure compatibility with various DVD formats.
Installing the software is the cornerstone of your DVD copying quest. It equips you with the tools necessary to dive into the next steps confidently.
Step 2: Insert the DVD
Now that your software is ready, it’s time to bring the DVD into play.
- Insert the DVD into the Drive: If you’re using an external drive, connect it to your computer and insert the DVD. Give the system a moment to recognize the disc.
- Check for AutoPlay: Some systems may prompt an AutoPlay menu when the DVD is inserted. If this occurs, simply close the window. We’ll be accessing the content through our ripping software, not the default player.
- Verify Disc Compatibility: Ensure that your drive can read the DVD properly. Some older discs may have scratches or other damage that could hinder the reading process.
By securely inserting your DVD, you set the wheels in motion, allowing the software to read and display its contents in the subsequent steps.
Step 3: Launch the Software
With the DVD nestled in the drive, it’s time to open your ripping software and embark on the main event.
- – Open the Application: Find the software shortcut on your desktop or start menu and launch the application. Wait for it to load fully; some software may take a moment as it recognizes the inserted disc.
- – Allow Permissions: Your operating system might request permissions for the software to access the DVD drive. Ensure you allow these permissions to facilitate a smooth operation.
- – Confirm DVD Detection: Within the software, confirm that the DVD has been detected. Most programs will display the DVD title or thumbnail, indicating readiness to proceed.
Launching the software brings you one step closer to achieving digital liberation for your DVDs. With everything in place, it’s time to select exactly what you want to copy.
Step 4: Select the DVD Content to Copy
DVDs are like treasure chests, often packed with more than just the main feature. From special features to multiple audio tracks, you have options.
- – Explore Content Options: Use the software’s interface to navigate the disc’s contents. You’ll typically find titles representing different movie parts or special features.
- – Choose the Main Title: For most users, the primary interest is the main feature film. It’s usually the longest title listed. Select it by checking the corresponding box or highlighting it.
- – Select Additional Content: If you’re interested in extras, such as director’s commentary or bonus scenes, include these in your selection. Ensure you have enough storage space if you opt for multiple features.
- – Audio and Subtitle Preferences: Decide on the audio tracks and subtitles you wish to include. Many DVDs offer multiple languages and subtitle options, so tailor your selection according to your needs.
The power to choose the content rests in your hands. With these options set, it’s time to decide how the final output will appear.
Step 5: Choose the Output Format
The next phase involves deciding on the format your new digital file will take. This is akin to selecting the frame for a picture; it affects the display and compatibility with various devices.
- – Explore Format Options: Your software will offer a range of output formats, from MP4 and MKV to AVI and MOV. Each format has its pros and cons regarding quality, compression, and compatibility.
- – Select the Right Format: If you’re unsure which format to choose, MP4 is a safe and versatile option. It offers excellent compression without significant loss in quality and is compatible with most devices and players.
- – Resolution and Quality Settings: Adjust the resolution and quality settings according to your preference. Higher resolutions maintain clarity but consume more space, while lower resolutions save space but may compromise quality.
- – Preset Configurations: Many programs offer preset configurations optimized for specific devices, such as smartphones, tablets, or gaming consoles. Selecting a preset tailored to your device ensures smooth playback.
Choosing the right format is pivotal, as it determines how you’ll enjoy your movies post-conversion. Once you’re satisfied with the settings, you’re ready to bring the process to life.
Step 6: Start the Copying Process
With everything meticulously set, it’s time to set the digital gears in motion and commence the copying process. This is the grand finale, where physical discs transform into digital masterpieces.
- – Initiate the Process: Look for the “Start” or “Rip” button within the software interface. Click it, and watch as the program begins to convert your DVD into a digital file.
- – Monitor Progress: As the software works its magic, you’ll see a progress bar or percentage indicator. Copying can take anywhere from a few minutes to over an hour, depending on the disc’s size and your computer’s capabilities.
- – Troubleshoot if Necessary: Should the process halt unexpectedly, refer to any error messages provided by the software. Common issues might include insufficient storage or a corrupted DVD. Address these issues and retry if needed.
- – Completion and Storage: Once the process completes, your digital file will be saved to your designated output folder. Take a moment to verify its playback, ensuring audio and video sync seamlessly.
Congratulations! You’ve successfully copied your DVD, freeing it from its physical confines and granting it digital immortality. The experience of transforming your collection doesn’t just offer convenience; it’s an invitation to explore, enjoy, and cherish your media on a whole new level. Now that you have mastered the art of DVD copying, a world of possibilities awaits. Keep reading for additional tips and advanced techniques that can further enhance your digital library.
Understanding Output Formats
You’ve successfully ripped your DVD, but now the question arises: what format should you choose for your digital file? Output formats play a crucial role in how you’ll enjoy your newly digitized media. They affect everything from compatibility to storage space, so selecting the right one can significantly enhance your viewing experience. Let’s delve into the nuances of choosing the perfect format and striking a balance between quality and file size.
Which Format Should You Choose?
The digital landscape is filled with a plethora of formats, each boasting unique attributes. Here are some of the most popular choices, along with their defining characteristics:
- – MP4 (MPEG-4 Part 14): MP4 is the reigning champion of versatility. Known for its excellent compression without sacrificing quality, it’s widely compatible with almost any device you can think of, from smartphones and tablets to smart TVs and gaming consoles. This format is an all-rounder, making it an ideal choice for most users.
- – MKV (Matroska Video): MKV is the connoisseur’s choice. It supports a multitude of audio tracks, subtitles, and chapters within a single file, offering unparalleled flexibility. If you love including director’s commentaries or multiple subtitle options, MKV is your go-to format. However, it may not be supported on all devices, so make sure to check compatibility first.
- – AVI (Audio Video Interleave): AVI is a classic. It offers excellent video quality but tends to produce larger file sizes. It’s been around for ages and remains a reliable option for those prioritizing quality over storage space. Keep in mind, though, that AVI files can be cumbersome to manage on devices with limited storage.
- – MOV (QuickTime File Format): MOV, Apple’s brainchild, is perfect for Mac and iOS aficionados. It provides excellent video quality, often favored by filmmakers and video editors. However, its compatibility outside of Apple ecosystems can be somewhat restricted, so consider your device lineup before opting for this format.
- – WMV (Windows Media Video): WMV is tailored for Windows users. It excels at reducing file sizes, making it a practical choice for those with limited storage capacity. However, WMV is primarily compatible with Windows-based devices, which may pose challenges if you switch between platforms.
Choosing the right format is akin to selecting the perfect pair of shoes for an outfit. It depends on where you plan to watch your videos, how much storage you have, and the importance of extra features like subtitles and audio tracks.
Quality vs. File Size: Finding the Balance
Once you’ve settled on a format, it’s time to tackle the perennial debate: quality versus file size. It’s a delicate dance, one where striking the right equilibrium can lead to an optimal viewing experience.
- – High Quality, Large File Size: If you’re an enthusiast who demands the highest fidelity, you might lean towards higher-quality settings, such as 1080p or 4K resolution. This choice results in larger files, capturing every detail in crystal clarity. However, these files require ample storage space, so ensure your hard drive is up to the task.
- – Medium Quality, Moderate File Size: For most users, a medium-quality setting is the sweet spot. It provides a good balance between visual quality and storage efficiency. This setting is perfect for everyday viewing on a variety of devices, offering clear images without monopolizing your storage.
- – Lower Quality, Small File Size: Lower quality settings are ideal for those with limited storage capacity or slower internet connections. This choice works well for mobile devices where screen sizes are smaller, and high-resolution isn’t as critical. While there’s a noticeable drop in visual fidelity, the convenience of reduced file size can be a significant advantage.
- – Bitrate Considerations: Bitrate plays a pivotal role in determining quality and file size. A higher bitrate results in better quality but larger files. Most software allows you to adjust this setting, offering a customizable approach to finding the perfect balance.
- – Resolution Choices: Consider the resolution of your playback device. If you’re primarily watching on a smartphone or tablet, 720p might suffice. However, if your main viewing experience is on a large-screen TV, 1080p or even 4K might be warranted.
Finding the right balance between quality and file size is a matter of personal preference and practical constraints. Experiment with different settings to discover what works best for your needs, and remember, there’s no one-size-fits-all answer. This section concludes our exploration of output formats and quality considerations, guiding you to make informed decisions that enhance your digital library experience. Now, you’re well-equipped to turn your DVD collection into a streamlined, accessible digital treasure trove.
Next, we’ll explore some advanced tips and tricks to take your DVD copying to the next level, ensuring you’re maximizing the potential of your new digital library.
Troubleshooting Common Issues
As with any technological endeavor, DVD copying might not always go off without a hitch. But don’t worry! When you encounter issues, it’s important to remember that they are usually quite common and can be easily resolved. Below, we’ll unravel some of the most prevalent hurdles people face while copying DVDs and provide actionable solutions to ensure a smooth ripping process. Whether it’s a pesky “DVD Not Recognized” error or the frustration of slow copying speeds, we’ve got you covered.
“DVD Not Recognized” Error
One of the most vexing issues users encounter is the dreaded “DVD Not Recognized” error. When your computer doesn’t acknowledge the presence of a disc, it can bring your ripping endeavors to a screeching halt. Here’s how to get back on track:
- – Check the DVD Drive: First, ensure that your DVD drive is functioning correctly. Insert a different disc to see if it’s recognized. If other discs work, the issue might lie with your specific DVD rather than the drive itself. If the drive fails to read any disc, consider cleaning the lens with a specialized cleaning kit or trying a different drive.
- – Inspect the DVD: Examine the DVD for scratches, smudges, or dirt. These imperfections can prevent the disc from being read properly. Gently clean the surface with a soft, lint-free cloth and a dab of rubbing alcohol, wiping from the center outward.
- – Driver and Firmware Update: Outdated drivers can cause your DVD drive to act up. Visit the manufacturer’s website to download the latest driver updates or firmware for your DVD drive. This simple update often resolves recognition issues, as it provides compatibility fixes and enhancements.
- – Compatibility Issues: Some DVDs may have region-specific encoding or copy protection that prevents them from being recognized. Ensure that your software can bypass these restrictions. Tools like AnyDVD or MakeMKV often come equipped with region unlocking capabilities.
By addressing these potential roadblocks, you’ll often find that your DVD drive springs back to life, ready to facilitate a seamless ripping session.
Slow Copying Speeds
Patience may be a virtue, but nobody likes to wait longer than necessary for their DVDs to copy. If you find yourself twiddling your thumbs as the progress bar inches along, consider these tips to accelerate the process:
- – Close Unnecessary Applications: Running multiple programs simultaneously can hog system resources, significantly slowing down the ripping process. Close all non-essential applications, freeing up CPU power and RAM for your DVD copying task.
- – Check DVD Condition: A scratched or damaged DVD may cause the drive to read slower, as it struggles to decipher the data. Ensure the disc is in good condition, cleaning it if needed, to facilitate a faster read time.
- – Adjust Software Settings: Explore your ripping software’s settings. Some programs allow you to prioritize speed over quality. If file quality isn’t your primary concern, tweaking these settings can expedite the process. However, be mindful that this may lead to larger file sizes or slight reductions in quality.
- – Hardware Limitations: Older hardware might naturally result in slower copying speeds. Upgrading your DVD drive to a more modern model can yield noticeable speed improvements. Consider investing in an external DVD drive with higher read speeds if you frequently encounter sluggish performance.
- – Avoid Multitasking: Performing other tasks on your computer while ripping a DVD can tax your system, slowing down the copying process. Let your computer focus solely on the ripping task for the best speeds.
By making these adjustments, you’ll likely find that your DVDs copy faster, allowing you to enjoy your digital collection without unnecessary delay.
Audio/Video Sync Issues
Few things are as jarring as watching a movie where the audio doesn’t align with the video. If you’re experiencing this discordance, here’s how to restore harmony between sound and picture:
- – Software Settings Check: Double-check your ripping software’s settings. Some programs allow you to adjust the audio offset or delay. Fine-tuning these settings can resolve sync discrepancies.
- – Check Output Format: Occasionally, certain output formats might cause sync issues due to their encoding methods. Experiment with different formats to see if switching resolves the issue.
- – Update Ripping Software: Using outdated software versions can sometimes cause sync issues. Ensure your ripping software is updated to the latest version, as developers frequently release patches that address such problems.
- – Inspect System Performance: Audio/video sync problems can also arise from insufficient system resources. Ensure your computer isn’t overloaded with other tasks, allowing it to dedicate ample resources to the DVD ripping process.
- – Post-Processing Tools: If sync issues persist after ripping, consider using post-processing tools like VLC Media Player or HandBrake to adjust the audio delay. These programs provide intuitive controls to synchronize audio and video after the fact.
Addressing audio/video sync issues requires a bit of experimentation, but with patience and the right tools, you can ensure that your digital copies provide a seamless viewing experience.
Troubleshooting these common issues ensures that your DVD copying endeavors remain smooth and hassle-free. With the right knowledge and tools, you can tackle any obstacle that arises during the ripping process. This guide empowers you to enjoy a flawless digital library experience, enabling you to savor your media without the need for physical discs.
In our next section, we’ll explore some advanced tips and techniques to further enhance your DVD copying skills. Stay tuned for more insights on making the most out of your digital collection!
Enhancing Your DVD Copies
So, you’ve mastered the basics of copying DVDs to your computer. But why stop there? With a little extra effort, you can elevate your digital copies, making them more versatile and tailored to your preferences. Whether it’s adding subtitles and audio tracks or making some edits to refine your copies, enhancing your DVDs can significantly enrich your viewing experience. Let’s dive into how you can make your digital collection even better.
Adding Subtitles and Audio Tracks
One of the great benefits of digital media is the ability to customize your content. Adding subtitles and audio tracks can make your copies more accessible and enjoyable for a wider audience. Here’s how to do it:
- – Choosing Subtitles and Audio Tracks: Start by deciding which subtitles and audio tracks you want to include. Subtitles can be particularly useful for foreign films or for viewers who prefer reading along. Additional audio tracks, such as commentary or alternate languages, can add depth to your viewing experience.
- – Using Ripping Software: Many modern DVD ripping software options offer built-in features to include subtitles and multiple audio tracks in your copies. During the ripping process, you can usually select which subtitles and audio tracks to include from a menu within the software. Check the software’s documentation for specifics on how to access these options.
- – External Subtitles: If your ripping software doesn’t support embedding subtitles, you can add them separately using tools like Subtitle Edit or Aegisub. Download or create subtitle files in formats such as SRT or ASS, then use video editing software to merge them with your video file.
- – Synchronizing Audio: When adding multiple audio tracks, ensure that they are correctly synchronized with the video. Most software will automatically handle synchronization, but it’s wise to review the final output to ensure that everything aligns properly.
By incorporating additional subtitles and audio tracks, you can create a more inclusive and personalized media experience. This step enhances the versatility of your digital collection, catering to diverse viewing needs.
Editing Your Copies: Basic Tips
Sometimes, a bit of editing can transform your digital copies into polished, professional-grade files. Whether you want to trim unnecessary scenes or adjust the overall quality, here are some basic editing tips to get you started:
- – Trimming and Cutting: Use video editing software like Adobe Premiere Pro, Final Cut Pro, or free alternatives like Shotcut or DaVinci Resolve to trim out any unwanted portions of your video. This is particularly useful if you only want specific scenes or if there are long intros or credits you prefer to exclude.
- – Adjusting Quality: If you’re not satisfied with the quality of your copy, consider using video enhancement tools to fine-tune it. Adjust brightness, contrast, and saturation to improve visual clarity. Many editing programs offer built-in filters and effects to help with these adjustments.
- – Adding or Removing Chapters: Some video editing software allows you to add or remove chapters, creating a more user-friendly experience for navigating your media. This can be especially handy for long movies or series, where you might want to divide the content into manageable sections.
- – Incorporating Custom Menus: For a more sophisticated touch, you can create custom menus for your DVDs. Tools like DVD Styler or Wondershare DVD Creator enable you to design and add interactive menus to your video files, giving your digital copies a professional feel.
- – Exporting in High Quality: When exporting your edited video, choose settings that balance quality and file size. Most editing software provides options to export in various resolutions and formats. Opt for higher bitrates and resolutions for the best quality, keeping in mind your storage limitations.
Editing your digital copies not only refines their quality but also tailors them to your personal taste. Whether you’re trimming down content or enhancing visual appeal, these adjustments can make a noticeable difference in your viewing pleasure.
By adding subtitles and audio tracks, and performing basic edits, you enhance your DVD copies, turning them into more versatile and enjoyable digital assets. Your digital library will not only be more comprehensive but also more aligned with your preferences and needs. With these advanced techniques, you’re well on your way to mastering the art of DVD copying.
Stay tuned as we explore more advanced tips and tricks in our final segment, designed to take your DVD copying skills to the next level.
Storing and Organizing Your Copied DVDs
Congratulations! You’ve navigated the world of DVD copying and now have a treasure trove of digital files at your fingertips. But what’s next? With a growing collection, it’s crucial to establish a system that keeps your files well-organized and easily accessible. Proper storage and organization not only streamline your media experience but also ensure your collection remains pristine and manageable. Let’s explore how to create an efficient digital library and discover the best storage solutions to safeguard your precious media.
Creating a Library: How to Keep Your Files Neat
Building a digital library requires a bit of strategy to ensure everything remains in order. Here’s how to set up a neat and user-friendly media library:
- – Organize by Categories: Start by categorizing your files into broad groups such as genres, years, or formats. For instance, you could create folders for “Action Movies,” “Documentaries,” or “Family Films.” Within each category, you can further refine with subfolders for specific years or series. This hierarchical approach makes it easier to locate specific files quickly.
- – Consistent Naming Conventions: Establish a consistent naming convention for your files to enhance searchability. A useful format might be “Title (Year) – Quality” (e.g., “Inception (2010) – 1080p”). This method not only helps in identifying the content at a glance but also maintains uniformity across your collection.
- – Metadata and Tags: Incorporate metadata and tags to provide additional details about your files. Many media players and management software support tagging, allowing you to add information such as actors, directors, and plot summaries. This data enriches your library and makes searching for specific content much more intuitive.
- – Regular Maintenance: Schedule periodic reviews of your library to keep it current and tidy. Remove duplicates, update file names, and ensure that your categories remain relevant as your collection evolves. Regular maintenance prevents clutter and keeps your digital library in top shape.
- – Backup and Redundancy: Regularly back up your files to safeguard against data loss. Consider implementing a redundancy plan where files are stored in multiple locations, such as an external hard drive and a cloud service. This ensures that your collection is protected from hardware failures or accidental deletions.
By following these organizational tips, you’ll create a digital library that’s both efficient and user-friendly, allowing you to enjoy your media collection with ease.
Best Storage Solutions
The right storage solution can make all the difference in managing and preserving your digital files. Here’s a rundown of the best options available to keep your DVD copies safe and accessible:
- – External Hard Drives: External hard drives are a popular choice for storing large volumes of data. They offer substantial storage capacity and are relatively affordable. Look for drives with ample space and high-speed data transfer rates to ensure smooth access to your files. For added convenience, choose models with automatic backup features.
- – Network-Attached Storage (NAS): A NAS device connects to your home network, allowing multiple users to access and share files simultaneously. It’s ideal for households with several users or for those who want to access their media from different devices. NAS systems often come with built-in redundancy and backup options for enhanced data protection.
- – Cloud Storage: Cloud storage solutions like Google Drive, Dropbox, and OneDrive offer flexibility and remote access. They allow you to store files off-site and access them from anywhere with an internet connection. While cloud storage is convenient, it’s crucial to consider the cost of subscription plans and ensure you have a reliable internet connection.
- – Solid-State Drives (SSD): SSDs are known for their speed and reliability compared to traditional hard drives. They provide faster data access and lower latency, making them an excellent choice for frequently accessed files. Although SSDs can be pricier, their performance benefits often outweigh the cost for avid media collectors.
- – Optical Media Storage: For a more traditional approach, you can also archive files onto optical media like DVDs or Blu-rays. While less common in today’s digital age, this method can be useful for long-term storage. Be sure to use high-quality discs and keep them in a cool, dry place to prevent degradation.
Each storage solution has its advantages, so consider your needs and budget when selecting the best option for your digital library. Whether you opt for external drives, cloud storage, or a combination, ensuring your files are securely stored and easily accessible will enhance your media experience.
In summary, creating a well-organized library and selecting the right storage solutions are vital steps in managing your DVD copies effectively. With a bit of planning and the right tools, you’ll be able to enjoy your digital collection without the hassle of disorganization or data loss. Happy organizing!
Playing Your Copied DVDs
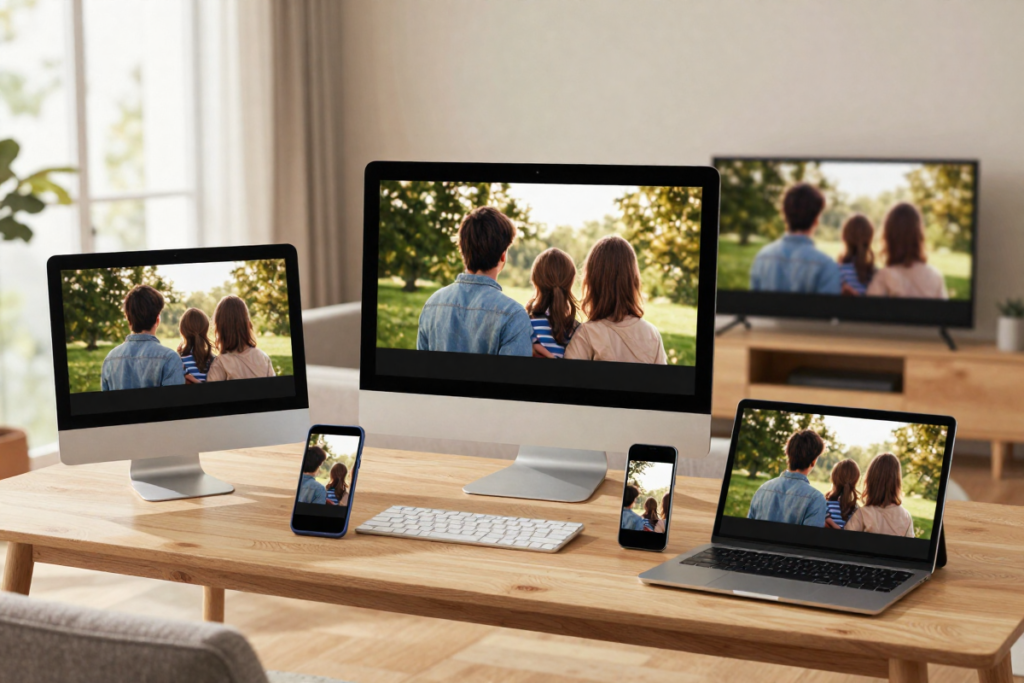
With your DVD collection neatly copied, organized, and stored, it’s time to enjoy your media. The key to a great viewing experience lies in selecting the right media player and knowing how to transfer your files to other devices. Let’s dive into the best options for playing your copied DVDs on your PC and how to make your content accessible across various platforms.
Best Media Players for Your PC
Choosing the right media player is crucial for an optimal viewing experience. The right player ensures smooth playback, supports various file formats, and provides additional features like subtitles and audio track options. Here are some top media players that excel in these areas:
- – VLC Media Player: VLC is a perennial favorite among media enthusiasts. This versatile player supports a wide range of formats, including MKV, MP4, AVI, and more. Its user-friendly interface and robust feature set, such as subtitle support and customizable playback options, make it a top choice for watching your copied DVDs. Plus, VLC is open-source and free, adding to its appeal.
- – MPC-HC (Media Player Classic – Home Cinema): MPC-HC is a lightweight and powerful media player that’s perfect for users seeking simplicity combined with functionality. It offers excellent support for various formats and codecs, and its minimalistic design ensures that you can focus solely on your media. Despite its simplicity, MPC-HC includes advanced features like subtitle support and video playback adjustments.
- – PotPlayer: PotPlayer stands out with its rich feature set and high customization options. It supports a plethora of formats and provides detailed control over video and audio settings. For users who want an all-in-one solution with extensive configuration options, PotPlayer is an excellent choice.
- – Kodi: Kodi is a robust media center application that allows for extensive customization and integration with various add-ons. It’s ideal for users who want to turn their PC into a full-fledged media hub. Kodi supports various file formats and offers features like media organization and streaming integration, making it a versatile option.
Selecting the right media player will enhance your viewing experience and ensure that your copied DVDs play back smoothly on your PC.
Transferring to Other Devices
To fully enjoy your digital collection, you may want to access your DVDs on other devices beyond your computer. Transferring files to various platforms can increase your convenience and accessibility. Here’s how to do it:
- – Smartphones and Tablets: For portable viewing, transferring your files to smartphones or tablets is a great option. You can use file transfer methods such as USB connections, cloud storage, or dedicated media transfer apps. Ensure that the media player app on your mobile device supports the file formats of your copied DVDs. Apps like VLC for mobile and MX Player offer robust format support and playback capabilities.
- – Streaming Devices: If you have a streaming device like Roku, Amazon Fire TV, or Apple TV, you can use these devices to stream your copied DVDs. Upload your files to a media server application such as Plex or Emby, which allows you to access and stream your media library from any compatible device. This setup provides a seamless viewing experience across your home network.
- – Smart TVs: Many modern smart TVs support USB drives or network connections for accessing media files. Simply copy your files to a USB drive or connect your computer to the TV via a network. Use the TV’s built-in media player or an app to browse and play your copied DVDs.
- – External Media Players: For those who prefer a more traditional approach, connecting your external hard drive or USB drive to a standalone media player is a straightforward method. These devices often come with HDMI outputs, allowing you to connect directly to your TV for a high-quality viewing experience.
- – Network Attached Storage (NAS): If you use a NAS system, you can access your media files from any device connected to your network. Many NAS systems have built-in media server functionalities that stream content to various devices, ensuring that your entire media library is available at your fingertips.
Transferring your copied DVDs to other devices ensures that you can enjoy your media collection in various settings, whether on-the-go or at home. By leveraging these methods, you can enhance your media consumption and maximize the versatility of your digital library.
In summary, selecting the best media player for your PC and efficiently transferring your files to other devices will enhance your viewing experience and make your digital collection accessible wherever you go. With these tools and techniques, you’re all set to enjoy your DVDs in a modern, flexible way.
Securing Your Digital Copies
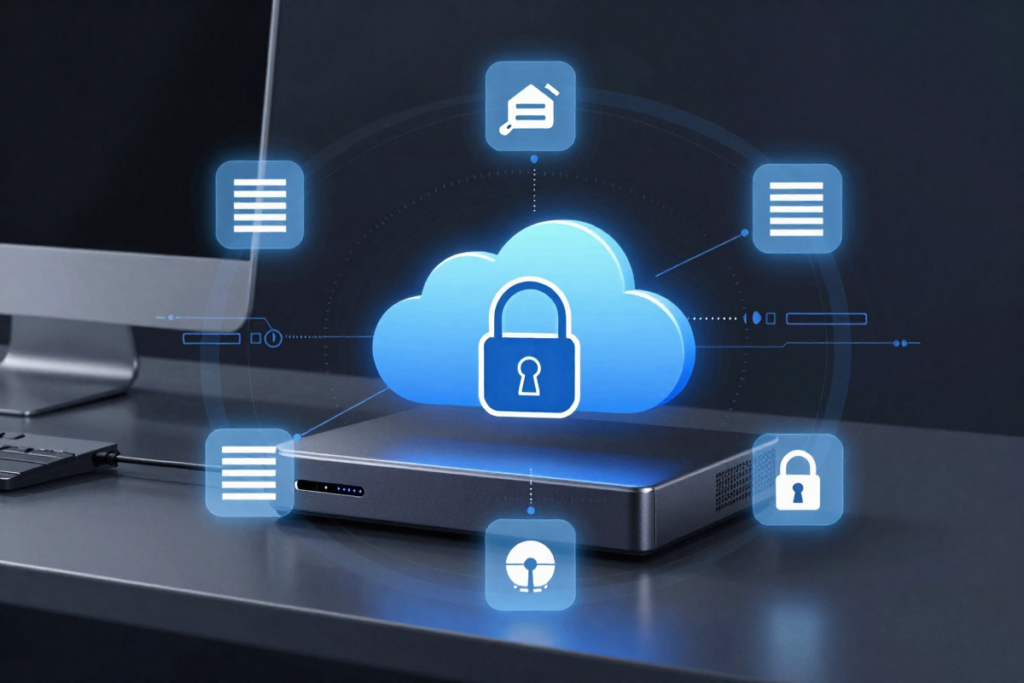
With your DVD collection successfully copied and organized, it’s crucial to ensure that your digital assets are protected. Securing your files from loss or unauthorized access is key to maintaining the integrity and privacy of your media library. Let’s explore the essential steps for backing up your files and protecting them from unwanted access.
Backing Up Your Files
A reliable backup strategy is vital to safeguard your digital copies against unforeseen events like hardware failures or accidental deletions. Implementing a robust backup plan ensures that your media library remains intact and accessible. Here’s how to effectively back up your files:
- – Local Backups: Begin by creating a local backup of your files on an external hard drive or a Network Attached Storage (NAS) system. Regularly update this backup to include any new or modified files. Many external drives come with backup software that automates this process, ensuring that your files are consistently backed up without manual intervention.
- – Cloud Backups: Complement your local backups with cloud storage solutions for added redundancy. Services like Google Drive, Dropbox, or iCloud offer scalable storage options and can automatically sync your files. Cloud backups provide the advantage of off-site storage, protecting your data from local disasters such as fire or theft.
- – Automated Backup Solutions: Utilize automated backup solutions to simplify the process. Tools like Backblaze or Acronis True Image offer seamless and continuous backup services. These solutions often come with features like versioning and incremental backups, which only update the changes made since the last backup, conserving storage space and time.
- – Backup Frequency: Set a regular schedule for backing up your files. Depending on how often you add or modify content, you might choose to back up weekly, bi-weekly, or monthly. Regular backups minimize the risk of losing recent changes and ensure that your backup remains current.
By implementing a comprehensive backup strategy, you ensure that your digital copies are well-protected against data loss and remain accessible even in the event of a system failure.
Protecting Against Unauthorized Access
Securing your digital media from unauthorized access is equally important to ensure your privacy and protect your intellectual property. Here’s how to fortify your digital library against potential threats:
- – Password Protection: Use strong, unique passwords for all your storage accounts and devices. For cloud storage services, enable two-factor authentication (2FA) for an added layer of security. This extra step requires a second form of verification, such as a text message code or authentication app, making unauthorized access significantly more difficult.
- – Encryption: Encrypt sensitive files to protect them from unauthorized access. Encryption tools like VeraCrypt or BitLocker (for Windows) can secure your files by converting them into an unreadable format that only authorized users with the correct decryption key can access. Encryption is particularly important for cloud storage and external drives.
- – Access Control: Implement access control measures for shared or networked storage solutions. Set permissions to restrict access to authorized users only and avoid sharing sensitive files with untrusted individuals. For NAS systems, configure user accounts with appropriate access levels to ensure that only those with the necessary permissions can view or modify your files.
- – Regular Security Audits: Perform regular security audits to identify and address potential vulnerabilities. Check for any unauthorized access attempts and review your security settings periodically to ensure they remain up-to-date. Keeping your software and firmware updated also protects against known security threats.
– Secure Deletion:
When deleting files, ensure that they are securely erased to prevent recovery. Use file shredding tools that overwrite the data multiple times, making it irretrievable. This step is crucial when disposing of old drives or transferring them to new users.
By taking these measures, you safeguard your digital copies from unauthorized access and ensure that your media library remains secure. Protecting your files not only enhances your privacy but also maintains the integrity of your valuable collection.
In summary, securing your digital copies involves a dual approach of diligent backups and robust protection against unauthorized access. With these strategies in place, you can enjoy your media collection with confidence, knowing that your files are both preserved and protected.
Frequently Asked Questions (FAQs)
Navigating the world of DVD copying can bring up a host of questions. From dealing with damaged discs to choosing the best file formats for streaming, having clear answers can make the process smoother. Here, we tackle some of the most common queries to help you with your DVD copying endeavors.
Can I Copy Scratched or Damaged DVDs?
Copying scratched or damaged DVDs can be a bit more challenging, but it’s often possible with the right approach. Here’s what you need to know:
- – Use Specialized Software: Some DVD ripping software comes equipped with features specifically designed to handle scratched or damaged discs. Programs like DVDFab and AnyDVD offer advanced error correction and recovery tools that can read and copy data from imperfect discs. These tools analyze the disc’s surface and attempt to recover as much information as possible.
- – Clean the Disc: Before attempting to copy a scratched DVD, gently clean the disc with a soft, lint-free cloth. Wipe the disc from the center outward in a straight line to avoid creating additional scratches. For more stubborn grime or scratches, consider using a disc cleaning solution or a specialized disc repair kit.
- – Try a Different Drive: If your DVD drive struggles to read the disc, try using a different drive. Some drives are better at reading damaged media due to variations in their optical sensors. Testing with another drive might improve your chances of successfully copying the disc.
- – Limitations of Recovery: Be aware that not all damaged discs can be fully recovered. Severe damage might lead to incomplete or corrupted copies. In such cases, consider consulting a professional data recovery service if the data is particularly valuable.
In summary, while copying scratched or damaged DVDs can be tricky, using specialized software and taking proper care of the disc can often yield successful results.
What’s the Best Format for Streaming?
When it comes to streaming your copied DVDs, selecting the right file format can make a significant difference in quality and compatibility. Here’s a breakdown of the best formats for various streaming scenarios:
- – MP4 (H.264): MP4 with H.264 compression is widely regarded as the best format for streaming. It strikes a perfect balance between high-quality video and efficient file size. Most streaming platforms and devices support this format, making it a versatile choice for various applications. It’s also compatible with a wide range of media players and streaming apps.
- – MKV: MKV (Matroska Video) is another excellent format, especially if you need to retain multiple audio tracks, subtitles, or chapters. MKV supports high-definition content and offers flexible features for advanced users. However, while many modern streaming devices and software support MKV, it’s not as universally compatible as MP4.
- – AVI: AVI (Audio Video Interleave) is an older format that supports high-quality video but often results in larger file sizes. It’s less commonly used for streaming due to its lack of modern compression efficiency compared to MP4. If file size is not a concern and you need high-quality video, AVI might be an option, though you may need additional software to ensure compatibility with streaming platforms.
- – WEBM: WEBM is a format designed specifically for web use, offering good video quality with relatively low file sizes. It’s supported by many web-based streaming services and browsers. While not as widely compatible as MP4, it’s a solid choice for web-based streaming scenarios.
In conclusion, MP4 with H.264 compression is generally the best format for streaming due to its balance of quality and compatibility. MKV is a great alternative if you need advanced features, while AVI and WEBM can be useful depending on your specific needs and target platforms..
Conclusion: Enjoy Your DVD Collection Anytime

Congratulations! You’ve navigated the intricacies of copying DVDs to your computer and are now equipped to enjoy your media in a more flexible and convenient format. As you embark on this journey, let’s recap the key benefits and get you inspired to start copying your own collection.
The Benefits of a Digital Library
Creating a digital library from your DVD collection offers a myriad of advantages that enhance your viewing experience:
- – Accessibility Anytime, Anywhere: With your DVDs copied to your computer, accessing your favorite movies and shows becomes a breeze. Whether you’re lounging on the couch or traveling, your entire media library is just a few clicks away. The convenience of having instant access to your content, without needing to dig through physical discs, is truly liberating.
- – Space Saving: Digitizing your DVDs helps free up valuable physical space. No more cluttered shelves or stacks of discs taking up room. A well-organized digital library allows you to keep your collection neat and tidy, making room for other essentials.
- – Enhanced Organization: Digital copies allow for superior organization compared to physical discs. Create folders, tag files, and use media management software to easily sort and locate your favorite titles. Search features and customizable playlists further streamline your media experience.
- – Improved Durability: Digital files are less susceptible to physical damage than their DVD counterparts. While scratched or damaged discs can become unplayable, digital copies remain intact as long as they are properly backed up and secured.
- – Easy Sharing and Streaming: Sharing your favorite movies with family and friends is simpler with digital files. Stream your content to different devices within your home network or even share files with loved ones, making your collection more versatile.
Ready to Start Copying?
Now that you understand the benefits and the steps involved, it’s time to get started on your own DVD copying project. With the right tools and a bit of preparation, you can transform your physical collection into a digital library that you can enjoy anytime, anywhere.
Follow the steps outlined in this guide, choose the software that best fits your needs, and make sure to back up and secure your files. As you begin the process, you’ll discover how easy and rewarding it is to have your entire media collection at your fingertips.
Embrace the convenience of digital media and enjoy the freedom of having your DVD library readily available. Here’s to countless hours of entertainment and a more organized, accessible media experience. Happy copying!
Recommended Resources and Tools
To make your DVD copying journey even smoother, it’s essential to have the right tools and resources at your disposal. From top-notch software to helpful guides, the following recommendations will ensure you have everything you need to efficiently and effectively convert your DVD collection into digital files.
Best Software Picks
Choosing the right software can make all the difference in your DVD copying experience. Here are some highly recommended options that cater to various needs and preferences:
- HandBrake: HandBrake is a popular, open-source tool renowned for its versatility and powerful features. It supports a wide range of formats and allows you to customize encoding settings to match your needs. With its user-friendly interface and robust functionality, HandBrake is ideal for both beginners and advanced users.
- DVDFab: DVDFab is a comprehensive suite of tools for DVD copying, ripping, and converting. It offers a range of features including advanced error correction for damaged discs and the ability to handle various formats. Whether you need to copy a DVD to your hard drive or convert it for different devices, DVDFab has you covered.
- MakeMKV: MakeMKV is an excellent choice for users who want to preserve the highest quality possible. It converts DVDs and Blu-rays into MKV files, maintaining original quality and supporting multiple audio tracks and subtitles. It’s especially useful if you prefer to keep your files in a lossless format.
- WonderFox DVD Ripper: WonderFox DVD Ripper is known for its reliable ripping and high-quality output. It supports a plethora of formats and is designed to handle encrypted DVDs. Its straightforward interface makes it a great choice for users looking for a quick and efficient way to copy their DVDs.
- AnyDVD HD: AnyDVD HD is a powerful tool that works in the background to remove copy protection from DVDs and Blu-rays. It’s particularly useful if you’re dealing with discs that have complex encryption. Combined with other software, AnyDVD HD can streamline your DVD copying process.
Helpful Tutorials and Guides
To further assist you in mastering the DVD copying process, the following tutorials and guides offer valuable insights and step-by-step instructions:
- HandBrake Official Documentation: The official HandBrake documentation provides in-depth information on using the software effectively. It includes detailed guides on setting up your encoding preferences and troubleshooting common issues. Perfect for users who want to get the most out of this powerful tool.
- DVDFab User Guides: DVDFab offers a comprehensive collection of user guides and video tutorials. These resources cover everything from basic operations to advanced features, ensuring you can make full use of DVDFab’s capabilities.
- MakeMKV Wiki: The MakeMKV Wiki is a treasure trove of information for users of this software. It includes FAQs, troubleshooting tips, and guides on handling various types of discs. This resource is invaluable for ensuring a smooth ripping process.
- YouTube Tutorials: YouTube is home to a plethora of video tutorials that cover various DVD copying software and techniques. Channels dedicated to tech tutorials often provide step-by-step videos that can help visualize the process and offer practical tips.
- Tech Forums and Communities: Engaging with tech forums and online communities can provide additional support and insights. Websites like Reddit, Stack Exchange, and specialized forums often have active discussions and user-generated content that can address specific questions or issues you might encounter.
By leveraging these recommended tools and resources, you can streamline your DVD copying process and ensure that you have all the support you need to succeed. Happy copying!
Share Your Experience
Now that you’re equipped with all the knowledge and tools to copy your DVDs with ease, it’s time to put your newfound skills into action. But don’t just stop there—share your journey and stay engaged with the community!
Tell Us About Your Journey!
We’d love to hear about your experiences as you embark on the journey of digitizing your DVD collection. What challenges did you face? Did you discover any tips or tricks that made the process smoother? Your insights could help others who are just starting out. Share your story in the comments below or on social media, and be sure to tag us so we can see how your project turned out. Your feedback and personal anecdotes not only enrich the community but also help others navigate their own DVD copying adventures.
Stay Updated with More Tips
The world of digital media is always evolving, and there’s always more to learn. To stay ahead of the curve and check out more of our posts. We regularly update our content with fresh guides, software reviews, and cutting-edge techniques to keep you informed and empowered. Don’t miss out on new developments and practical advice that can enhance your media management skills.
We’re excited to be part of your digital journey and look forward to hearing about your successes and discoveries. Keep exploring, keep learning, and happy copying!