Blu-Ray discs are a marvel, offering stunning visuals and crystal-clear audio that elevate your movie nights to an extraordinary experience. But as incredible as they are, there’s a hitch: physical discs are prone to scratches, wear, and the ever-looming danger of being lost. That’s where the fun of ripping Blu-Ray discs comes into play—a game-changer that allows you to preserve your favorite films in all their high-definition glory, digitally. Imagine having your entire Blu-Ray collection accessible at your fingertips, ready to be enjoyed on any device, anytime, anywhere. In this guide, you’ll discover a quick and simple way to unlock this convenience, empowering you to build a digital library that rivals any streaming service. Say goodbye to scratched discs and hello to a seamless cinematic experience, no matter where you are.
Introduction To Blu Ray Ripping

What is Blu-Ray Ripping? A Beginner’s Overview
Blu-Ray ripping might sound like a techie term, but it’s far more accessible than it seems. At its core, ripping is the process of extracting content from a Blu-Ray disc and converting it into a digital file. Think of it as a way to liberate your movies from the confines of a disc, allowing them to live freely on your devices. Once ripped, these files can be stored, edited, or even played on devices that don’t have a Blu-Ray drive, like your smartphone or tablet.
Imagine being able to watch your favorite Blu-Ray movies while traveling, without lugging around a portable player and a stack of discs. Ripping makes this possible by transforming those bulky discs into sleek digital files. It’s a straightforward process that opens up a world of convenience, especially in an era where digital media reigns supreme. And the best part? You don’t need to be a tech wizard to do it. With the right Blu-Ray ripping software and a bit of guidance, anyone can learn how to rip Blu-Ray discs.
Why You Might Want to Rip Blu-Ray Discs
There are plenty of reasons to consider ripping your Blu-Ray collection, and they go far beyond just freeing up shelf space. For one, discs are fragile. They can get scratched, lost, or damaged over time, potentially rendering your favorite movies unwatchable. By ripping your Blu-Ray discs, you create a digital backup that ensures you’ll never lose access to your prized collection, no matter what happens to the physical copies.
Another compelling reason is convenience. Digital files are far easier to manage and access. Whether you want to watch a movie on your laptop, tablet, or TV, having a digital version at the ready makes the process seamless. No more fumbling through cases or dealing with slow-loading menus; just click and play. Plus, with a digital library, you can easily organize your movies, add custom subtitles, and even tweak the video quality to suit your preferences.
And let’s not forget about the flexibility it offers. Ripping allows you to convert Blu-Ray content into different file formats, making it compatible with a wide range of devices and software. This means you’re not locked into one type of playback or storage. You have the freedom to watch your movies how and where you want.
Is Blu-Ray Ripping Legal? Understanding the Laws
Now, before you dive headfirst into the world of Blu-Ray ripping, it’s important to understand the legal landscape. The legality of ripping Blu-Ray discs is a bit of a gray area, varying depending on where you live. In some regions, it’s legal to rip discs for personal use, as long as you own the original copy and don’t distribute the digital files. This practice is often viewed as a form of backup, ensuring you don’t lose your content if the physical disc is damaged.
However, in other areas, ripping Blu-Ray discs might be restricted by copyright laws, even if it’s for personal use. The Digital Millennium Copyright Act (DMCA) in the United States, for example, generally prohibits the circumvention of copy protection mechanisms, which Blu-Ray discs often have. This means that, technically, ripping a Blu-Ray in the U.S. could be considered illegal, even if you’re not sharing the files.
That said, enforcement of these laws can be inconsistent, and many people choose to rip their discs anyway, under the assumption that they’re within their rights as the disc’s owner. It’s a personal decision, but one that should be made with a clear understanding of the potential legal implications. Ultimately, it’s about balancing the convenience of digital media with respect for the rights of content creators.
What You Need to Get Started
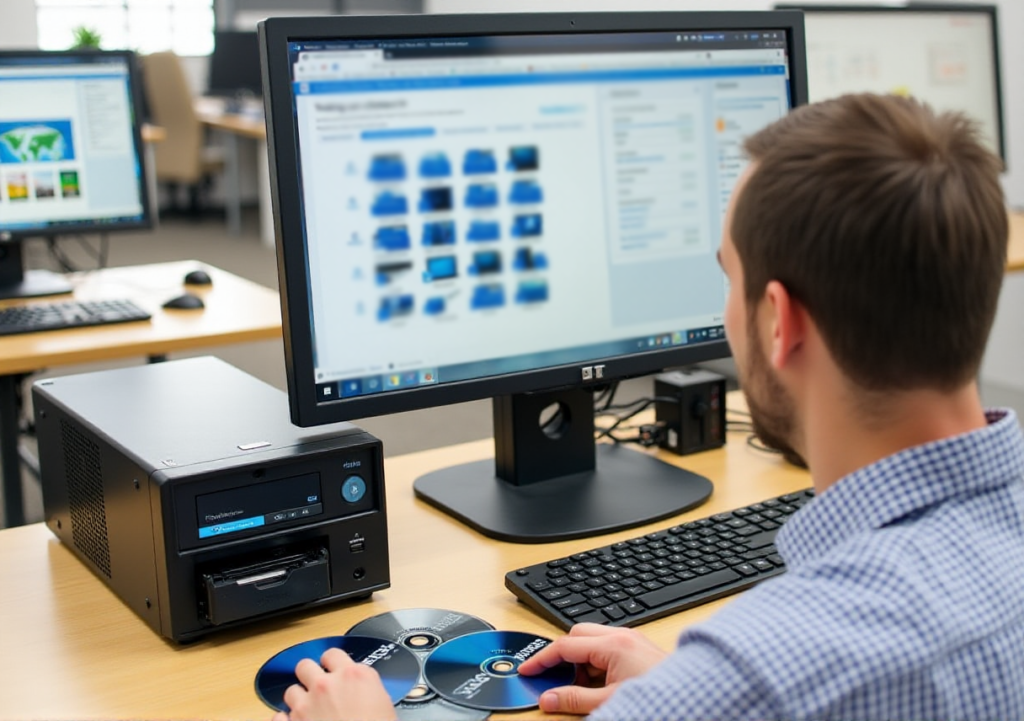
Essential Tools and Software for Blu-Ray Ripping
To get started with Blu-Ray ripping, you’ll need a few essential tools. First, a computer with a Blu-Ray drive—whether internal or external. If your computer lacks a Blu-Ray drive, you can easily purchase an external one that connects via USB. These drives are affordable, versatile, and compatible with most devices.
Next, you’ll need Blu-Ray ripping software. This software bypasses the copy protection on your discs and converts them into digital files. Popular options include MakeMKV and HandBrake. MakeMKV is great for creating high-quality digital copies, while HandBrake excels at compressing those files without sacrificing quality. Together, these tools provide a powerful solution for all your ripping needs.
Choosing the Right Blu-Ray Drive: What to Look For
Selecting the right Blu-Ray drive involves considering a few key factors. First is compatibility. Ensure the drive you choose works with your computer’s operating system—whether Windows, macOS, or Linux. Most drives are plug-and-play, requiring no additional software installation, but it’s wise to double-check.
Speed is another crucial factor. Blu-Ray discs hold a lot of data, so the faster the drive, the less time you’ll spend waiting for your rips to complete. Look for drives with high read speeds, like 6X or 8X. If you plan on ripping 4K UHD Blu-Rays, ensure the drive is 4K-capable, as not all drives can handle these discs.
Lastly, consider durability and build quality. A reliable Blu-Ray drive should feel sturdy and be capable of handling numerous rips without failing. Brands like LG, Pioneer, and ASUS are known for producing reliable, high-performance drives that stand the test of time.
[My Recommended USB Drive – LG Ultra HD Blu Ray Burner]
[My Recommended Internal Drive – LG WH16NS40 4K Blu Ray drive ]
Selecting the Best Ripping Software: Top Picks
With your Blu-Ray drive ready, it’s time to choose the best ripping software. MakeMKV is a top choice for its simplicity and effectiveness—it’s as close to a “one-click” solution as you’ll find. It rips the Blu-Ray content directly to an MKV file without compressing it, preserving the original quality.
HandBrake is your go-to for compression and conversion. After ripping your Blu-Ray with MakeMKV, you can use HandBrake to convert the MKV file into a more space-efficient format like MP4. HandBrake offers presets that optimize your file for different devices, whether you’re watching on a tablet, smartphone, or TV.
Understanding File Formats: MP4, MKV, and More
Understanding file formats is crucial to achieving the best results. MKV (Matroska Video) is preferred by many for its versatility, as it can store multiple video, audio, and subtitle tracks in a single file, preserving the full Blu-Ray experience.
MP4 is another popular format, known for its compatibility across devices. MP4 files are generally smaller and more compressed than MKV files but still deliver high-quality video and audio. For those looking to store movies on mobile devices or stream them online, formats like AVI might come into play, though they’re less common in the Blu-Ray ripping community.
Choosing the right file format depends on your needs—whether you prioritize quality, file size, or compatibility.
Setting Up Your Ripping Environment
Preparing Your Computer: System Requirements
Before diving into the world of Blu-Ray ripping, it’s essential to ensure your computer is up to the task. Ripping Blu-Ray discs demands a fair amount of processing power, storage, and memory. Ideally, your computer should have at least a dual-core processor, though a quad-core or higher is preferable for faster rips. A minimum of 4GB of RAM is required, but if you’re looking to handle large files or multitask while ripping, 8GB or more will provide smoother performance.
Storage is another critical factor. Blu-Ray movies can consume anywhere from 25GB to 50GB of space per disc, so having ample hard drive space is crucial. Consider using an external hard drive or a dedicated internal drive to store your ripped files. Solid-state drives (SSDs) are faster than traditional hard drives, offering quicker read/write speeds, which can significantly reduce the time it takes to rip a disc.
Installing the Blu-Ray Ripping Software
Once your computer is ready, the next step is to install the Blu-Ray ripping software. Start by downloading your chosen software—MakeMKV and HandBrake are both excellent options. MakeMKV is particularly easy to set up. Simply download the installer from the official website, run it, and follow the on-screen instructions. The software will be ready to use in just a few minutes.
HandBrake, on the other hand, is often used in conjunction with MakeMKV. After you’ve ripped the Blu-Ray disc to your computer using MakeMKV, you can use HandBrake to compress and convert the file to a more manageable size. Installing HandBrake is equally straightforward—download it from the official site, run the installer, and you’re good to go. Both programs are compatible with Windows, macOS, and Linux, so you can use them on virtually any computer.
Configuring Your Software for Optimal Performance
To get the best results from your Blu-Ray rips, a bit of software configuration is needed. Start with MakeMKV. The software is designed to be user-friendly, but tweaking a few settings can enhance your experience. For example, you can choose to rip only the main movie, excluding extras like trailers or bonus features. This reduces the file size and speeds up the ripping process. Make sure to select the highest possible quality settings to preserve the full HD or 4K quality of your Blu-Ray.
Next, move on to HandBrake for file conversion and compression. HandBrake offers a range of presets tailored to different devices, from smartphones to smart TVs. Choose a preset that matches your intended use. For instance, if you’re planning to watch the movie on a large screen, select a preset that maintains high resolution. HandBrake also allows you to adjust the bitrate, which controls the file size and video quality. A higher bitrate means better quality, but larger files.
In both programs, it’s essential to keep your software up-to-date. Regular updates often include bug fixes, performance improvements, and new features. Check for updates periodically to ensure you’re getting the best performance and the latest tools.
Step-by-Step Guide to Ripping Blu-Ray Discs
Ripping your first Blu-Ray disc might seem daunting, but it’s a straightforward process once you get the hang of it. Here’s a step-by-step guide to help you through:
- Insert the Blu-Ray Disc: Place the Blu-Ray disc into your Blu-Ray drive. Wait for your computer to recognize the disc.
- Open MakeMKV: Launch MakeMKV. The software should automatically detect the inserted disc. Click on the disc icon to start scanning.
- Select the Content to Rip: After the scan completes, MakeMKV will display a list of available titles and chapters. Typically, you’ll want to select the main movie title. Deselect any additional content you don’t need, like bonus features or trailers.
- Choose Your Destination: Specify the folder where you want the ripped file to be saved. MakeMKV will save the file in MKV format by default, which is ideal for preserving quality.
- Start Ripping: Click the “Make MKV” button to begin the ripping process. This might take some time, depending on the size of the disc and the speed of your drive.
- Convert with HandBrake: Once the ripping process is complete, open HandBrake. Load the MKV file you just created, select your desired output format (like MP4), and adjust any settings as needed. Click “Start Encode” to begin converting the file.
- Check Your File: Once HandBrake finishes, check your output file to ensure it meets your expectations. You should now have a digital copy of your Blu-Ray movie ready for viewing.
Troubleshooting Common Issues
What to Do If the Disc Won’t Load
Sometimes, even after doing everything right, the Blu-Ray disc might refuse to load. This can be frustrating, but don’t worry—there are a few steps you can take to troubleshoot the issue. First, check the disc itself. Blu-Ray discs are more prone to scratches and smudges than DVDs, so inspect the surface for any obvious damage. If you spot fingerprints or dust, gently clean the disc with a soft, lint-free cloth, wiping from the center outward.
If the disc appears clean but still won’t load, try ejecting and reinserting it. Sometimes, the drive doesn’t properly recognize the disc on the first attempt. You should also ensure that your Blu-Ray drive’s firmware is up to date, as outdated firmware can cause compatibility issues with newer discs. Manufacturers often release updates that improve drive performance and compatibility, so checking their website for the latest version is a good idea.
If all else fails, try loading the disc on a different computer or using a different Blu-Ray drive. This will help you determine if the issue lies with the disc itself or your hardware.
[Recommended – Disc Cleaning Kit]
Handling Error Messages During the Ripping Process
Encountering error messages during the ripping process is not uncommon. One of the most frequent errors is related to copy protection. Modern Blu-Ray discs often have advanced encryption that can sometimes trip up even the best ripping software. If you receive an error message indicating a problem with decryption, ensure that your ripping software is up to date. Software like MakeMKV regularly updates its decryption algorithms to handle new forms of copy protection.
Another common error message might relate to read errors, often caused by scratches or damage to the disc. If this occurs, try cleaning the disc and attempting the rip again. You might also want to lower the read speed of your Blu-Ray drive. Slowing down the read speed can sometimes help the drive get past difficult sections of the disc that cause read errors.
If you continue to encounter errors, consider trying a different ripping software or checking online forums dedicated to Blu-Ray ripping. These communities are often filled with users who have encountered and solved similar issues.
Fixing Audio/Video Sync Problems in Your Ripped Files
After successfully ripping a Blu-Ray disc, you might find that the audio and video are out of sync in the final file. This issue can be particularly annoying, but it’s usually fixable with a few adjustments. The first step is to identify the source of the problem. Sometimes, the issue arises from the ripping process itself, while other times it may be due to incorrect playback settings.
If the problem occurred during the ripping process, try re-ripping the disc using different settings. In MakeMKV, for example, you can adjust the audio delay settings, which can help sync the audio with the video. If you’re using HandBrake for file conversion, make sure the “Constant Frame Rate” (CFR) option is enabled. This setting ensures that the video plays at a consistent frame rate, reducing the likelihood of sync issues.
For files that are already ripped and out of sync, you can use video editing software like Avidemux or VLC Media Player to manually adjust the audio delay until it matches the video. These tools allow you to fine-tune the sync by milliseconds, helping you achieve perfect alignment.
By taking these steps, you can overcome the most common issues that arise during Blu-Ray ripping, ensuring that your digital copies are as flawless as the originals.
Enhancing Your Ripped Blu-Ray Files
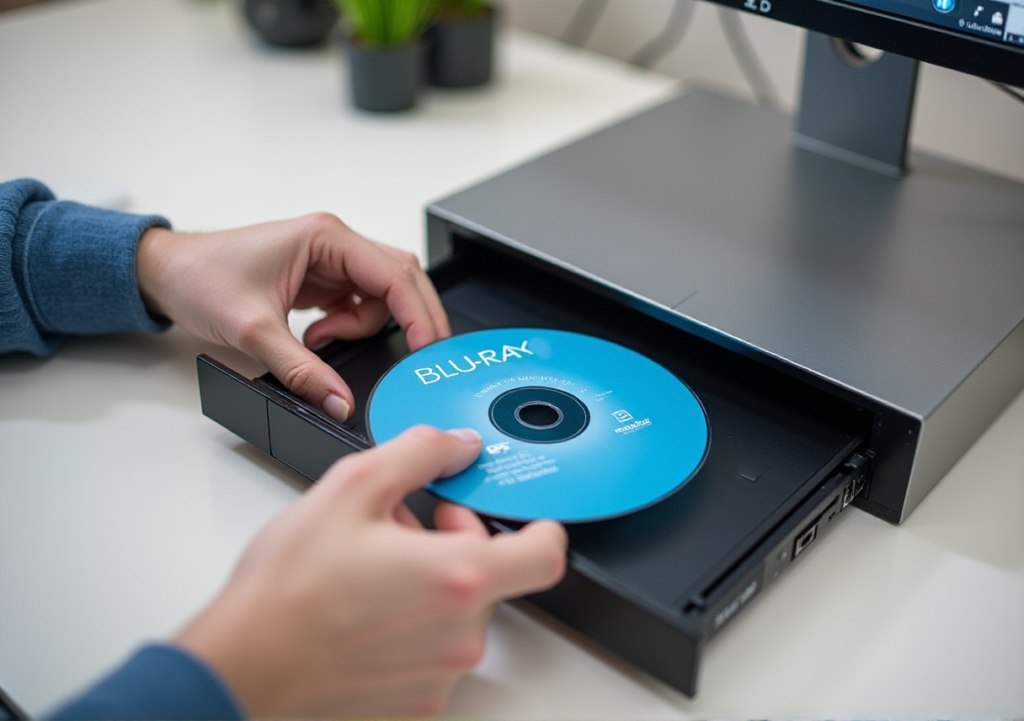
How to Compress Ripped Files Without Losing Quality
Once you’ve ripped your Blu-Ray disc, you might find that the resulting file is quite large. Compressing these files can save storage space without significantly impacting quality. To achieve this, use tools like HandBrake, which excels in file compression while maintaining high video quality.
Begin by opening HandBrake and loading your ripped file. Choose a preset that fits your needs—options like “Very Fast 1080p30” are excellent for balancing quality and file size. The key to preserving quality while compressing is to adjust the bitrate. A constant quality setting, typically set around RF 18-20 for HD content, allows HandBrake to compress the file efficiently without noticeable quality loss.
Another option is to use the H.265 codec, which offers superior compression compared to the older H.264 codec. H.265 reduces file size more effectively while retaining almost the same visual quality. However, be aware that H.265 can be more demanding on playback hardware, so ensure your devices support this format.
Adding Custom Subtitles to Your Ripped Movies
Custom subtitles can enhance your viewing experience, especially if you’re watching foreign films or need subtitles for accessibility reasons. Adding subtitles involves a few straightforward steps.
First, find or create subtitle files in SRT or ASS format. These files contain the text of the subtitles and their timing. Websites like OpenSubtitles or Subscene offer a vast library of subtitles for various movies and TV shows.
To embed subtitles into your ripped video, use software like HandBrake or MKVToolNix. In HandBrake, go to the “Subtitles” tab, where you can import your subtitle file and choose to either embed it into the video stream or keep it as a selectable track. For more advanced options, MKVToolNix allows you to merge subtitles with your video file, offering extensive customization for subtitle appearance and timing.
Converting Ripped Files to Different Formats
Converting your ripped Blu-Ray files to different formats can make them compatible with various devices and media players. For example, MP4 is widely supported and ideal for streaming, while MKV offers greater flexibility with multiple audio tracks and subtitles.
To convert your files, use HandBrake or a similar conversion tool. In HandBrake, load your ripped file and choose a format preset that fits your target device. MP4 is a good choice for general use, while MKV is perfect for archiving high-quality videos.
When converting, pay attention to the codec settings. H.264 is a solid choice for MP4 due to its balance of quality and file size. For MKV, you might use H.265 if you want better compression. Adjust the resolution and bitrate settings according to your needs—higher resolutions and bitrates provide better quality but result in larger files.
For more advanced conversions, tools like FFmpeg offer extensive options for tweaking file parameters. FFmpeg is a command-line tool that provides detailed control over every aspect of the conversion process, from codecs to container formats.
By compressing files effectively, adding custom subtitles, and converting to different formats, you can tailor your ripped Blu-Ray content to suit any viewing preference, ensuring both convenience and quality.
Storing and Organizing Your Ripped Blu-Ray Collection
Best Practices for File Naming and Organization
Organizing your ripped Blu-Ray collection begins with a solid file naming strategy. Start by using a consistent format for your filenames to make sorting and searching easier. A good convention might be “Title (Year) – Quality – Format,” for example, “Inception (2010) – 1080p – MP4.” Including the year and quality ensures you can quickly identify the version of the movie you have.
For further organization, create a folder structure that categorizes your movies by genre, year, or series. For instance, you could have main folders for “Action,” “Drama,” “Comedy,” and so on, with subfolders for specific years or franchises within those categories. This method helps you find movies quickly and keeps your collection neat and accessible.
Additionally, consider adding metadata to your files. Tools like MediaInfo or the built-in options in Plex can help you tag movies with details like cast, plot summaries, and genres. Properly tagged files make searching and sorting a breeze, especially as your collection grows.
Consider using a media management tool like Plex or Kodi. These tools help you organize your files, create custom playlists, and even stream your movies to different devices. It’s like having your very own streaming service with all of your favorite movies and TV shows.
How to Store Ripped Files Safely: External Drives vs. Cloud Storage
Backing up your ripped files is crucial to prevent data loss. Regular backups ensure that even if your primary storage fails, you won’t lose your entire movie collection. Consider using an external hard drive or cloud storage service for backups. External drives provide a reliable offline backup, while cloud services offer the convenience of remote access and automatic updates.
Many cloud storage providers, like Google Drive, Dropbox, and OneDrive, offer ample space and easy file sharing. For large collections, a combination of external and cloud storage might be the best solution. Ensure your backup solution is regularly updated with your latest files to keep your library safe and current.
Network Attached Storage (NAS) devices are like your personal media hub, offering a fantastic way to store and stream your media files with ease. Imagine having a central, always-on server that holds all your photos, music, and movies, accessible from any device in your home or even on the go. NAS devices connect to your home network and allow multiple users to access and stream content simultaneously without needing a dedicated PC running 24/7. They’re perfect for families or anyone who wants to keep their digital life organized and accessible. Popular brands like Synology and QNAP, offer robust NAS solutions with user-friendly interfaces and powerful features. Synology is renowned for its intuitive software and versatile apps, QNAP stands out with its high-performance models and extensive customization options. Whether you’re a media enthusiast looking to create your own streaming server or just want a secure place to keep your digital treasures, a NAS device is a game-changer.
Creating a Media Library: Software Solutions to Consider
To manage your ripped Blu-Ray collection efficiently, consider using media library software. These tools can help you catalog, access, and enjoy your movies with ease.
Plex is one of the most popular choices for managing a media library. It organizes your collection with rich metadata, including movie posters, synopses, and ratings. Plex also offers streaming capabilities, allowing you to watch your movies on various devices from anywhere in your home network or even remotely.
Kodi is another robust option for media management. It’s highly customizable and supports a wide range of plugins and extensions. Kodi can organize your files, manage metadata, and even integrate with streaming services for a comprehensive media experience.
For a simpler solution, consider software like MediaMonkey or VLC Media Player, which offer basic media library features and are great for smaller collections. These tools are user-friendly and provide essential features for file organization and playback.
By following best practices for file naming and organization, choosing the right storage solution, and utilizing media library software, you’ll keep your ripped Blu-Ray collection well-organized and easily accessible. This ensures that your movie-watching experience remains seamless and enjoyable, no matter how extensive your collection becomes.
Playing Your Ripped Blu-Ray Files
Recommended Media Players for Ripped Blu-Ray Files
Once your Blu-Ray discs are ripped and ready, you’ll need reliable media players to enjoy them. For a seamless playback experience, consider using players that support a wide range of formats and offer robust features.
VLC Media Player stands out as a versatile and free option. It supports virtually all video and audio formats, including MP4, MKV, and more. VLC’s simple interface and extensive codec support make it a favorite among users. It also offers features like subtitle synchronization and video adjustments, which can enhance your viewing experience.
Media Player Classic – Home Cinema (MPC-HC) is another excellent choice. This lightweight player is easy on system resources and supports high-definition content effortlessly. MPC-HC’s straightforward design is ideal for users who prefer a no-frills approach without sacrificing functionality.
For a more advanced option, PotPlayer provides an array of customization features. It supports a wide variety of formats and offers extensive settings for video and audio playback. PotPlayer also integrates well with various subtitle formats, making it a solid choice for multilingual content.
Streaming Your Ripped Collection to Other Devices
To enjoy your ripped Blu-Ray files on different devices throughout your home, setting up a streaming solution can be highly effective. Plex is a top choice for streaming your media library. It organizes your collection, fetches metadata, and streams content to devices like smart TVs, tablets, and smartphones. Plex’s server-client architecture ensures that your media is accessible from anywhere within your home network or even remotely, provided you have a Plex account.
Emby is another robust option, offering similar features to Plex with a focus on user customization. It supports a variety of devices and provides features like live TV and DVR, expanding your media streaming capabilities.
For a more hands-on approach, Kodi can be configured with various add-ons to stream ripped files. Kodi’s flexibility allows you to customize your media center to your liking, integrating with different streaming services and home automation systems.
Syncing Ripped Movies with Your Mobile Devices
To take your ripped movies on the go, syncing them with mobile devices is key. Start by converting your files into formats compatible with your mobile devices, such as MP4 for iPhones and Android phones. Tools like HandBrake are invaluable for this, allowing you to adjust resolution and bitrate to suit your device’s screen size and storage capacity.
Once converted, use iTunes for iOS devices or Google Drive and Dropbox for Android devices to transfer your files. Simply upload your converted movies to the cloud storage service and download them onto your mobile device. This method provides easy access to your media library from anywhere with an internet connection.
For direct transfers, you can use USB cables to connect your device to your computer. Transfer the files manually into the appropriate media folder on your mobile device. Many smartphones also support media file management apps that make this process straightforward.
By using recommended media players, setting up efficient streaming solutions, and syncing files with your mobile devices, you ensure that your ripped Blu-Ray collection is always accessible and enjoyable, whether you’re at home or on the move.
Maximizing the Quality of Your Ripped Movies
Tips for Maintaining High Video and Audio Quality
When it comes to ripping Blu-Ray discs, preserving high video and audio quality is essential to ensure your digital copies match the original. Here are some tips to help you achieve the best possible results.
First, choose ripping software that offers advanced settings for video and audio quality. Software like MakeMKV and HandBrake provide customizable options that allow you to control various aspects of the ripping process. Opt for settings that maintain the original resolution and bit depth of the video. For instance, selecting the “Passthrough” option in HandBrake ensures that the original video stream is preserved without unnecessary compression
Next, pay attention to the codec you use. H.264 is a popular choice for maintaining quality while achieving efficient compression. However, H.265 (HEVC) offers even better compression, which can help preserve quality while reducing file size. Choose the codec based on your playback devices’ compatibility and your storage requirements.
When adjusting audio settings, ensure that you’re using high-quality audio tracks. Opt for lossless formats such as AAC or FLAC if preserving audio fidelity is crucial. HandBrake allows you to select the audio codec and bitrate, so choose a higher bitrate for better audio quality. Typically, a bitrate of 192 kbps to 320 kbps is sufficient for high-quality audio.
Understanding Bitrate: Balancing Quality and File Size
Bitrate plays a pivotal role in the balance between quality and file size. It determines how much data is processed per second of video or audio. A higher bitrate generally results in better quality but larger file sizes, while a lower bitrate reduces file size at the expense of quality.
For video, a bitrate of 5,000 to 10,000 kbps is often recommended for 1080p content. This range provides a good balance between maintaining visual fidelity and managing file size. For 4K content, you might need a bitrate of 20,000 kbps or higher to ensure that the detail and clarity are preserved.
When configuring your ripping software, look for options that let you control the constant quality (CQ) or average bitrate (ABR). Constant Quality (CQ) mode maintains a uniform quality level throughout the video, adjusting the bitrate as needed. This method can be beneficial for ensuring that key scenes retain their quality. Average Bitrate (ABR) mode sets a fixed bitrate across the entire video, which can result in varying quality but more predictable file sizes.
For audio, choose a bitrate that suits your needs. While lower bitrates like 128 kbps might be acceptable for casual listening, higher bitrates (192 kbps or more) are preferable for a richer sound experience. If possible, use variable bitrate (VBR) encoding, which adjusts the bitrate dynamically based on the complexity of the audio content, providing a balance between quality and file size.
By carefully selecting your ripping settings and understanding how bitrate affects quality and file size, you can ensure that your ripped Blu-Ray movies retain the highest possible standards. This attention to detail will allow you to enjoy your movies with superb audio and visual clarity, making your digital collection a worthy alternative to the original discs.
Advanced Blu-Ray Ripping Techniques
Batch Ripping: How to Rip Multiple Discs at Once
For avid movie collectors or those with extensive Blu-Ray libraries, batch ripping can be a game-changer. This technique allows you to rip multiple discs simultaneously, saving both time and effort.
Begin by using software that supports batch processing, such as MakeMKV or DVDFab. With MakeMKV, you can queue up multiple discs and let the software handle the ripping process consecutively. Simply load each disc into your Blu-Ray drive and configure your settings once—MakeMKV will automatically start processing each disc in turn.
If you’re using DVDFab, you can set up a batch job by selecting the discs you want to rip and configuring the output settings. DVDFab’s multi-threaded processing can significantly speed up the batch ripping process, especially if you have a powerful computer with multiple drives.
Ensure your system is equipped to handle the load. A robust setup with ample storage and a fast Blu-Ray drive will help manage multiple simultaneous rip jobs efficiently. Additionally, consider investing in additional Blu-Ray drives if you frequently work with large collections.
Creating Custom Blu-Ray Rips with Menus and Chapters
For those who prefer a more sophisticated ripping experience, creating custom Blu-Ray rips with menus and chapters can provide a more interactive and organized media experience. This process involves preserving or creating your own navigational elements within the ripped file.
To achieve this, HandBrake and MKVToolNix are invaluable tools. Start with HandBrake to rip the main content, and then use MKVToolNix to add custom menus and chapters. MKVToolNix allows you to create interactive menus and manage chapters, so you can navigate your movie as if you were using the original Blu-Ray disc.
Another approach is to use BDInfo and TSMuxer for detailed control over the structure of your rip. BDInfo helps you analyze the Blu-Ray structure and identify the chapters and menu options, while TSMuxer can help you merge these elements into your final file.
For a more integrated solution, Plex or Kodi can handle your custom rips with menus and chapters. These media servers can manage and display your organized content, allowing you to access your movies and navigate through chapters seamlessly.
Using Command Line Tools for Automated Ripping
For tech-savvy users, command line tools can provide advanced control and automation for ripping Blu-Ray discs. MakeMKV’s CLI (Command Line Interface) and FFmpeg are popular choices for this task.
With MakeMKV CLI, you can script the ripping process to automate the handling of multiple discs or specific settings. This is especially useful if you regularly rip large numbers of discs. The command line syntax allows you to set parameters for output format, destination folders, and more.
FFmpeg, while primarily known for video conversion, can be used in conjunction with other tools for ripping. You can write scripts to handle batch processing or automate quality settings, making it a powerful option for those familiar with command line operations.
To set up automated ripping, write scripts that call these tools with predefined parameters. You might use cron jobs or scheduled tasks to run these scripts at regular intervals, ensuring your ripping tasks are managed efficiently without manual intervention.
By mastering these advanced Blu-Ray ripping techniques, you can streamline your media management, create custom rips that suit your preferences, and harness the power of automation to handle large collections with ease. These methods enhance your ripping experience and ensure your digital media library is as functional and enjoyable as possible.
Legal and Ethical Considerations
The Importance of Respecting Copyright Laws
When it comes to ripping Blu-Ray discs, it’s crucial to navigate the legal landscape with care. Copyright laws are designed to protect the rights of content creators and distributors, ensuring that their intellectual property is not used without permission. These laws apply to Blu-Ray discs, which are copyrighted works, and violating them can have serious legal consequences.
Ripping Blu-Ray discs without authorization can infringe on copyright, especially if you share or distribute the ripped content. Even though the process of ripping itself might seem benign, distributing or making copies of the content without permission can be considered copyright infringement. It’s essential to be aware of these regulations and to understand that respecting copyright laws is not just a legal obligation but an ethical one.
How to Rip Blu-Rays for Personal Use Only
To stay within legal boundaries, it’s important to limit your Blu-Ray ripping activities to personal use only. The law typically allows for making copies of media you own for personal use under certain circumstances, such as for backup purposes. However, these copies should not be shared or distributed in any form.
When ripping Blu-Rays for personal use, focus on creating digital backups of your collection. These backups should remain private and should not be shared with others or uploaded to online platforms. By keeping your ripped files solely for personal access and ensuring they are stored securely, you can enjoy the convenience of digital copies without breaching copyright laws.
Ethical Alternatives to Blu-Ray Ripping
If you’re concerned about legal and ethical issues, consider alternative methods to enjoy your favorite movies without the need for ripping Blu-Rays. Streaming services provide a legal and convenient way to access a vast library of films and TV shows. Services like Netflix, Amazon Prime Video, and Hulu offer extensive collections that can be streamed on various devices, eliminating the need to rip physical media.
Another option is to purchase digital copies of movies directly from platforms like iTunes or Google Play Movies. These digital versions are licensed for personal use and can be accessed on multiple devices, giving you the flexibility of digital content without any legal concerns. Additionally, some Blu-Ray discs come with digital download codes, allowing you to obtain a digital copy of the movie legally when you buy the physical disc.
For movie enthusiasts who enjoy collecting physical media, consider investing in high-quality Blu-Ray collections that include digital copies. This way, you get the best of both worlds: the superior quality of Blu-Ray and the convenience of digital access.
By respecting copyright laws, focusing on personal use, and exploring ethical alternatives, you can enjoy your movie collection responsibly. Maintaining an awareness of these considerations ensures that you’re not only enjoying your media in a legal manner but also supporting the creators and distributors who make it all possible.
Some Final Words On Blu Ray Ripping

Recap of the Ripping Process: From Disc to Digital
As we wrap up this comprehensive guide on ripping Blu-Ray discs, let’s take a moment to recap the journey from physical disc to digital file. We started by exploring the fundamentals of Blu-Ray ripping, understanding why you might want to convert your physical collection into digital format, and ensuring you’re navigating within legal boundaries.
The process began with gathering the necessary tools and setting up your environment. From selecting the right Blu-Ray drive and ripping software to configuring your computer for optimal performance, each step laid the foundation for a successful ripping experience. Once equipped, you dove into the actual ripping process—loading your disc, choosing the appropriate ripping mode, and fine-tuning settings for resolution, audio, and subtitles.
Troubleshooting common issues helped ensure a smooth operation, addressing potential problems like disc loading errors or audio-sync issues. Enhancing your ripped files with custom features, such as compressing without quality loss or adding subtitles, allowed you to tailor your collection to your preferences. Storing and organizing your digital library efficiently kept your collection accessible and neatly managed.
Playing your ripped files across various devices, and maximizing the quality of your movies through bitrate management, ensured a premium viewing experience. Advanced techniques like batch ripping, creating custom rips with menus, and using command line tools provided you with sophisticated methods to streamline and elevate your media handling.
Final Tips for a Smooth Blu-Ray Ripping Experience
To make your Blu-Ray ripping experience as smooth as possible, keep a few final tips in mind. Always ensure your ripping software and hardware are up-to-date to avoid compatibility issues and benefit from the latest features and improvements. Regularly check for software updates or patches that might enhance functionality or resolve known bugs.
Maintaining a clean and organized workspace will help you avoid accidental errors during the ripping process. Properly labeling and categorizing your ripped files from the start will save you time and hassle later on. Additionally, periodically back up your digital collection to prevent data loss from hardware failure or other unforeseen issues.
When experimenting with settings, consider doing a test run with a single disc to ensure your configurations produce the desired results. This approach minimizes the risk of wasting time on multiple discs if adjustments are needed.
Encouragement to Share Your Experience and Ask Questions
Your journey into the world of Blu-Ray ripping is both exciting and empowering, and sharing your experiences can be incredibly valuable to others. Whether you’ve encountered unique challenges, discovered efficient methods, or have tips of your own, your insights can help fellow enthusiasts and newcomers navigate the process more effectively.
Feel free to ask questions or seek advice from communities or forums dedicated to Blu-Ray ripping. Engaging with others who share your interests can provide new perspectives and solutions to any issues you may encounter. Your experiences and questions not only contribute to a supportive community but also help in refining and expanding the collective knowledge on this topic.
As you continue to build and enjoy your digital media library, remember that the process of ripping Blu-Rays is a blend of technology, creativity, and personal preference. Embrace the journey, and enjoy the convenience and satisfaction of having your favorite movies at your fingertips in the digital age.
Disclaimer: This article contains affiliate links. If you purchase an item through the link I will earn a small commission at no extra cost to you.