In a world where streaming services dominate, there’s something undeniably special about owning your music. The tactile experience of holding a CD, the thrill of discovering forgotten tracks, and the satisfaction of curating a personal collection are irreplaceable. But why let these moments fade into obscurity? By ripping your CDs to digital formats like FLAC and MP3, you can preserve your music in pristine quality while enjoying the convenience of modern technology. Imagine accessing your entire library—every note, every lyric—on any device, at any time, without compromising sound fidelity. Whether you’re an audiophile seeking lossless perfection or simply want to digitize your collection, this guide will show you how to rip CDs to FLAC, MP3, and more. Get ready to unlock the full potential of your music library with just a few clicks.
Introduction: Why Ripping CDs Still Matters
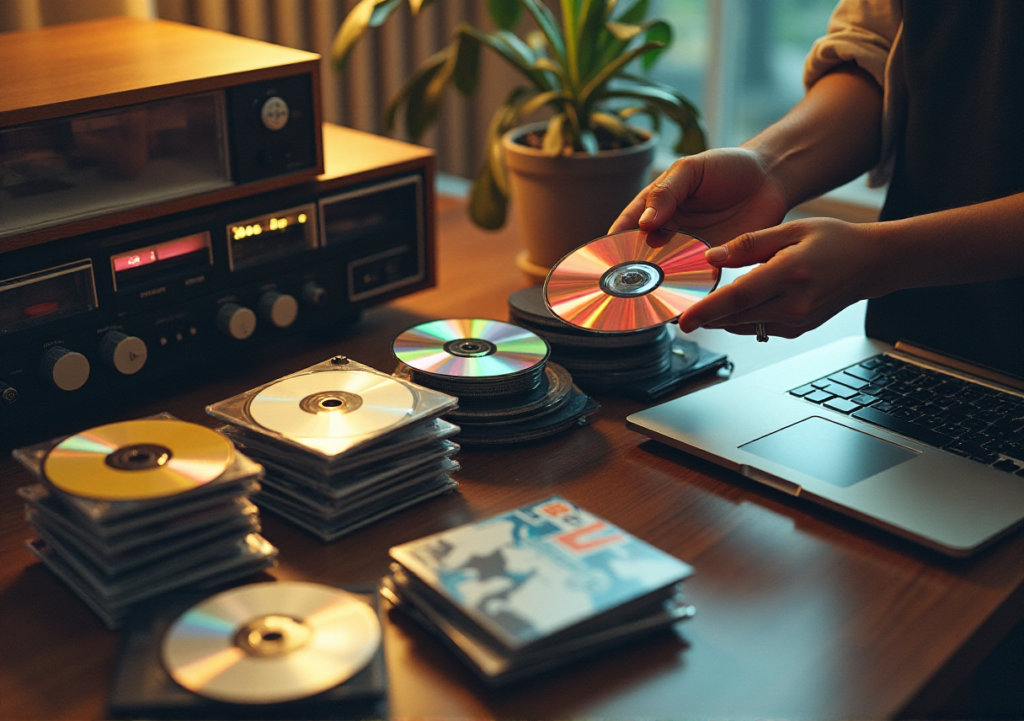
The Joy of Owning Physical Music: Why CDs Aren’t Dead Yet
In an era dominated by digital streaming, there’s a certain allure to holding a CD in your hands. The tactile feel of the disc, the crisp artwork that tells a story, the liner notes filled with insights from the artist—all of these elements contribute to a sensory experience that digital files simply can’t replicate. For many, CDs are more than just a medium for music; they are a gateway to memories, a tangible connection to a specific time and place. Each disc carries with it the moments when you first discovered that album, the endless hours spent playing it on repeat, and the deep, personal connection formed with the music.
Despite the rise of streaming giants, CDs remain a cherished part of many music lovers’ collections. They represent a physical manifestation of one’s musical journey, a carefully curated archive of life’s soundtrack. And while the convenience of streaming is undeniable, there’s something profoundly satisfying about owning a physical piece of the music you love. The act of choosing a CD, inserting it into a player, and listening to it in its entirety, without the distractions of shuffled playlists or algorithm-driven suggestions, is an intentional act of appreciation.
Benefits of Ripping CDs: Convenience, Quality, and Longevity
Ripping your CDs into digital audio formats like FLAC or MP3 is not just about going digital; it’s about preserving the integrity of your collection while embracing the conveniences of modern technology. Let’s talk quality first—FLAC, or Free Lossless Audio Codec, allows you to rip your CDs without any loss of audio quality. This means that every nuance, every subtlety that the artist intended is preserved, untouched by the compression that often accompanies digital formats like MP3. It’s the closest thing to having the artist in the room with you.
But let’s not dismiss the practicalities. Ripping your CDs means you can take your entire digital music library with you, wherever you go. Imagine having your favorite albums accessible on your phone, your computer, or your car’s stereo system, all without the need for a Wi-Fi connection. This convenience is priceless, particularly in a world where we are constantly on the move.
Moreover, ripping CDs to digital formats ensures the longevity of your music collection. Physical CDs, while durable, are not immune to wear and tear. Over time, they can get scratched, damaged, or simply lost. By converting your CDs to digital files, you are safeguarding your collection against the ravages of time. You’re not just backing up your music; you’re future-proofing it.
In summary, ripping CDs isn’t just a nod to nostalgia—it’s a practical, forward-thinking move that blends the best of both worlds: the timeless joy of physical music and the boundless possibilities of digital convenience. Whether you’re an audiophile seeking the ultimate in sound quality or a casual listener wanting easy access to your favorite tunes, ripping your CDs to FLAC, MP3, or other formats is a simple yet powerful way to keep your music alive and well in the digital age.
Understanding Audio Formats: FLAC, MP3, and More
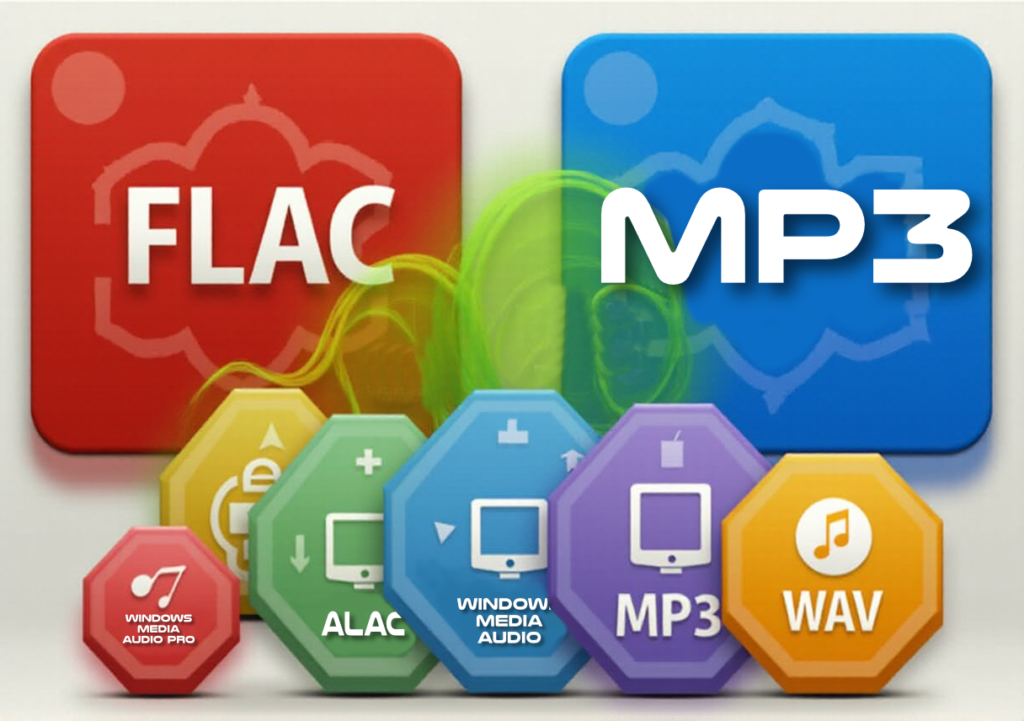
FLAC vs. MP3: What’s the Difference?
When it comes to CD ripping, choosing the right audio format is crucial. Two of the most commonly used formats are FLAC and MP3, but they serve very different purposes. FLAC, or Free Lossless Audio Codec, is the go-to choice for audiophiles who crave the purest sound quality. It’s a lossless format, meaning that it retains all the audio data from the original recording, ensuring that not a single note is lost. Imagine listening to a track and hearing every instrument, every breath of the singer, with the same clarity as the artist intended. That’s FLAC.
On the other hand, MP3 is a lossy format, which means some audio data is discarded during compression to reduce file size. This format is incredibly popular due to its small file size, which makes it ideal for portable devices with limited storage. However, this convenience comes at a cost—some of the audio quality is sacrificed in the process. The trade-off between FLAC and MP3 ultimately boils down to your priorities: do you value pristine sound quality or the ability to carry a massive library in your pocket?
The Pros and Cons of Popular Audio Formats
While FLAC and MP3 are the heavy hitters, there are several other audio formats worth considering. WAV, for instance, is another lossless format that offers excellent sound quality, but it’s even larger than FLAC files and lacks the ability to store metadata like album art or track titles. Then there’s AAC, the format favored by Apple devices, which provides better sound quality than MP3 at similar bitrates, making it a popular choice for those in the Apple ecosystem.
OGG is another format to be aware of, particularly for those using open-source software or streaming platforms like Spotify, which uses a variant of OGG for its streams. OGG files are smaller than FLAC but generally offer better quality than MP3 at equivalent bitrates. However, the main drawback is compatibility—not all devices or software support OGG files, so it’s a less versatile option.
Choosing the right format involves balancing several factors: audio quality, file size, and compatibility with your devices. If you’re archiving your music and want to ensure the highest quality, FLAC or WAV might be the best options. For everyday listening on a variety of devices, MP3 or AAC might be more practical. Understanding these trade-offs is key to making an informed decision.
Why Choose FLAC for Your Music Collection?
For those who prioritize quality above all else, FLAC is the clear choice for building a digital music library. Unlike MP3, which strips away certain audio frequencies to compress files, FLAC retains every detail of the original recording. This is particularly important if you have a high-end audio system or plan to edit or remaster your tracks in the future—FLAC files provide the richest, most accurate sound reproduction available.
Another advantage of FLAC is that it’s a non-proprietary, open-source format. This means it’s widely supported across a range of platforms and devices, and you won’t be locked into any particular ecosystem. Furthermore, FLAC files can be easily converted to other formats without any loss in quality, offering a flexibility that other formats simply can’t match.
Ultimately, choosing FLAC for your music collection is about preserving the full depth and texture of your music. It’s an investment in quality that ensures your favorite albums sound just as good today as they will decades from now. Whether you’re rediscovering old favorites or ripping new acquisitions, FLAC offers a level of fidelity that keeps your music sounding its best, no matter how technology evolves.
What You’ll Need to Get Started
Essential Tools: CD Drive, Software, and Storage
Before you begin CD ripping, it’s important to gather the essential tools that will make the process smooth and efficient. First and foremost, you’ll need a reliable CD drive. While many modern computers no longer include built-in CD drives, external CD drives are widely available and relatively inexpensive. Look for one that’s compatible with your system, whether it’s USB-A or USB-C, and ensure it supports both CDs and DVDs for added versatility.
Next, you’ll need the right software. There are many CD ripping software options available, each with its own strengths and weaknesses. This software will be responsible for audio extraction from your CDs and converting it into the digital audio formats of your choice. We’ll dive deeper into software choices in the next section.
Finally, consider your storage needs. High-quality FLAC files can take up significant space, so having ample storage is crucial. An external hard drive or a high-capacity SSD is a smart investment, particularly if you plan to digitize an extensive collection. Cloud storage is another option, providing easy access to your digital music library from any device, though you’ll want to ensure it offers enough space and robust security features.
Choosing the Right Software: Free vs. Paid Options
The software you choose will play a critical role in the CD to digital process, and there are plenty of options, both free and paid, to consider. If you’re just getting started and looking for a cost-effective solution, free software like Exact Audio Copy (EAC) or Fre
offers powerful features without the price tag. EAC, in particular, is well-regarded for its accuracy and ability to handle scratched or damaged CDs, making it a great choice for those looking to preserve older collections.
On the other hand, paid options like dBpoweramp offer more advanced features, including batch conversion, faster ripping speeds, and more robust file management capabilities. dBpoweramp is known for its user-friendly interface and comprehensive support for a wide range of audio file formats. The added convenience and efficiency of paid software can be well worth the investment, especially if you’re working with a large library or need more control over the ripping process.
When choosing software, consider your specific needs—do you require advanced features, or are you simply looking for a reliable, straightforward option? Also, think about the long-term benefits of paid software, including regular updates and customer support, which can be invaluable as you build and maintain your digital audio library.
Preparing Your CDs: Tips for a Clean and Smooth Ripping Process
Before you start ripping, it’s important to ensure your CDs are in the best possible condition. A clean disc is essential for accurate ripping, as even minor scratches or smudges can cause errors in the digital files. Start by inspecting each CD for visible dirt or debris. A soft, lint-free cloth can be used to gently clean the surface—wipe in straight lines from the center of the disc outward, avoiding circular motions that can cause additional scratches.
[RECOMMENDED: Disc Cleaning Kit]
For more stubborn spots, a small amount of distilled water or isopropyl alcohol on the cloth can help. Be gentle, as CDs are delicate, and avoid using household cleaners that could damage the disc. If you encounter a disc that’s particularly scratched, consider using a CD repair kit before attempting to rip it.
Proper preparation ensures a smoother ripping process, reducing the likelihood of errors and ensuring that the digital copy accurately reflects the original recording. By taking the time to prepare your CDs, you’re not just preserving music—you’re maintaining the integrity and quality of your entire collection.
Step-by-Step Guide: How to Rip CD to FLAC
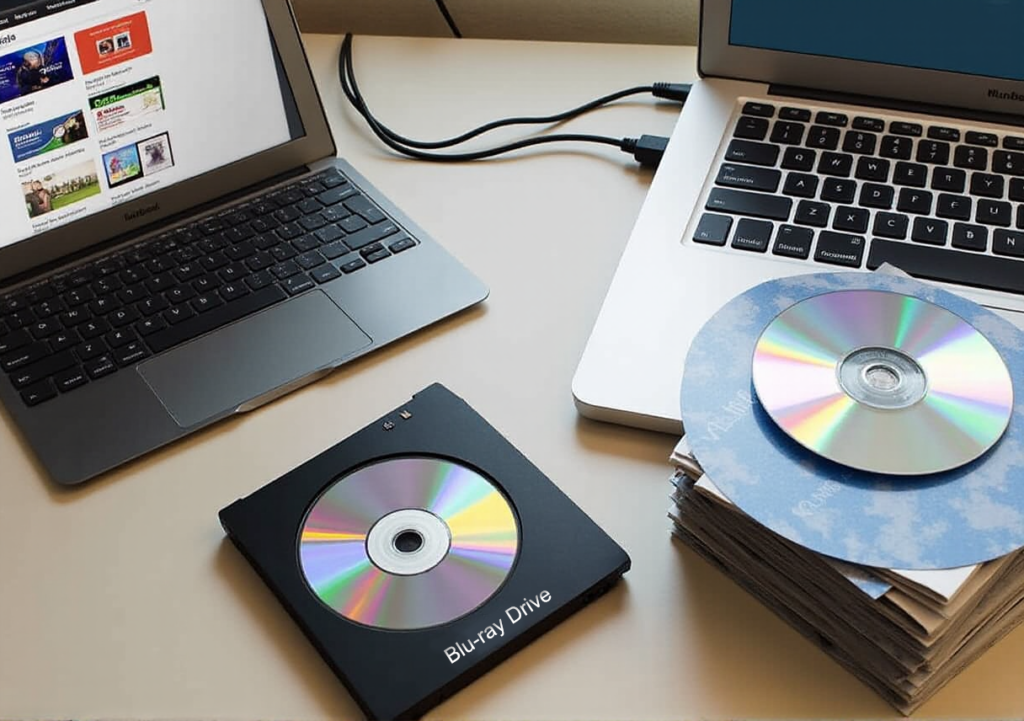
Setting Up Your Software for FLAC Ripping
Once you’ve chosen your ripping software, it’s time to set it up for FLAC. Most CD ripping software, whether free or paid, will allow you to choose the output format before you begin. Start by launching the software and inserting your CD into the drive. The software should automatically detect the disc and display its contents, including track names, album title, and artist information. If the metadata isn’t automatically filled in, you may need to manually input or correct it.
Next, navigate to the settings or preferences section of your software and select FLAC format as your output format. Ensure that the software is set to rip at the highest possible quality—this typically means a setting of 16-bit or 24-bit, depending on the original CD quality. Some software may also allow you to choose the compression level for FLAC files. While FLAC is a lossless format, lower compression levels can result in slightly smaller file sizes without sacrificing quality. Choose the level that best balances file size and performance for your needs.
Optimizing FLAC Settings for the Best Audio Quality
To ensure the highest possible audio quality, take a moment to optimize your FLAC settings. Most software will offer a range of options that can be fine-tuned for the best results. First, check the bit depth and sample rate settings. A standard CD is typically 16-bit and 44.1 kHz, so these should be your default settings. However, if you’re working with high-resolution audio CDs, you may want to increase these settings to 24-bit or even 96 kHz to capture more detail.
Another setting to consider is error correction. Many ripping programs offer an error correction mode, which can help ensure that scratches or other imperfections on the CD don’t affect the quality of the ripped files. While this process can take longer, it’s worth the extra time to ensure a flawless rip. Additionally, some software allows you to rip a test track first—this can help you verify that your settings are correct before committing to ripping the entire CD.
Finally, pay attention to the metadata tagging settings. Properly tagging your FLAC files with accurate track titles, album art, and other metadata will make organizing and accessing your music collection much easier down the line.
How to Rip Multiple CDs Quickly and Efficiently
If you have a large CD collection to digitize, efficiency becomes key. Ripping multiple CDs can be a time-consuming process, but with the right approach, you can streamline it significantly. One of the best ways to do this is by using batch processing features available in some paid software like dBpoweramp Audio Converter. This allows you to load multiple CDs into your drive, set your preferred settings once, and let the software rip them in succession.
If you’re using a single-drive setup, consider setting up a rhythm—insert a CD, start ripping, and while the first CD is processing, prepare the next one. This way, you minimize downtime between rips. If you have multiple drives or an external CD changer, you can rip multiple discs simultaneously, further speeding up the process.
Keep in mind that while speed is important, so is maintaining audio quality. Ensure that your ripping software is set up correctly for each disc, especially if you’re working with a mix of standard and high-resolution CDs. With the right setup, you can efficiently rip your entire collection without compromising on the audio quality that FLAC is known for.
Ripping CDs to MP3 and Other Formats
Converting to MP3: The Best Settings for Quality and File Size
When it comes to CD ripping to MP3, balancing quality and file size is essential. MP3 format files are compressed, which means they’re smaller and more convenient for portable devices, but this compression can lead to a loss of audio fidelity. To achieve the best results, start by selecting a high bitrate. For most purposes, a bitrate of 192 kbps is sufficient and offers a good balance between sound quality and file size. However, for higher quality, consider going up to 256 kbps or even 320 kbps if your software allows it. Higher bitrates preserve more of the original audio, making your MP3s sound richer and more detailed.
Additionally, make sure you choose a good encoding algorithm. Most modern ripping software uses the LAME encoder, which is renowned for its efficiency and quality. If your software offers options for variable bitrate (VBR) encoding, this can be a smart choice. VBR adjusts the bitrate according to the complexity of the audio, giving you high quality when needed and reducing file size during simpler passages. This way, you get the best possible sound without unnecessarily large files.
How to Rip CDs to WAV, AAC, and OGG Formats
While MP3 is popular for its small file size and broad compatibility, other digital audio formats like WAV, AAC, and OGG offer their own unique advantages. WAV files are uncompressed, providing the highest audio quality but at the expense of large file sizes. They’re ideal for archiving or editing audio but can be cumbersome for everyday use due to their size. When ripping to WAV, ensure that your software is set to the same bit depth and sample rate as the original CD—typically 16-bit and 44.1 kHz.
AAC, or Advanced Audio Coding, is favored for its superior compression efficiency compared to MP3. It delivers better sound quality at lower bitrates, making it a popular choice for Apple devices and streaming platforms. For the best results, encode your AAC files at a bitrate of 128 kbps or higher. This format is especially useful if you’re looking to save space without sacrificing too much audio quality.
OGG Vorbis is another option worth considering. It’s an open-source format that offers high-quality audio and efficient compression. OGG files often achieve better sound quality than MP3 at the same bitrate, but compatibility can be an issue. Ensure your devices and software support OGG before committing to this format. When ripping to OGG, a bitrate of 160 kbps or higher is recommended to maintain good audio quality.
Batch Ripping: Save Time by Ripping to Multiple Formats at Once
If you’re tackling a large collection, batch ripping to multiple formats can save you a lot of time. Many modern CD ripping tools offer batch processing capabilities, allowing you to rip a CD to several formats simultaneously. This feature is particularly useful if you want to create high-quality FLAC files for archiving while also generating MP3s for portable use.
To set up batch ripping, first select the formats you want to convert to in your software’s settings. You might choose FLAC for lossless audio quality, MP3 for general use, and perhaps AAC or OGG for specific devices or needs. Next, configure each format’s settings—bitrate for MP3s, sample rate for WAVs, etc. Once everything is set, load your CDs into the drive, and let the software do the rest. Batch ripping automates the process, making it easier to build a diverse digital music library without repetitive manual work.
By utilizing these settings and techniques, you can efficiently rip your CDs into multiple formats, ensuring that you have the best possible quality and compatibility for all your listening needs. Whether you’re archiving in FLAC, enjoying the portability of MP3s, or exploring the efficiency of AAC and OGG, these tips will help you make the most of your music digitization efforts.
Organizing and Managing Your Ripped Music Files
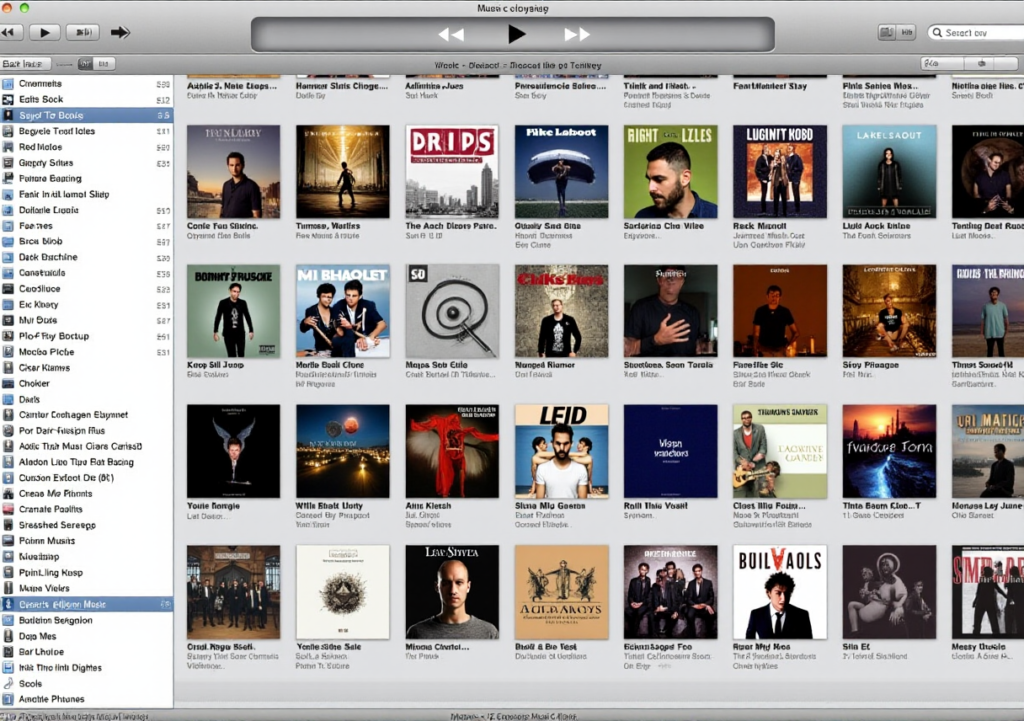
Tagging Your Files: Keeping Your Music Library Organized
Once you’ve ripped your CDs into digital formats, organizing your music library is essential for easy access and enjoyment. Proper metadata tagging is the cornerstone of this organization. Metadata tags include vital information such as artist name, album title, track number, and genre. Accurate tagging ensures that your music files are easily searchable and sortable, preventing the chaos of an unorganized library.
Many ripping software programs automatically tag files, but these tags can sometimes be incomplete or incorrect. Tools like MP3Tag or MusicBrainz Picard can help you refine and correct metadata. These applications allow you to edit tags manually or download missing information from online databases. It’s worth investing time in this process to ensure every track is correctly labeled, as it enhances your overall music experience and aids in quick navigation through your collection.
Best Practices for Storing Your Music Collection
How you store your music files plays a significant role in managing your collection efficiently. First, choose a clear and consistent folder structure. A common approach is to organize by artist, then album, with each track neatly named and numbered. For example, a folder might be structured as: Artist Name > Album Name > Track Number - Track Title.
When it comes to physical storage, consider using high-capacity external drives or digital storage solutions. External drives offer large storage space and fast access speeds, while cloud storage provides the advantage of accessibility from anywhere. If you opt for cloud storage, ensure that it’s a reputable provider with strong security measures to protect your digital collection from loss or theft.
Additionally, regular backups are crucial. Ensure that your music collection is backed up to a separate drive or cloud service to prevent data loss. A good backup routine will save you from potential heartbreak in case of hardware failure or accidental deletion.
How to Create Playlists and Sync Your Music Across Devices
Creating playlists and syncing your music across devices enhances your listening experience by providing easy access to your favorite tracks and albums no matter where you are. Most music management software, like iTunes, MusicBee, or MediaMonkey, offers robust playlist features. You can create custom playlists based on genres, moods, or specific events, tailoring your music experience to fit any occasion.
To sync your music across devices, first ensure that your files are stored in a cloud service that supports cross-device syncing. Services like Google Drive, Dropbox, or dedicated music platforms like Spotify offer seamless synchronization of your music library across multiple devices. For a more integrated experience, use music management apps that support cloud syncing, allowing you to access and manage your playlists and files directly from your smartphone, tablet, or other connected devices.
Keep in mind that maintaining a consistent organization and tagging system across all devices will ensure that your music library remains coherent and enjoyable, no matter where you’re listening. With these strategies, your music collection will not only be well-organized but also easily accessible and tailored to your personal taste.
Tools of the Trade: Best Software for Ripping CDs
Review of Top CD Ripping Software: Audacity, Exact Audio Copy, dBpoweramp, and More
When it comes to CD ripping, choosing the right software is crucial for achieving high-quality results. Let’s explore some of the top contenders in the field.
Audacity is a popular, open-source audio editor that’s widely known for its versatility. While primarily used for editing audio, it can also rip CDs with the help of additional plugins and configurations. Audacity’s strength lies in its powerful editing features, allowing you to fine-tune your audio files after ripping. However, it’s worth noting that Audacity’s CD ripping capabilities are not as straightforward as those of dedicated CD ripping software.
Exact Audio Copy (EAC) is often hailed as one of the best free tools for precise CD ripping. It is renowned for its accuracy and error correction capabilities, making it a top choice for audiophiles looking to preserve the quality of their music. EAC uses sophisticated algorithms to handle scratched or damaged discs, ensuring that the digital audio extraction closely matches the original recordings. While its interface may seem a bit dated, its performance is top-notch, especially for those who prioritize sound quality and audio quality preservation.
dBpoweramp stands out as a premium option with a reputation for its user-friendly interface and robust feature set. This paid software supports a wide range of audio file formats and offers high-speed ripping with minimal quality loss. dBpoweramp also includes batch processing capabilities, making it ideal for large collections. Its advanced settings allow for detailed customization, and the software’s comprehensive metadata tagging features ensure that your music files are well-organized and tagged correctly.
Other notable mentions include Fre:ac and CDex, which also offer free, reliable CD ripping solutions. fre:ac supports a variety of formats and provides a straightforward interface, while CDex is known for its simplicity and ease of use. Both are excellent choices for users who need efficient audio conversion without a steep learning curve.
How to Choose the Right Software for Your Needs
Selecting the best CD ripping software depends on your specific requirements and preferences. If you’re looking for basic functionality and a straightforward process, free tools like EAC or Fre
are great options. They offer essential features without the cost and are particularly suited for casual users or those new to digital music.
For users who require advanced features and are willing to invest in their music collection, paid software like dBpoweramp is worth considering. Its extensive format support, batch processing, and high-quality ripping capabilities cater to more demanding needs. If you’re managing a large library or need precise control over your ripping process, investing in a premium tool can provide valuable benefits.
Additionally, consider the ease of use and the software’s support for metadata tagging. Software that simplifies tagging and organizing your files can save you significant time and effort, enhancing your overall music file management experience. The best audio formats and file format compatibility should also play a role in your decision-making process.
Free vs. Paid Software: Is It Worth the Investment?
The debate between free and paid software often comes down to your priorities and how you plan to use the tool. Free software offers solid performance and essential features, making it a viable choice for many users. It’s particularly appealing if you’re on a tight budget or have modest ripping needs.
Paid software, on the other hand, provides additional features, faster processing, and enhanced support. The investment can be justified if you value high efficiency, advanced customization, and superior quality. Premium software often includes customer support, regular updates, and extended format compatibility, which can be beneficial for extensive or professional use.
In summary, while free options are excellent for getting started, paid software can offer significant advantages for those seeking top-tier performance and comprehensive features. Assess your needs, explore the options, and choose the software that best aligns with your goals for ripping and managing your music collection.
Troubleshooting Common Issues When Ripping CDs
Dealing with Scratched or Damaged CDs: Tips and Tricks
Scratched or damaged CDs can be a significant challenge during the ripping process. These imperfections can cause errors, skipping, or even failure to read the disc entirely. To minimize these issues, start by cleaning your CD. Use a soft, lint-free cloth and wipe from the center outwards to avoid spreading dirt or smudges. For stubborn grime, a solution of mild dish soap and water can be effective, but ensure the CD is thoroughly dried before attempting to rip it again.
If scratches are deep and cleaning doesn’t help, consider using a CD repair kit. These kits, available at most electronics stores, include polishing compounds designed to smooth out minor scratches. Apply the solution as directed and test the CD again. Additionally, if your ripping software supports it, enable error correction features. Software like Exact Audio Copy (EAC) excels at recovering data from damaged discs by utilizing advanced error correction algorithms, which can significantly improve the quality of your ripped files.
Fixing Common Errors: Skipping, Incorrect Tags, and More
Skipping during playback or other errors in ripped files can be frustrating. Skipping usually indicates that the CD has physical damage or that your CD drive is struggling to read it. Ensuring a clean CD and drive can help, but if the problem persists, consider testing with a different drive to see if the issue lies with the hardware.
Incorrect tags often occur due to incomplete or inaccurate metadata downloaded by the ripping software. To fix this, use dedicated tagging tools like MP3Tag or MusicBrainz Picard to manually correct and enhance metadata. These tools allow you to edit tags and ensure that your music files are correctly identified and organized.
Sometimes, errors in the ripping process are due to incorrect settings or software glitches. Recheck your software settings to ensure that the correct formats and quality options are selected. If errors persist, try updating the software to the latest version or reinstalling it to resolve any underlying issues. Regularly updating your ripping software ensures compatibility with the latest disc formats and bug fixes, improving overall reliability.
What to Do If Your Software Isn’t Recognizing Your CD
If your software isn’t recognizing your CD, the problem could be with the software, the CD drive, or the CD itself. First, check if the CD is properly inserted and that your drive is functioning correctly. Test with a different CD to rule out issues with the drive. If the drive recognizes other discs, the issue might be specific to the CD you’re trying to rip.
Ensure that your ripping software is up-to-date and compatible with your operating system. Sometimes, outdated software can cause recognition issues. If updates don’t solve the problem, try restarting your computer and re-launching the software. Occasionally, software or system glitches can interfere with the CD recognition process.
If the problem persists, consider trying an alternative ripping tool. Different software can handle various disc formats and errors in different ways, so switching tools might resolve the issue. For example, if your primary software fails, try using a free tool like CDex or a more robust option like dBpoweramp to see if it can recognize and rip the CD.
By following these troubleshooting tips, you can address common issues encountered during CD ripping and ensure a smoother, more successful conversion of your physical music collection into digital files.
Enhancing Your Listening Experience
How to Improve Sound Quality with Audio Editing Software
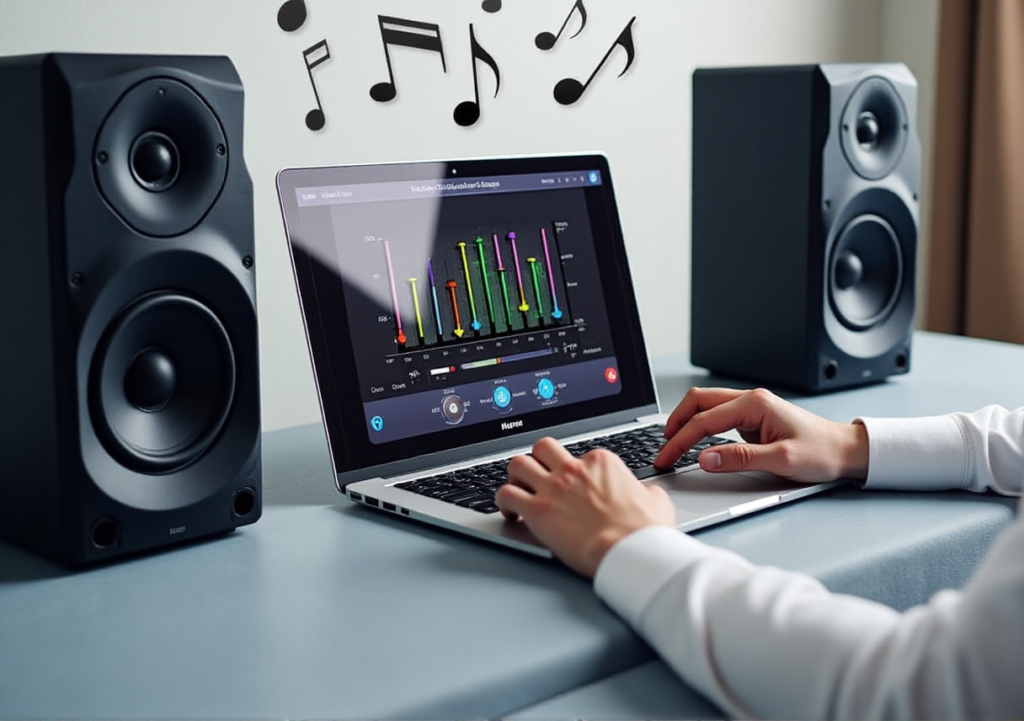
After ripping your CDs and converting them into digital audio formats, the next step is to enhance the sound quality of your digital files. Audio editing software offers powerful tools to refine and polish your music, ensuring a superior listening experience. Applications such as Audacity is excellent choices for this purpose.
With Audacity, you can apply various effects to improve sound quality. Use the equalizer to adjust bass, midrange, and treble frequencies, or apply noise reduction to eliminate unwanted background noise. For those seeking more advanced editing, Adobe Audition provides high-end features such as multi-track editing and advanced noise reduction. Both programs allow you to normalize volume levels, which helps in balancing the loudness across different tracks.
For a more immersive experience, consider using plugins and filters to enhance specific aspects of your audio. Reverb can add depth and warmth, while compression can ensure consistent volume levels. Experiment with these tools to find the perfect balance that suits your personal taste and enhances your music digitization efforts.
The Best Audio Players for Listening to Your Ripped Music
Choosing the right audio player can significantly impact your listening experience. A quality audio player not only supports various formats but also offers features that enhance playback and manage your digital music library effectively.
Foobar2000 is a highly customizable audio player known for its minimalist design and advanced features. It supports a wide range of audio file formats, including FLAC and MP3, and provides extensive tagging capabilities, making it an excellent choice for managing a large music collection. Another popular option is VLC Media Player, which is renowned for its versatility and ability to handle almost any audio format you throw at it. Its user-friendly interface and extensive feature set make it a favorite among many music enthusiasts.
For those who prefer a more integrated experience, iTunes or MusicBee can be great choices. iTunes offers seamless integration with Apple devices and a polished interface, while MusicBee provides a rich feature set with options for customizing your listening experience and managing your library. Both are ideal for organizing your music and creating playlists from your ripped files.
Exploring High-Resolution Audio: Is It Worth It?
High-resolution audio offers an enhanced listening experience compared to standard formats, but is it worth the investment? High-res audio files, such as FLAC or ALAC, provide greater detail and fidelity, capturing more of the original recording’s nuances. This can be particularly noticeable when using high-quality headphones or speakers that are capable of reproducing these finer details.
However, the benefits of high-res audio may be subtle if you’re using standard playback equipment or if the original recordings are not of high quality. For most casual listeners, the difference between high-res audio and standard formats might not be significant enough to justify the additional cost and storage requirements. The debate between FLAC vs MP3 often highlights this trade-off between file size and audio quality.
That said, if you’re an audiophile or have a collection of high-quality recordings, exploring high-resolution audio could be a worthwhile investment. It’s essential to ensure that your audio equipment and playback software support high-res formats to fully appreciate the enhanced sound quality.
In summary, enhancing your listening experience involves not only refining your audio files with editing software but also choosing the right player and considering the benefits of high-resolution audio. By focusing on these aspects, you can enjoy a richer, more immersive listening experience from your meticulously ripped music collection.
Keeping Your Digital Music Collection Safe
How to Back Up Your Ripped Music: Cloud Storage and External Drives
Once you’ve invested time and effort into ripping your CD collection and converting your audio files to formats like FLAC or MP3, safeguarding your digital music files becomes essential. Backing up your ripped music ensures that your hard work isn’t lost due to unexpected hardware failures or accidental deletions.
Cloud storage offers a convenient and reliable backup solution. Services like Google Drive, Dropbox, and OneDrive provide ample space for your music library and allow you to access your files from any device with an internet connection. To ensure a robust backup, consider using a cloud service that offers automatic synchronization. This way, any new music or changes to existing files are automatically updated across all your devices. Additionally, some cloud services offer version history, which can be a lifesaver if you need to restore an earlier version of a file.
External drives are another excellent option for backing up your music collection. Whether you opt for an external hard drive or a solid-state drive, these devices offer substantial storage capacity and fast data transfer speeds. For added protection, consider using RAID (Redundant Array of Independent Disks) configurations or creating multiple backups. Regularly update your external drive backup to reflect any new additions or changes to your music library, and ensure that your file conversion tips and backup strategies are in place.
Protecting Your Files: Tips for Avoiding Data Loss
Preventing data loss involves more than just backing up your files; it also requires proactive measures to protect your digital music collection. Start by organizing your files and maintaining a consistent file naming convention. This practice not only helps in managing your library efficiently but also reduces the risk of accidental deletions.
Ensure that your backup solutions are regularly maintained and tested. Periodically check that your cloud storage and external drives are functioning correctly and that your files are accessible. It’s also wise to scan your external drives for errors and perform regular health checks to detect any potential issues before they lead to data loss.
Consider using antivirus software to protect your system from malware and ransomware that could compromise your files. Keeping your software and operating system up to date will help safeguard against vulnerabilities that could lead to data loss.
How to Transfer Your Music Collection to a New Device
When upgrading to a new device or simply transferring your music collection, a systematic approach ensures a smooth transition. Start by backing up your music files to your chosen backup solution. This step guarantees that you have a secure copy of your collection before initiating the transfer.
To transfer your music to a new device, begin by connecting your external drive or accessing your cloud storage from the new device. If using an external drive, copy the music files to the new device’s storage. For cloud storage, download the files directly to the new device.
After transferring your files, check that all music is correctly organized and accessible. Re-import your music into any media players or libraries you use, and verify that metadata and playlists are intact. If you use specialized music management software, ensure that it is set up to recognize your new device and correctly import your music files.
By taking these precautions, you can keep your digital music collection secure and ensure that your cherished tunes remain safe and easily accessible, no matter where you go or what device you use.
Advanced Tips for Audiophiles
Understanding Bitrate and Sample Rate: What You Need to Know
For audiophiles, the intricacies of audio quality go beyond the basic audio file formats and settings. Bitrate and sample rate are crucial elements that determine the fidelity of your digital music files.
Bitrate refers to the amount of data processed per second of audio. It significantly influences the quality and size of your files. Higher bitrates generally mean better sound quality but larger file sizes. For example, a 320 kbps MP3 file offers superior sound compared to a 128 kbps version. When ripping music and performing audio conversion, especially if you prioritize high-quality audio, opting for higher bitrates is advisable, though it requires more storage space.
Sample rate defines how often the audio is sampled per second, measured in kilohertz (kHz). Standard CD audio is sampled at 44.1 kHz, which provides high-quality sound. Higher sample rates, such as 96 kHz or 192 kHz, can capture even more detail, making them preferable for professional audio or high-fidelity listening. However, the benefits of increased sample rates might be subtle unless you use high-end audio equipment capable of reproducing these nuances.
Understanding and adjusting these settings according to your needs will ensure that your music maintains its intended quality and delivers the best listening experience.
Using Metadata to Enhance Your Music Library
Metadata plays a vital role in organizing and enhancing your digital music library. This information, embedded within your audio files, includes details such as artist names, album titles, track numbers, and genre. Properly tagging your files helps maintain a well-organized library, making it easier to find and enjoy your favorite music.
Editing metadata can be done using various software tools, such as MusicBrainz Picard or Mp3tag. These tools allow you to correct incorrect tags, add missing information, and ensure consistency across your library. Accurate metadata not only improves your listening experience but also aids in sorting and creating playlists.
For audiophiles, metadata can also include detailed album art and liner notes, adding a layer of richness to your collection. Investing time in perfecting your metadata ensures that every track is well-documented and easily accessible, enhancing the overall enjoyment of your music.
How to Rip Vinyl and Cassettes to Digital Formats
If you’re looking to preserve older formats like vinyl records or cassette tapes, digital conversion can breathe new life into these classic audio sources. The process involves capturing the analog signal and converting it into digital formats that can be enjoyed on modern devices.
Ripping vinyl requires a turntable equipped with a USB output or an audio interface to connect the turntable to your computer. Software such as Audacity can then record the playback and convert it into digital formats like FLAC or MP3. For the best results, ensure that the turntable is properly calibrated and use high-quality audio cables to minimize noise and distortion.
Digitizing cassette tapes involves a cassette deck connected to your computer through an audio interface or a dedicated USB cassette player. Similar to vinyl, you’ll use recording software to capture the audio and convert it into digital files. To achieve optimal sound quality, clean the cassette heads regularly and ensure that the tapes are in good condition.
Both processes allow you to preserve the unique character of analog recordings while enjoying the convenience and versatility of digital formats. With the right equipment and techniques, you can successfully bridge the gap between classic and contemporary audio formats, enriching your music collection with timeless treasures.
Frequently Asked Questions About Ripping CDs
Can I Rip CDs I Don’t Own? Understanding Copyright Laws
The legal landscape surrounding CD ripping can be somewhat complex, particularly when it comes to ownership and copyright laws. In general, ripping CDs that you do not own is a violation of copyright laws. Copyright laws protect the intellectual property of artists and record labels, and unauthorized copying or distribution of their work is illegal.
Personal Use Exception: In many jurisdictions, you are permitted to rip CDs for personal use if you own the physical copy. This means you can create digital backups or convert your music into different formats for your own enjoyment. However, distributing or sharing these digital copies, whether online or offline, infringes on copyright and can lead to legal repercussions.
Always ensure that you respect the copyright laws of your country and avoid any actions that could be considered unlawful. For music that you don’t own, consider purchasing digital copies through legitimate channels or streaming services to support the artists and comply with legal standards.
How Long Does It Take to Rip a CD? Time-Saving Tips
The time required to rip a CD can vary depending on several factors, including the speed of your CD drive, the length of the album, and the format you choose. On average, ripping a full-length album might take between 5 to 15 minutes.
To speed up the process, consider these tips:
- Use a Fast CD Drive: Investing in a high-speed CD drive can significantly reduce ripping times. Look for drives with high read speeds, such as 24x or higher.
- Optimize Your Software Settings: Configure your ripping software for faster performance. Disable any unnecessary features and adjust settings for speed rather than accuracy if you prioritize time over perfection.
- Batch Ripping: If you have multiple CDs to rip, batch processing allows you to queue several albums to rip sequentially. This way, you can set the process in motion and let your computer handle the work while you focus on other tasks.
- Close Background Applications: Ensure that other programs are closed during the ripping process to allocate maximum system resources to your ripping software.
By employing these strategies, you can minimize wait times and make the most of your music digitization efforts.
What’s the Best Format for Streaming? FLAC vs. MP3 vs. AAC
Choosing the best format for streaming largely depends on your priorities for sound quality and file size. Each format offers distinct advantages:
- FLAC (Free Lossless Audio Codec): FLAC is renowned for its lossless compression, preserving the original quality of your music while reducing file size. It’s ideal for audiophiles who seek the highest sound fidelity. However, FLAC files are larger and might not be supported by all streaming platforms.
- MP3 (MPEG-1 Audio Layer III): MP3 is a widely used format that balances sound quality and file size. It’s highly compatible with most devices and streaming services. For general listening purposes and to save storage space, MP3 at 256 kbps or 320 kbps offers a good compromise between quality and efficiency.
- AAC (Advanced Audio Codec): AAC provides better sound quality than MP3 at similar bitrates, making it a preferred choice for many streaming platforms and services. It’s especially useful for streaming applications where sound quality and bandwidth efficiency are crucial.
For streaming purposes, AAC often strikes a balance between quality and file size, while MP3 remains a reliable choice for universal compatibility. If you’re an audiophile who values lossless sound, FLAC is the way to go, but keep in mind its larger file sizes and compatibility limitations.
Conclusion: Enjoy Your Perfect Digital Music Collection
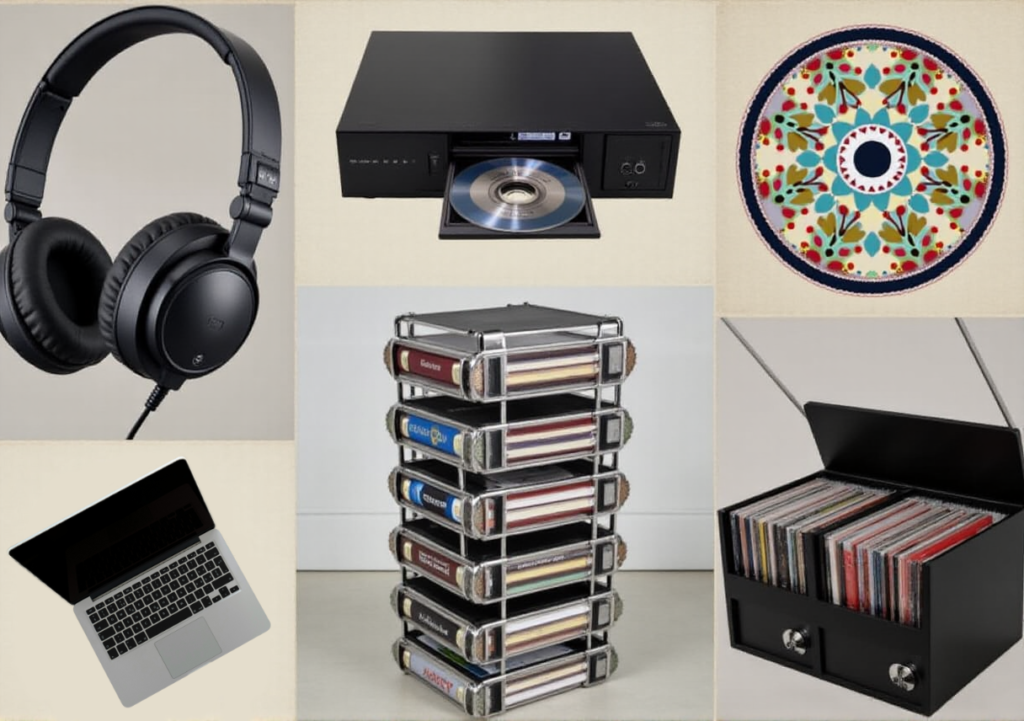
The Satisfaction of a Well-Curated Music Library
There’s something undeniably gratifying about creating a meticulously organized digital music library. Imagine having all your favorite albums, tracks, and artists at your fingertips, each file tagged correctly and stored in high-quality audio formats. This level of organization not only enhances your listening experience but also reflects the care and effort you’ve put into preserving your music.
Building a well-curated library allows for effortless access to your music, making it simple to enjoy your favorites anytime, anywhere. The ability to quickly find that one perfect song or create the ultimate playlist for any occasion is a luxury that makes the effort of ripping and organizing your CDs well worth it. With each track perfectly tagged and stored in formats like FLAC or MP3, your music collection becomes a true reflection of your tastes and passion.
Why Ripping CDs Is Still Relevant in the Streaming Age
In an era dominated by streaming services, it’s easy to overlook the value of CD ripping. However, CDs offer unique advantages that streaming cannot match. For one, the physical ownership of music provides a sense of permanence and control over your collection that digital subscriptions simply can’t offer. Ripping your CDs ensures that you have a personal copy of your music, free from the uncertainties of service availability and potential subscription costs.
Moreover, the quality of music available on streaming platforms often comes with audio compression that can diminish audio fidelity. By ripping your CDs to high-quality formats like FLAC, you preserve the original sound quality of your music, something that’s particularly important for audiophiles and music enthusiasts who appreciate superior sound.
Ripping CDs also allows you to create a tailored music library that reflects your unique preferences, unbound by the limitations of streaming algorithms and curated playlists. In a world where streaming services constantly evolve and change their libraries, having your own collection ensures you always have access to the music you love.
Encouraging Readers to Start Their CD Ripping Journey Today
Embarking on the journey of ripping your CDs is not just about digitizing music; it’s about taking control of your audio experience and creating a personalized, accessible music library that you can enjoy for years to come. With the right CD ripping software and techniques, the process is straightforward and rewarding.
So, why wait? Start by gathering your CDs, choosing the best ripping tools, and diving into the world of digital music. As you convert CD to FLAC or MP3 and transform your physical collection into a pristine digital format, you’ll not only preserve your favorite tracks but also gain the freedom to enjoy them in ways that best suit your lifestyle.
Embrace the satisfaction of a well-curated music library and the enduring value of your CD collection. Your perfect digital music collection awaits—start ripping today and savor the pleasure of music that’s always within reach.
Bonus: Top Accessories for Audiophiles
The Best Headphones for High-Quality Audio
When it comes to truly appreciating your meticulously ripped music collection, the right headphones can make all the difference. High-quality headphones are not just a luxury; they’re a gateway to experiencing every nuance of your music with crystal clarity. Look for models that offer a broad frequency response, exceptional comfort, and accurate sound reproduction. Brands like Sennheiser, Bose, and Sony are renowned for their top-tier headphones that deliver immersive soundscapes, making every note and beat come to life. Whether you’re a bass enthusiast or a fan of delicate acoustics, investing in premium headphones will elevate your listening experience and allow you to fully enjoy the depth and richness of your digital music library.
Recommended External CD Drives for Faster Ripping
A reliable external CD drive is an indispensable tool for efficient CD ripping. When selecting an external CD drive, speed and reliability are paramount. Opt for drives that support high-speed ripping and are compatible with a variety of formats. Brands such as LG, ASUS, and Pioneer offer excellent external drives that are known for their durability and fast performance. These drives not only speed up the ripping process but also ensure high-quality audio extraction from your CDs. A good external CD drive will streamline your ripping workflow, allowing you to process multiple discs with minimal hassle and get your music collection digitized faster.
Must-Have Storage Solutions for Your Music Collection
As your digital music library grows, having the right storage solutions becomes crucial. External hard drives and NAS (Network Attached Storage) systems offer ample space and security for your extensive collection. Choose drives with large capacities and reliable performance to store your high-quality audio files without worrying about running out of space. Brands like Western Digital, Seagate, and Synology provide robust storage options that cater to audiophiles’ needs.
For those seeking a more integrated and versatile solution, consider using a NAS device that supports media server applications like Plex and Jellyfin. These platforms allow you to not only store but also stream your music collection from anywhere. With Plex media server, you can organize your music library, create custom playlists, and access your tunes from any device with a user-friendly interface. Jellyfin media server, an open-source alternative, offers similar features and is particularly appealing if you prefer a free solution with extensive customization options.
Additionally, consider cloud storage solutions for added convenience and off-site backup. Services such as Google Drive, Dropbox, and OneDrive offer secure and accessible storage that can safeguard your music collection from potential data loss and provide easy access across multiple devices. Integrating your NAS with these cloud services can further enhance your setup, allowing you to sync and access your music collection seamlessly no matter where you are.
By leveraging these advanced storage options, you ensure that your digital music collection is not only well-protected but also easily accessible, giving you the freedom to enjoy your favorite tracks anytime and anywhere.
Equipping yourself with these essential accessories ensures that your CD ripping process is efficient, your listening experience is top-notch, and your music collection is securely stored. Embrace the quality and convenience of these tools, and enjoy the benefits of a well-curated and protected digital music library.
ITEM CHECKLIST
GEAR
CD drive
Pro Disc Repair Kit
CD repair kit
high-quality headphones
turntable equipped with a USB output
USB cassette player
Synology (NAS Server)
SOFTWARE
CD ripping software (EAC)
dBpoweramp
dBpoweramp Audio Converter
AudacityFre:ac
CDex
STORAGE
external hard drive
high-capacity SSD
MEDIA ORGANIZATION/MANAGEMENT
MP3Tag
MusicBrainz Picard
iTunes
MusicBee
MediaMonkey
Google Drive
Dropbox
OneDrive
Spotify
AUDIO PLAYERS
Foobar2000
VLC Media Player
Disclaimer: This article contains affiliate links. If you purchase an item through the link I will earn a small commission at no extra cost to you.